Dialogs are important components in Android to notify users or collect input. In this guide, you’ll learn how to create two types of dialogs in Java using Android Studio:
- Use Material Components for modern UI
- Don’t block critical UI behind dialogs
- Make dialogs cancelable if needed using
.setCancelable(true)
Conclusion
With AlertDialogs and Custom Dialogs, you can effectively interact with users in your Android app. Whether it’s a simple confirmation or a complex form input, these dialogs help make the user experience smoother and more intuitive.
- AlertDialogs – simple dialogs with buttons.
- Custom Dialogs – fully customizable layouts for complex interactions.
- AlertDialogs – simple dialogs with buttons.
- Custom Dialogs – fully customizable layouts for complex interactions.
1. Creating a Basic AlertDialog
Step-by-Step:
Step 1: Add this code to your Activity (e.g. MainActivity.java)
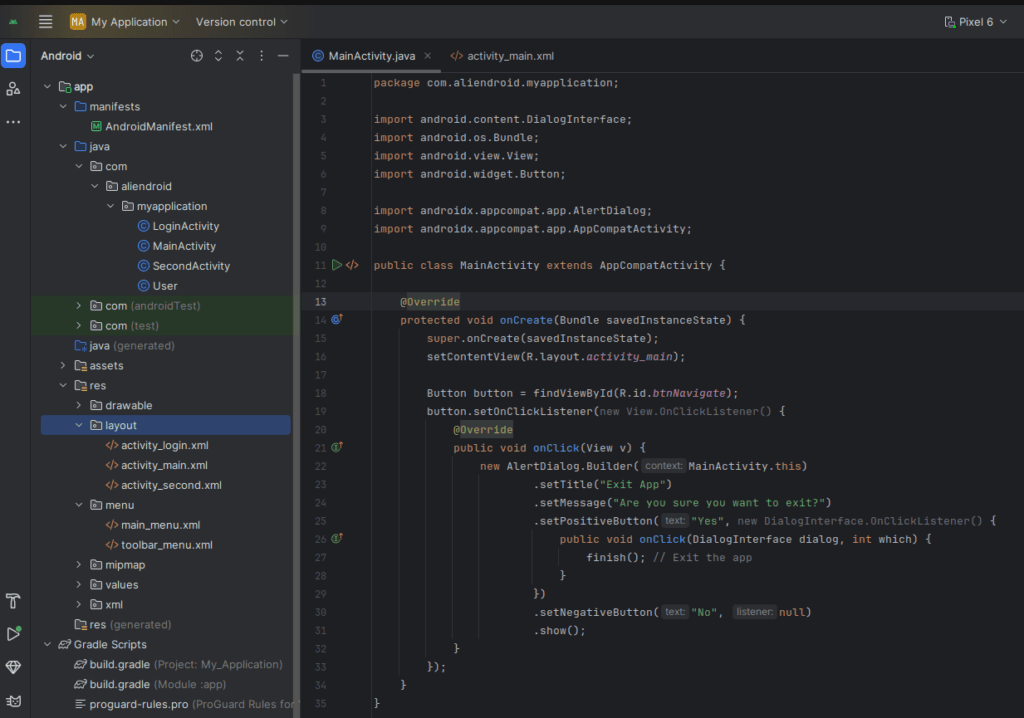
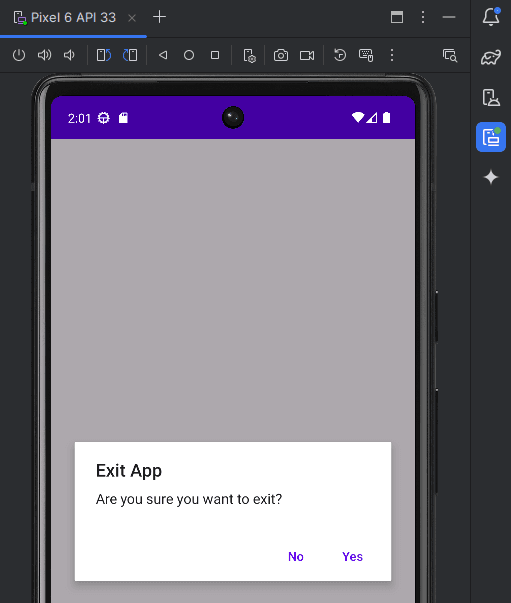
new AlertDialog.Builder(MainActivity.this)
        .setTitle("Exit App")
        .setMessage("Are you sure you want to exit?")
        .setPositiveButton("Yes", new DialogInterface.OnClickListener() {
            public void onClick(DialogInterface dialog, int which) {
                finish(); // Exit the app
            }
        })
        .setNegativeButton("No", null)
        .show();
2. Creating a Custom Dialog
Step-by-Step:
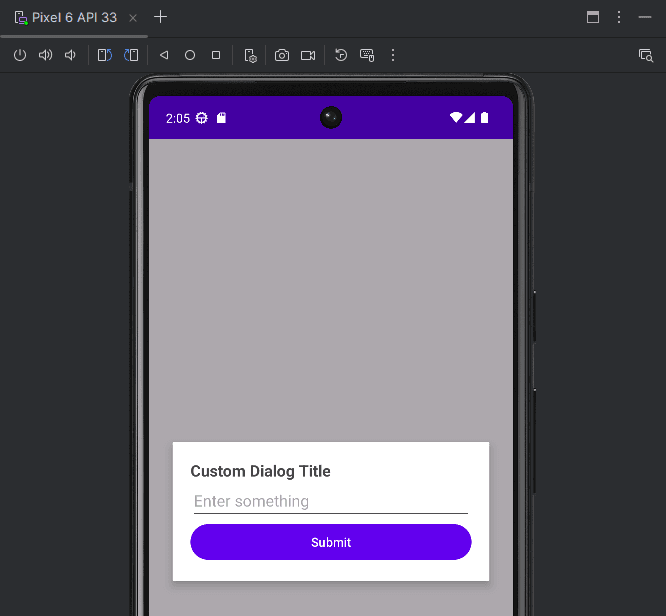
Step 1: Create a layout XML for your custom dialog
res/layout/custom_dialog.xml
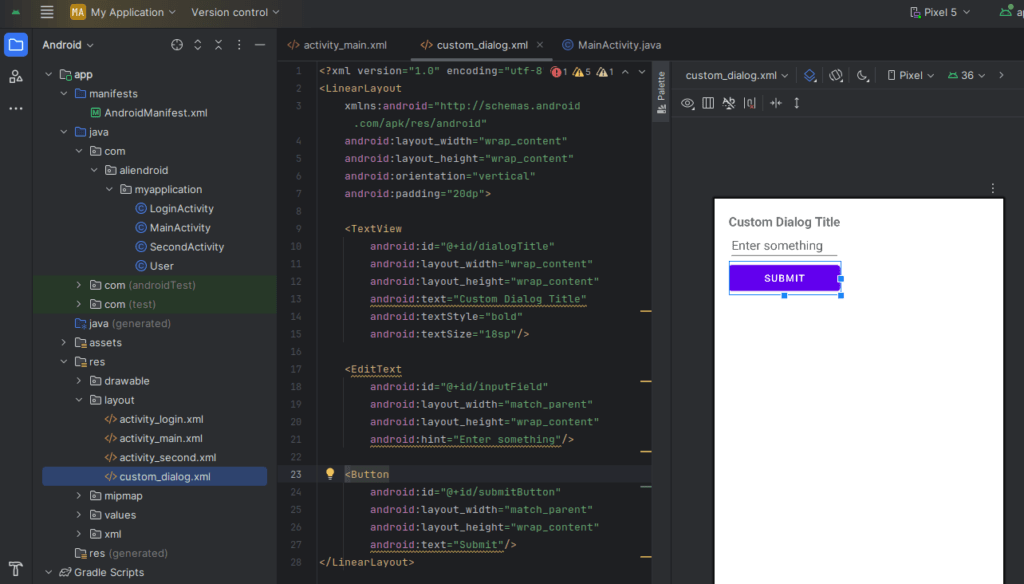
<?xml version="1.0" encoding="utf-8"?>
<LinearLayout
    xmlns:android="http://schemas.android.com/apk/res/android"
    android:layout_width="wrap_content"
    android:layout_height="wrap_content"
    android:orientation="vertical"
    android:padding="20dp">

    <TextView
        android:id="@+id/dialogTitle"
        android:layout_width="wrap_content"
        android:layout_height="wrap_content"
        android:text="Custom Dialog Title"
        android:textStyle="bold"
        android:textSize="18sp"/>

    <EditText
        android:id="@+id/inputField"
        android:layout_width="match_parent"
        android:layout_height="wrap_content"
        android:hint="Enter something"/>

    <Button
        android:id="@+id/submitButton"
        android:layout_width="match_parent"
        android:layout_height="wrap_content"
        android:text="Submit"/>
</LinearLayout>
Step 2: Show the dialog in your activity

LayoutInflater inflater = getLayoutInflater();
View dialogView = inflater.inflate(R.layout.custom_dialog, null);

AlertDialog.Builder builder = new AlertDialog.Builder(MainActivity.this);
builder.setView(dialogView);
AlertDialog dialog = builder.create();
dialog.show();

// Handle button click
Button submitBtn = dialogView.findViewById(R.id.submitButton);
EditText input = dialogView.findViewById(R.id.inputField);

submitBtn.setOnClickListener(v -> {
    String text = input.getText().toString();
    Toast.makeText(MainActivity.this, "Input: " + text, Toast.LENGTH_SHORT).show();
    dialog.dismiss();
});
3. Tips for Better Dialog Design
- Use Material Components for modern UI
- Don’t block critical UI behind dialogs
- Make dialogs cancelable if needed using
.setCancelable(true)
Conclusion
With AlertDialogs and Custom Dialogs, you can effectively interact with users in your Android app. Whether it’s a simple confirmation or a complex form input, these dialogs help make the user experience smoother and more intuitive.
- AlertDialogs – simple dialogs with buttons.
- Custom Dialogs – fully customizable layouts for complex interactions.