Menus allow users to navigate or trigger actions from the app interface. In Android, you can use OptionsMenu to show a list of items when the user taps the overflow icon (three dots).
Step 1: Create a Menu XML File
- Inside the
resfolder, go tores > menu. - Right-click the
menufolder → New → Menu resource file. - Name the file
main_menu.xmland paste the following code:
- Inside the

<menu xmlns:android="http://schemas.android.com/apk/res/android">
    <item
        android:id="@+id/menu_settings"
        android:title="Settings"
        android:icon="@android:drawable/ic_menu_preferences"
        android:showAsAction="ifRoom"/>
    <item
        android:id="@+id/menu_about"
        android:title="About"
        android:icon="@android:drawable/ic_menu_info_details"
        android:showAsAction="never"/>
</menu>
Step 2: Inflate the Menu in Your Java Activity
Inside your Java activity (e.g., MainActivity.java), override onCreateOptionsMenu:
@Override
public boolean onCreateOptionsMenu(Menu menu) {
    getMenuInflater().inflate(R.menu.main_menu, menu);
    return true;
}
Step 3: Handle Menu Item Clicks
Override onOptionsItemSelected() in the same activity:
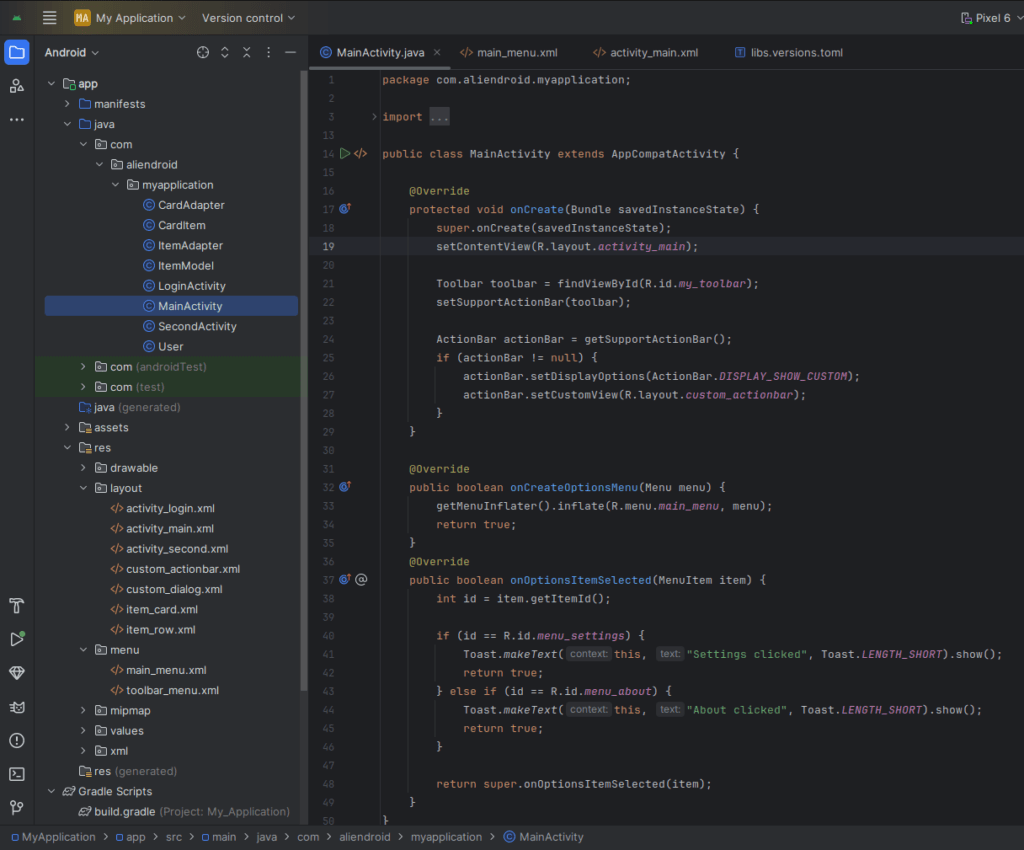
@Override
public boolean onOptionsItemSelected(MenuItem item) {
    int id = item.getItemId();

    if (id == R.id.menu_settings) {
        Toast.makeText(this, "Settings clicked", Toast.LENGTH_SHORT).show();
        return true;
    } else if (id == R.id.menu_about) {
        Toast.makeText(this, "About clicked", Toast.LENGTH_SHORT).show();
        return true;
    }

    return super.onOptionsItemSelected(item);
}
Final Result
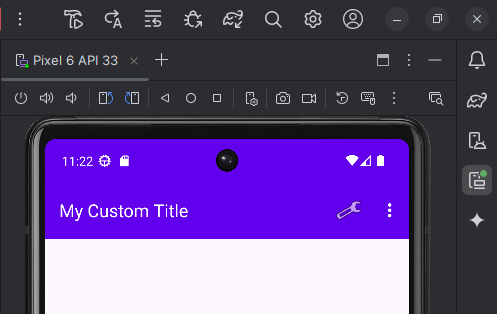
When you run your app, you’ll see a menu button (usually in the top-right corner). Clicking it will display the defined menu items (e.g., “Settings” and “About”). Clicking those will trigger the toast messages.
Tips
- Use icons to improve UX.
- You can conditionally hide/show items using
menu.findItem(R.id.id).setVisible(true/false). - For context menus or popup menus, consider using
PopupMenuorContextMenu.