This tutorial shows how to implement a TabLayout with a ViewPager using Java in Android Studio. This pattern is widely used for creating swipeable tabs in Android apps.
1. Add Required Dependencies (Optional)
Make sure you have these in your build.gradle (app-level):
implementation 'com.google.android.material:material:1.12.0'
Sync your project after adding.
2. Add TabLayout and ViewPager in activity_main
Open res/layout/activity_main.xml and update it:
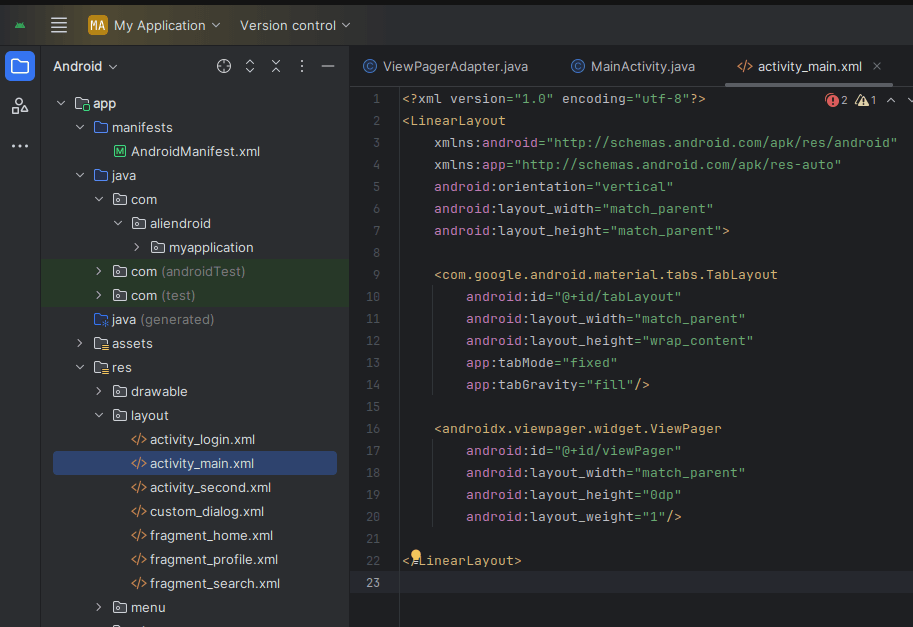
<?xml version="1.0" encoding="utf-8"?>
<LinearLayout
    xmlns:android="http://schemas.android.com/apk/res/android"
    xmlns:app="http://schemas.android.com/apk/res-auto"
    android:orientation="vertical"
    android:layout_width="match_parent"
    android:layout_height="match_parent">

    <com.google.android.material.tabs.TabLayout
        android:id="@+id/tabLayout"
        android:layout_width="match_parent"
        android:layout_height="wrap_content"
        app:tabMode="fixed"
        app:tabGravity="fill"/>

    <androidx.viewpager.widget.ViewPager
        android:id="@+id/viewPager"
        android:layout_width="match_parent"
        android:layout_height="0dp"
        android:layout_weight="1"/>

</LinearLayout>
3. Create Fragment Layouts
Create two fragments:
HomeFragment.javaProfileFragment.java
Each should inflate a layout (e.g., fragment_home.xml and fragment_profile.xml).
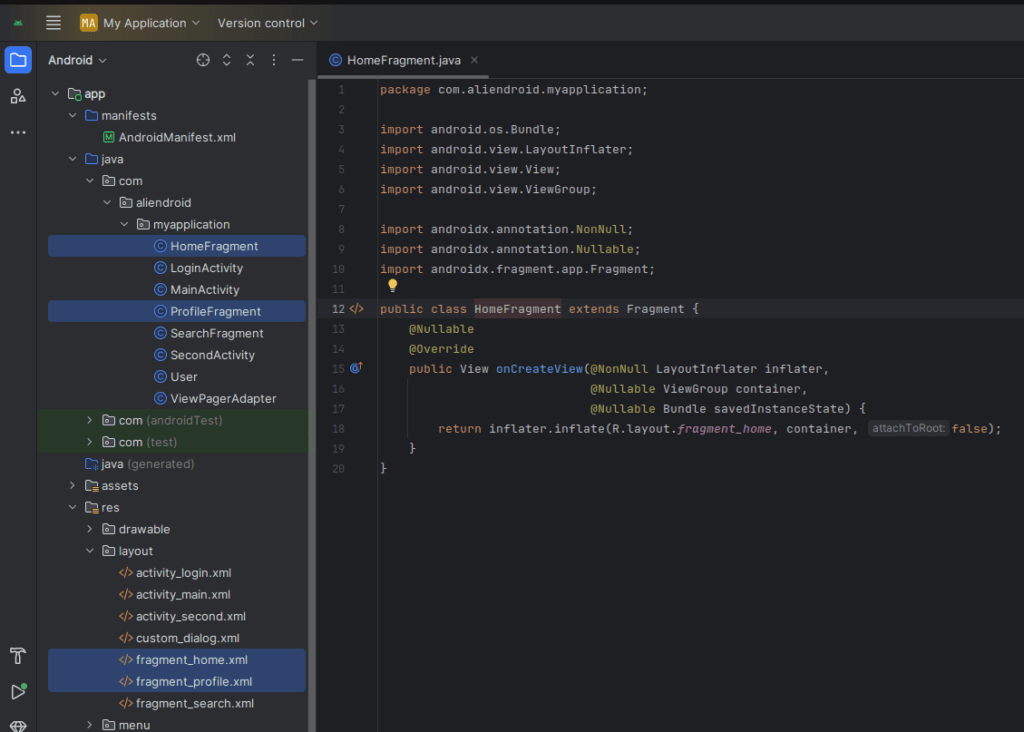
HomeFragment.java:
import android.os.Bundle;
import android.view.LayoutInflater;
import android.view.View;
import android.view.ViewGroup;

import androidx.annotation.NonNull;
import androidx.annotation.Nullable;
import androidx.fragment.app.Fragment;

public class HomeFragment extends Fragment {
    @Nullable
    @Override
    public View onCreateView(@NonNull LayoutInflater inflater,
                             @Nullable ViewGroup container,
                             @Nullable Bundle savedInstanceState) {
        return inflater.inflate(R.layout.fragment_home, container, false);
    }
}
fragment_home.xml:
<LinearLayout xmlns:android="http://schemas.android.com/apk/res/android"
    android:layout_width="match_parent"
    android:layout_height="match_parent"
    android:gravity="center"
    android:orientation="vertical">

    <TextView
        android:text="Welcome to Home"
        android:textSize="24sp"
        android:layout_width="wrap_content"
        android:layout_height="wrap_content"/>
</LinearLayout>
4. Create a ViewPagerAdapter
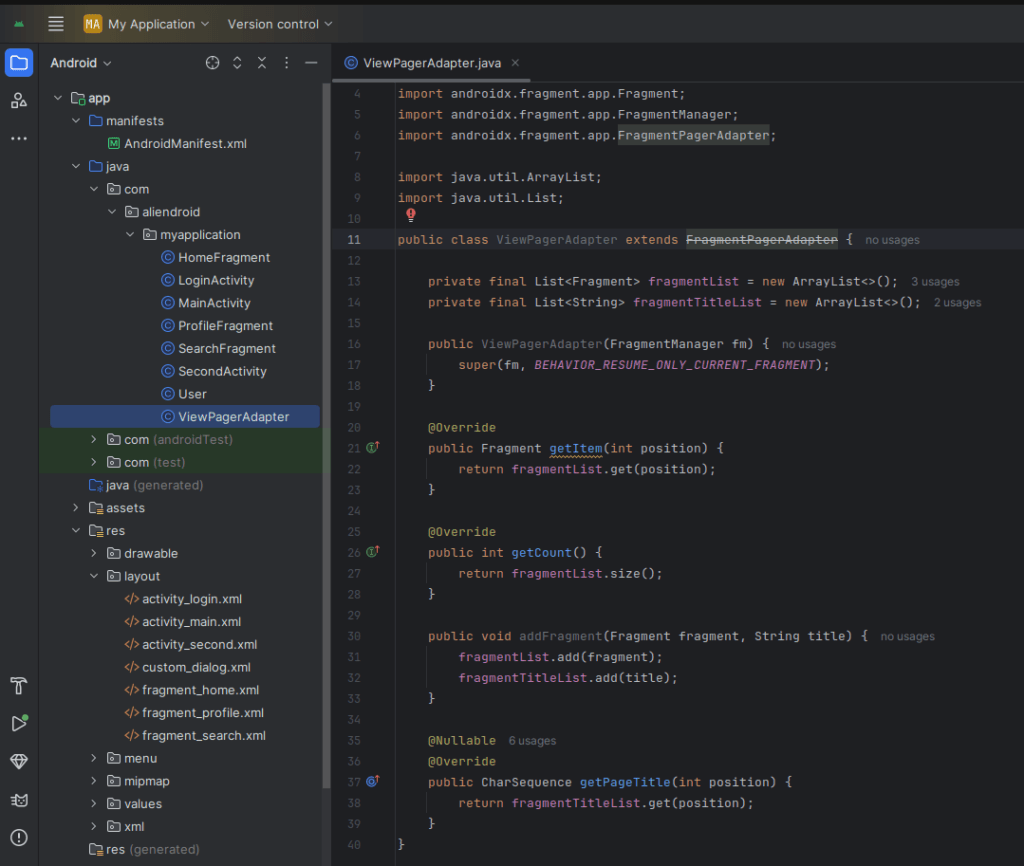
public class ViewPagerAdapter extends FragmentPagerAdapter {

    private final List<Fragment> fragmentList = new ArrayList<>();
    private final List<String> fragmentTitleList = new ArrayList<>();

    public ViewPagerAdapter(FragmentManager fm) {
        super(fm, BEHAVIOR_RESUME_ONLY_CURRENT_FRAGMENT);
    }

    @Override
    public Fragment getItem(int position) {
        return fragmentList.get(position);
    }

    @Override
    public int getCount() {
        return fragmentList.size();
    }

    public void addFragment(Fragment fragment, String title) {
        fragmentList.add(fragment);
        fragmentTitleList.add(title);
    }

    @Nullable
    @Override
    public CharSequence getPageTitle(int position) {
        return fragmentTitleList.get(position);
    }
}
6. Setup ViewPager and TabLayout in MainActivity
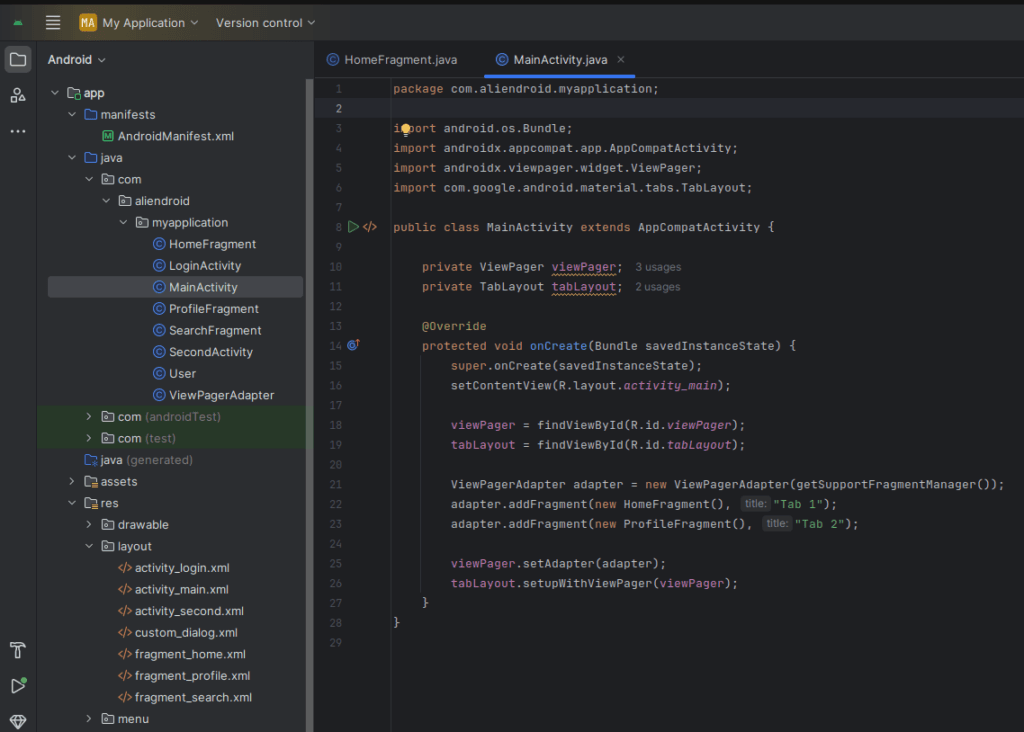
import android.os.Bundle;
import androidx.appcompat.app.AppCompatActivity;
import androidx.viewpager.widget.ViewPager;
import com.google.android.material.tabs.TabLayout;

public class MainActivity extends AppCompatActivity {

    private ViewPager viewPager;
    private TabLayout tabLayout;

    @Override
    protected void onCreate(Bundle savedInstanceState) {
        super.onCreate(savedInstanceState);
        setContentView(R.layout.activity_main);

        viewPager = findViewById(R.id.viewPager);
        tabLayout = findViewById(R.id.tabLayout);

        ViewPagerAdapter adapter = new ViewPagerAdapter(getSupportFragmentManager());
        adapter.addFragment(new HomeFragment(), "Tab 1");
        adapter.addFragment(new ProfileFragment(), "Tab 2");

        viewPager.setAdapter(adapter);
        tabLayout.setupWithViewPager(viewPager);
    }
}
Output
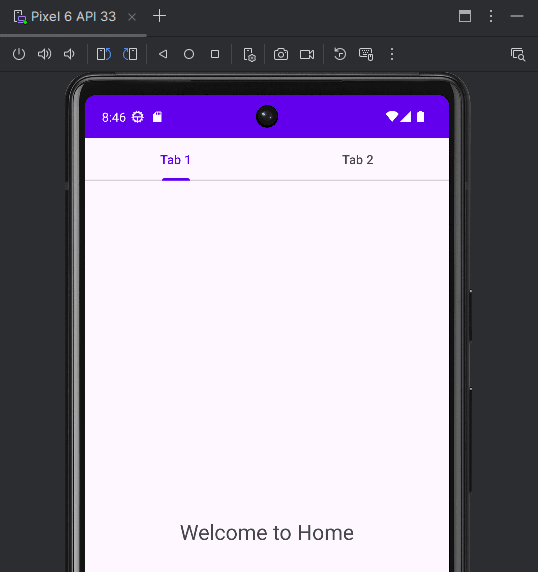
- A working TabLayout with two tabs.
- Each tab shows a different Fragment.
- Users can swipe between tabs or tap on them.
Tips
- You can use
ViewPager2for a newer implementation. - Add icons with
tabLayout.getTabAt(index).setIcon(R.drawable.icon);
- You can use