What is BottomNavigationView?
BottomNavigationView is a part of Android’s Material Components that allows users to quickly switch between top-level views of an app with a bottom menu. It’s especially useful for apps with 3–5 main sections.
Prerequisites
- Android Studio Installed
- Basic knowledge of Java and Android development
Step 1: Add Material Dependency (Optional)
Open your build.gradle (Module: app) and add:
dependencies {
    implementation 'com.google.android.material:material:1.12.0'
}
Step 2: Add BottomNavigationView in activity_main.xml
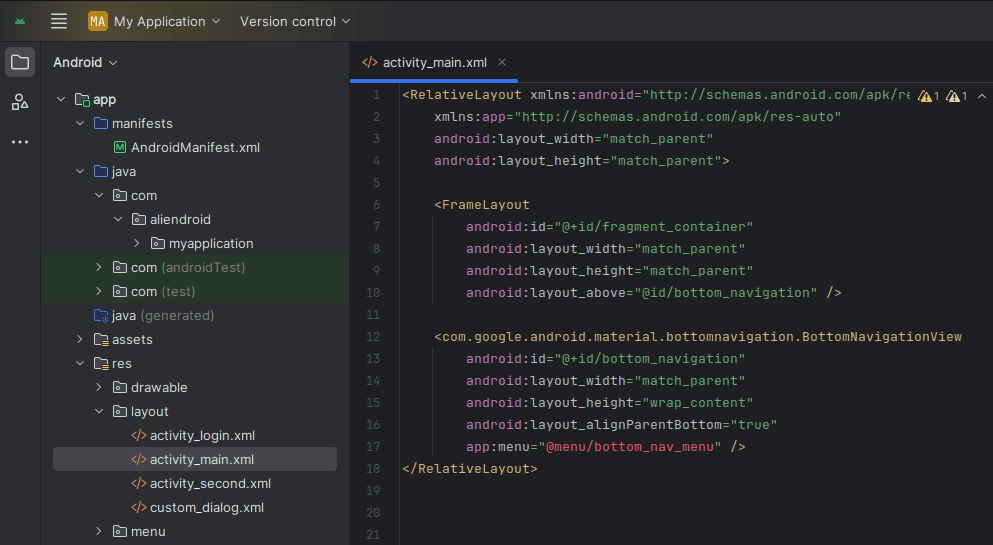
<RelativeLayout xmlns:android="http://schemas.android.com/apk/res/android"
    xmlns:app="http://schemas.android.com/apk/res-auto"
    android:layout_width="match_parent"
    android:layout_height="match_parent">

    <FrameLayout
        android:id="@+id/fragment_container"
        android:layout_width="match_parent"
        android:layout_height="match_parent"
        android:layout_above="@id/bottom_navigation" />

    <com.google.android.material.bottomnavigation.BottomNavigationView
        android:id="@+id/bottom_navigation"
        android:layout_width="match_parent"
        android:layout_height="wrap_content"
        android:layout_alignParentBottom="true"
        app:menu="@menu/bottom_nav_menu" />
</RelativeLayout>
Step 3: Create Menu Resource
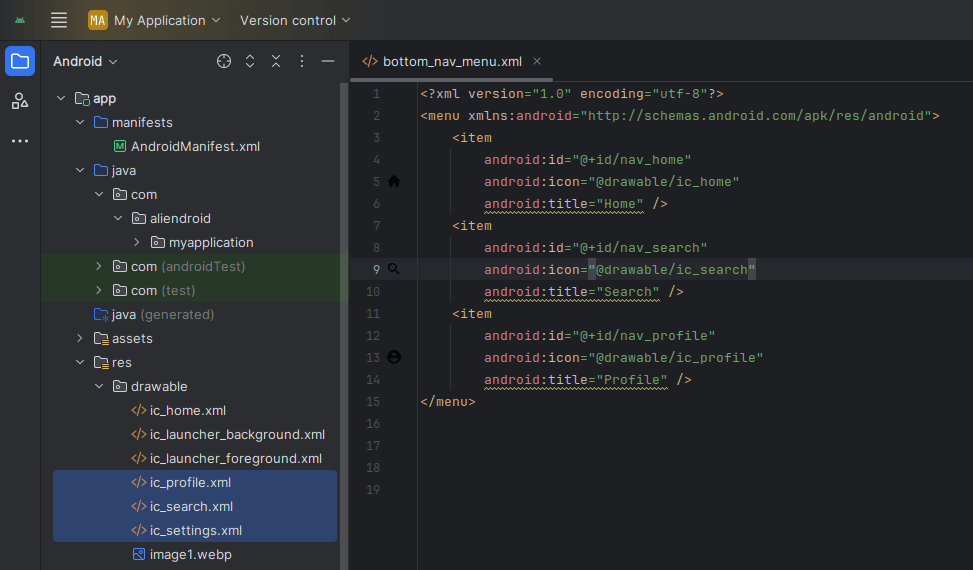
Create a new menu file in res/menu/bottom_nav_menu.xml:
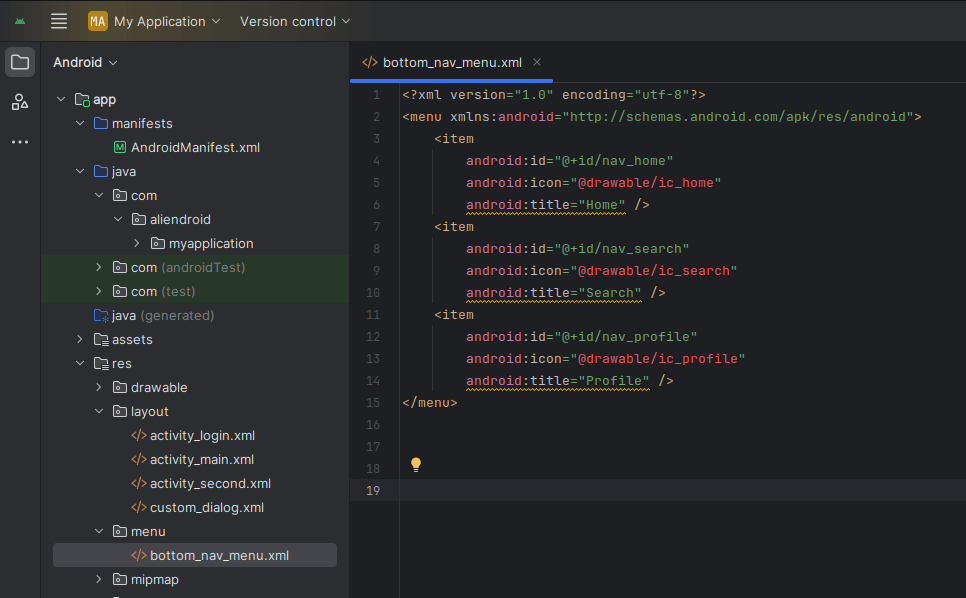
<menu xmlns:android="http://schemas.android.com/apk/res/android">
<item
android:id="@+id/nav_home"
android:icon="@drawable/ic_home"
android:title="Home" />
<item
android:id="@+id/nav_search"
android:icon="@drawable/ic_search"
android:title="Search" />
<item
android:id="@+id/nav_profile"
android:icon="@drawable/ic_profile"
android:title="Profile" />
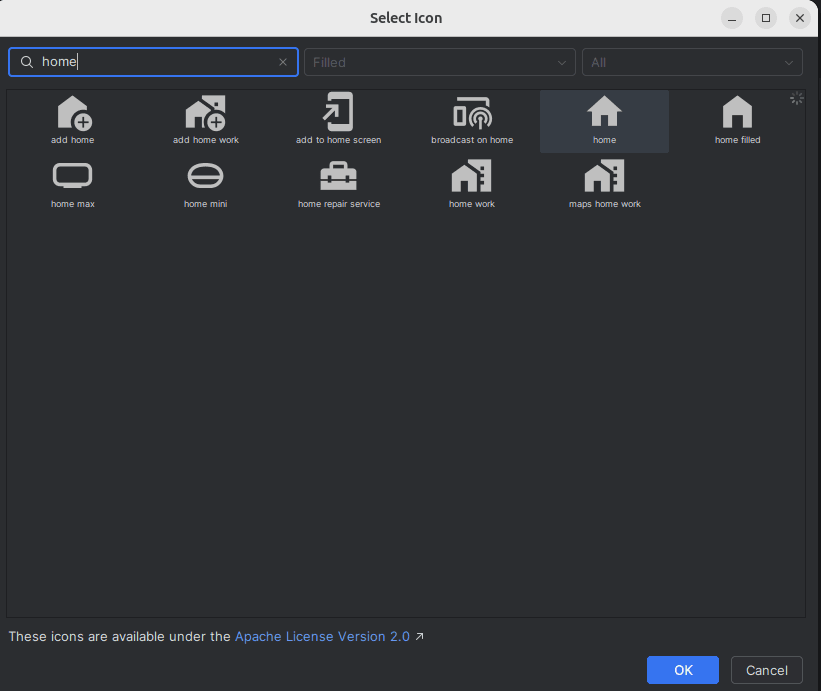
</menu>Add icon from vector asset, Right-click on the drawable > New > Vector Asset.
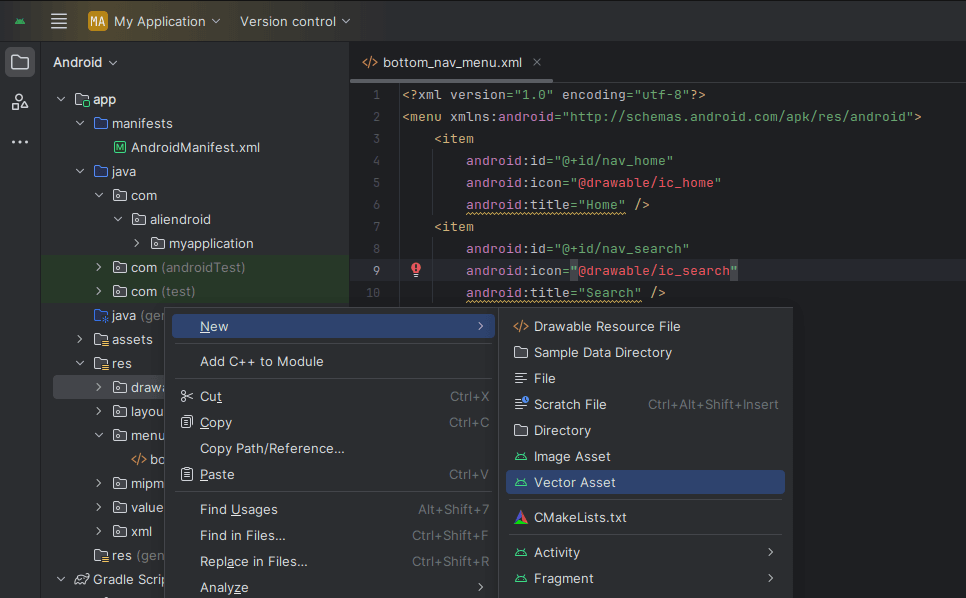
Click Clip art
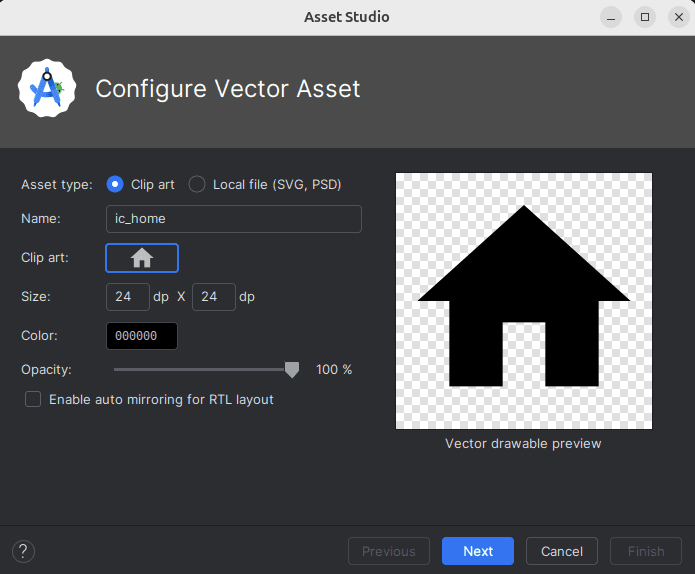
Select icon > OK > Next > Finish
add more icon
Step 4: Create Fragments
Create three fragments: HomeFragment, SearchFragment, and ProfileFragment.
Example: HomeFragment.java
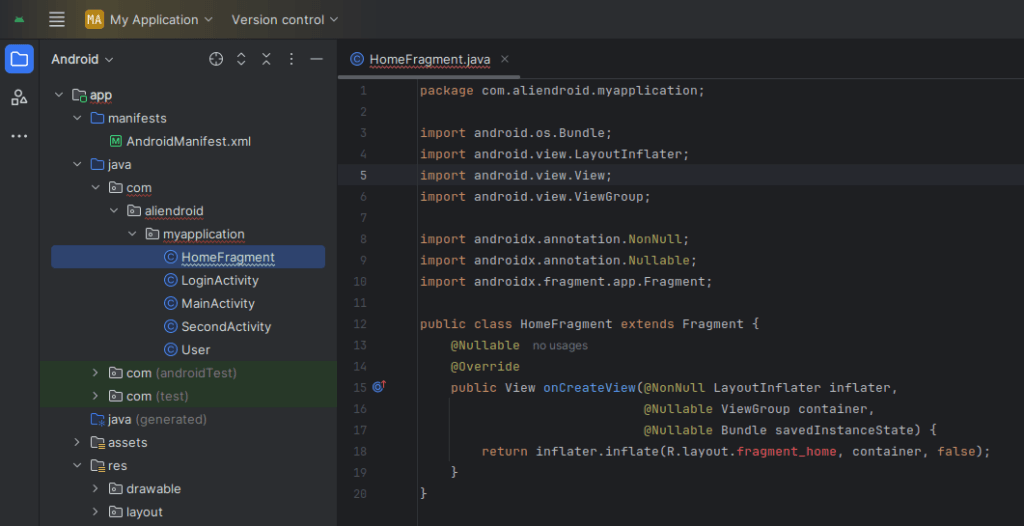
public class HomeFragment extends Fragment {
    @Nullable
    @Override
    public View onCreateView(@NonNull LayoutInflater inflater,
                             @Nullable ViewGroup container,
                             @Nullable Bundle savedInstanceState) {
        return inflater.inflate(R.layout.fragment_home, container, false);
    }
}
Step 5: Create Fragment Layouts
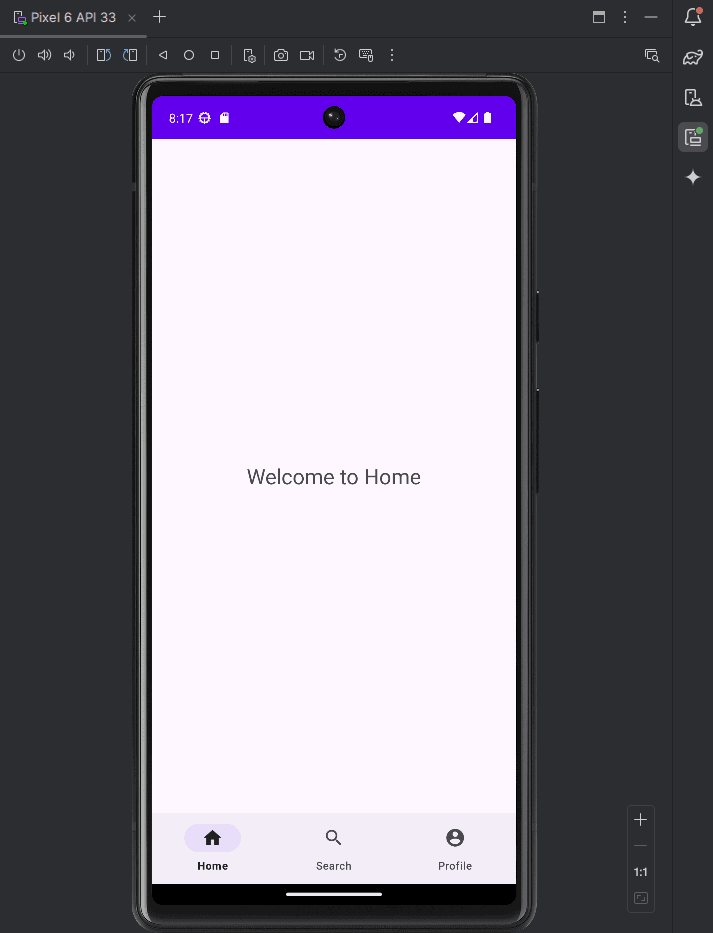
Example: res/layout/fragment_home.xml
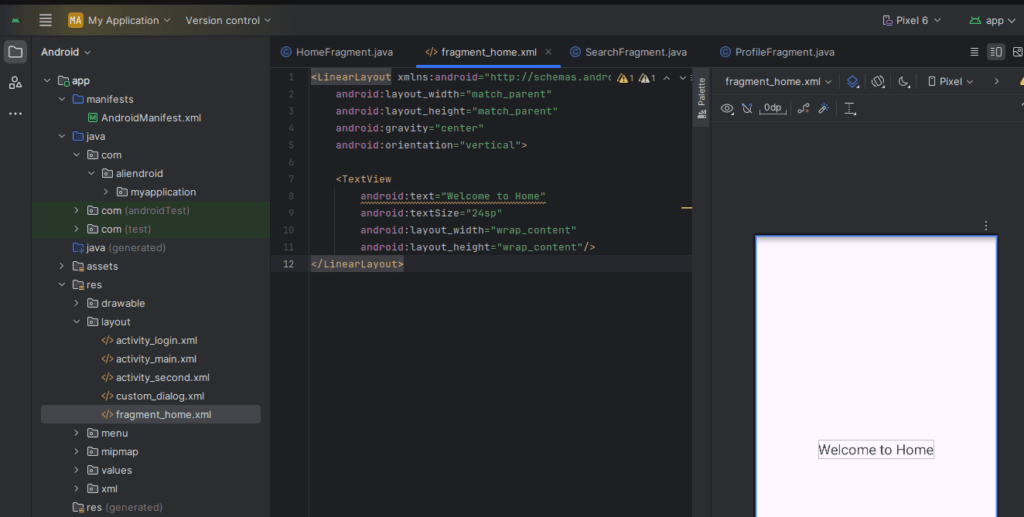
<LinearLayout xmlns:android="http://schemas.android.com/apk/res/android"
    android:layout_width="match_parent"
    android:layout_height="match_parent"
    android:gravity="center"
    android:orientation="vertical">

    <TextView
        android:text="Welcome to Home"
        android:textSize="24sp"
        android:layout_width="wrap_content"
        android:layout_height="wrap_content"/>
</LinearLayout>
Repeat for fragment_search.xml and fragment_profile.xml
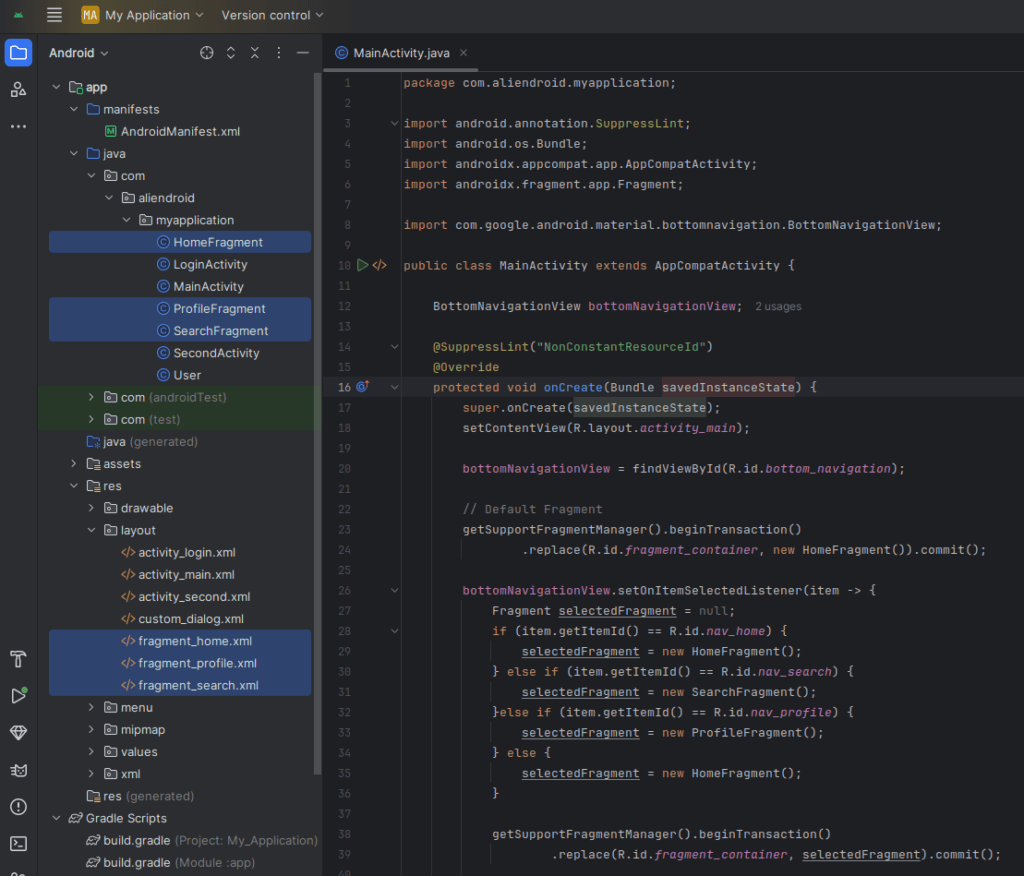
Step 6: Add Logic to MainActivity.java
import android.annotation.SuppressLint;
import android.os.Bundle;
import androidx.appcompat.app.AppCompatActivity;
import androidx.fragment.app.Fragment;

import com.google.android.material.bottomnavigation.BottomNavigationView;

public class MainActivity extends AppCompatActivity {

    BottomNavigationView bottomNavigationView;

    @SuppressLint("NonConstantResourceId")
    @Override
    protected void onCreate(Bundle savedInstanceState) {
        super.onCreate(savedInstanceState);
        setContentView(R.layout.activity_main);

        bottomNavigationView = findViewById(R.id.bottom_navigation);

        // Default Fragment
        getSupportFragmentManager().beginTransaction()
                .replace(R.id.fragment_container, new HomeFragment()).commit();

        bottomNavigationView.setOnItemSelectedListener(item -> {
            Fragment selectedFragment = null;
            if (item.getItemId() == R.id.nav_home) {
                selectedFragment = new HomeFragment();
            } else if (item.getItemId() == R.id.nav_search) {
                selectedFragment = new SearchFragment();
            }else if (item.getItemId() == R.id.nav_profile) {
                selectedFragment = new ProfileFragment();
            } else {
                selectedFragment = new HomeFragment();
            }

            getSupportFragmentManager().beginTransaction()
                    .replace(R.id.fragment_container, selectedFragment).commit();

            return true;
        });
    }
}
Done!
You’ve successfully implemented BottomNavigationView using Java in Android Studio. Now your app has a clean and intuitive navigation interface!