Build Calculator Html Css Js

Build calculator HTML CSS JS, a project encompassing the creation of a fully functional calculator using HTML, CSS, and JavaScript. This guide provides a detailed breakdown of the project, covering everything from initial setup to advanced features, including error handling, responsiveness, and testing.
We’ll delve into the essential structure, explore different calculation logics, and design user-friendly interfaces. This comprehensive approach will guide you through each step of the development process, equipping you with the necessary knowledge to build your own calculator.
Project Setup
This section Artikels the initial steps for setting up a basic HTML, CSS, and JavaScript calculator project. A well-organized project structure is crucial for maintainability and future development. Following these steps ensures a clear separation of concerns and allows for easy modification and expansion of features.
Project Folder Structure
A clear folder structure helps in managing the project files. A recommended structure is:
- calculator
- index.html
- style.css
- script.js
This structure keeps all related files together, making it easy to navigate and maintain the project.
HTML File (index.html)
The HTML file forms the structure of the calculator, including input fields, buttons, and a display area.
<!DOCTYPE html>
<html lang="en">
<head>
    <meta charset="UTF-8">
    <meta name="viewport" content="width=device-width, initial-scale=1.0">
    <title>Calculator</title>
    <link rel="stylesheet" href="style.css">
</head>
<body>
    <div class="calculator">
        <div class="display">0</div>
        <div class="buttons">
            <button class="operator">+</button>
            <button class="operator">-</button>
            <button class="operator">*</button>
            <button class="operator">/</button>
            <button>7</button>
            <button>8</button>
            <button>9</button>
            <button class="equal">=</button>
            <button>4</button>
            <button>5</button>
            <button>6</button>
            <button>1</button>
            <button>2</button>
            <button>3</button>
            <button>0</button>
            <button class="decimal">.</button>
            <button class="clear">C</button>
        </div>
    </div>
    <script src="script.js"></script>
</body>
</html>
This basic structure includes a container for the calculator, a display area, and a set of buttons for numbers, operators, and functions.
The inclusion of CSS and JavaScript references prepares for styling and functionality.
CSS File (style.css)
The CSS file styles the calculator elements, providing a visually appealing layout.
.calculator
  width: 200px;
  border: 1px solid #ccc;
  padding: 10px;
  border-radius: 5px;
  background-color: #f0f0f0;


.display
  width: 100%;
  height: 30px;
  padding: 5px;
  font-size: 16px;
  text-align: right;
  border: 1px solid #ccc;
  margin-bottom: 5px;


.buttons button
  width: 50px;
  height: 50px;
  font-size: 16px;
  margin: 2px;
  border: none;
  border-radius: 5px;
  background-color: #e0e0e0;
This simple CSS provides basic styling for the calculator elements, ensuring a clean and organized look.
JavaScript File (script.js)
The JavaScript file handles the calculator’s logic and functionality.
// JavaScript code to handle calculator operations goes here
This section will contain the JavaScript code to implement the calculator’s functions (number input, operator handling, calculations, clear).
Basic Calculation Logic
This section details the core JavaScript functions for performing arithmetic operations, handling user input, updating the display, and managing potential errors. Understanding these functions is crucial for a functional calculator application.
The following subsections describe the fundamental logic for each operation, input handling, result display, and error management.
Arithmetic Operation Functions
These functions form the heart of the calculator’s logic, performing the calculations based on user input. Each function takes two operands as input and returns the calculated result. Crucially, they must be designed to handle potential errors such as division by zero.
- Addition: This function adds two numbers together.
- Subtraction: This function subtracts one number from another.
- Multiplication: This function multiplies two numbers.
- Division: This function divides one number by another. It includes a check to prevent division by zero, returning an appropriate error message instead of a crash.
User Input Handling
The calculator needs to efficiently process user input to perform calculations. Input validation and parsing are crucial steps.
- Input Validation: The functions must check if the input is a valid number. This prevents unexpected behavior from non-numeric input.
- Input Parsing: The input, which is initially a string, needs to be converted into a numerical format for the calculation functions to work with.
Result Display, Build calculator HTML CSS JS
The results of the calculations must be effectively displayed to the user. A clear and concise display is essential for user understanding.
- Display Update: The result of the calculation needs to be shown in the designated display area. A function will be used to update the display element with the computed value.
Error Handling
Error handling is essential to ensure the calculator’s robustness. A gracefully handled error is more user-friendly than a crash.
- Division by Zero: A critical error to handle is division by zero. The function should detect this condition and return an appropriate error message to the user, such as “Division by zero is not allowed”.
- Invalid Input: The code should handle invalid input (non-numeric values) to prevent unexpected behavior or crashes. A clear error message should be displayed if the input is invalid.
Example JavaScript Code Snippets (Addition)
“`javascript
function add(num1, num2)
return num1 + num2;
//Example Usage
let result = add(5, 3);
console.log(result); // Output: 8
“`
“`javascript
// Example of input validation and error handling
function add(num1, num2)
if (typeof num1 !== ‘number’ || typeof num2 !== ‘number’)
return “Invalid input. Please enter numbers only.”;
return num1 + num2;
“`
User Interface Design
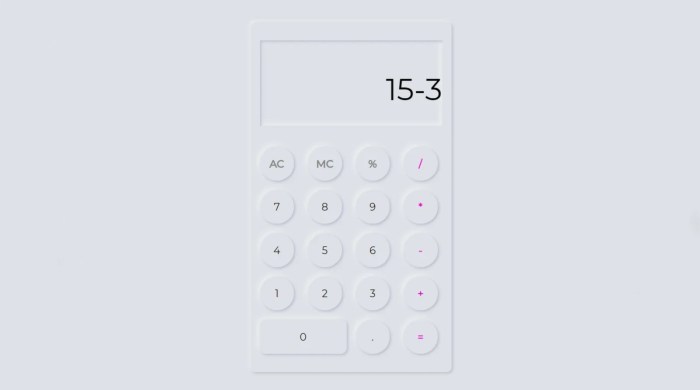
Source: foolishdeveloper.com
A well-designed user interface is crucial for a user-friendly calculator. A clean, intuitive layout enhances the user experience, making calculations smoother and more enjoyable. This section explores various approaches to designing the calculator’s interface, focusing on visual appeal and usability.
Clear and consistent visual hierarchy is key. Users should be able to easily identify important elements, such as the display, buttons, and any additional features. The design must support easy navigation and interaction with the calculator.
Button Styles and Layout Designs
Different button styles and layout designs can affect the user’s interaction with the calculator. The arrangement of buttons should be logical and intuitive, ensuring users can find the necessary functions quickly and easily.
- Standard Layout: A traditional calculator layout, with numbers arranged in a grid, and function buttons (like +, -,
-, /) strategically placed for easy access. This is often the most intuitive design for users familiar with standard calculators. - Scientific Layout: A layout incorporating more advanced mathematical functions, often with multiple levels of operations and complex formulas. This requires a more expansive layout to accommodate specialized functions like logarithms, trigonometric functions, and exponents.
- Compact Layout: This approach aims to minimize the visual footprint of the calculator. This is often achieved by using a more condensed arrangement of buttons or incorporating a “toggle” system where additional functions are accessible by pressing a key. This layout might be suitable for small screens or mobile devices.
CSS Styling for Buttons
Styling the calculator buttons with CSS is essential for creating a visually appealing interface. Using colors, shadows, and borders, you can enhance the visual hierarchy and make the buttons stand out. This is achieved through proper use of CSS selectors, classes, and attributes.
.button
  background-color: #f0f0f0;
  color: #333;
  border: 1px solid #ccc;
  padding: 10px 15px;
  border-radius: 5px;
  cursor: pointer;
  font-size: 16px;


.operator
  background-color: #e0e0e0;


.equal
  background-color: #4CAF50;
  color: white;
This CSS code snippet provides a basic example. Feel free to adjust colors, padding, and other properties to tailor the appearance to your specific design preferences.
Responsiveness
Ensuring the calculator is responsive is crucial for a positive user experience across different screen sizes. Using media queries, you can adjust the layout and button sizes to accommodate various devices, from desktop computers to mobile phones.
@media (max-width: 600px)
  .button
    font-size: 14px;
    padding: 8px 12px;
The example above demonstrates how to adjust button sizes on smaller screens. You can adapt similar techniques to modify button spacing, layout, and other elements for optimum responsiveness.
UI Components
Including specific UI components can enhance user experience. These include clear, decimal, and percentage buttons. Implementing these elements allows users to perform complex calculations efficiently and accurately.
- Clear Button: A “C” or “AC” button allows users to clear the display and start fresh.
- Decimal Point Button: A “.” button allows users to enter decimal numbers in their calculations.
- Percentage Button: A “%” button allows users to quickly calculate percentages. For example, to calculate 20% of 100, the user can input 100, then the percentage button, then 20.
Styling for Visual Appeal
The styling of the calculator can be improved using various techniques to create a visually appealing and user-friendly experience.
- Color Scheme: A color scheme should be chosen that is easy on the eyes and complements the overall design.
- Font Selection: A legible and visually appealing font should be selected to make the display and buttons easy to read.
- Spacing and Alignment: Proper spacing and alignment of buttons and text contribute to a visually appealing design.
Advanced Features
Adding advanced features to a calculator significantly enhances its usability and functionality. These enhancements allow for more complex calculations and often increase the user’s efficiency. Advanced features go beyond basic arithmetic and introduce capabilities for memory management, percentages, and more complex mathematical operations.
Memory Functions
Memory functions are crucial for saving intermediate results in calculations. These functions allow users to store values, recall them, and utilize them in subsequent calculations without re-entering them. This significantly simplifies multi-step calculations, reducing errors and improving efficiency.
- Storing a value: A dedicated button, often labeled “M+”, is used to store the current display value in memory. For example, if the display shows “50”, pressing “M+” stores “50” in memory.
- Retrieving a value: A button, often labeled “MR”, retrieves the value stored in memory and displays it on the screen. This stored value can then be used in subsequent calculations.
- Clearing memory: A button, often labeled “MC”, clears the memory. This is essential for resetting the memory to zero or starting a new calculation sequence.
- Adding to memory: A button, often labeled “M+”, adds the current display value to the value already stored in memory. For example, if memory holds “20”, and the display shows “30”, pressing “M+” updates the memory to “50”.
- Subtracting from memory: A similar function exists, often labeled “M-“, to subtract the display value from the memory value.
Percentage Calculations
Percentage calculations are fundamental for many applications, including discounts, markups, and financial computations. A dedicated percentage button simplifies these calculations.
- Implementing percentage calculation: The percentage function is often triggered by a button labeled “%”. For example, to calculate 20% of 100, the user enters “100”, then presses the “%” button followed by “×” (or equivalent multiplication operator) and “20”. The result will be displayed.
Square Root Function
A square root function is a necessary feature for mathematical calculations involving roots. The square root function computes the square root of the displayed value.
- Implementing square root: The square root function is typically triggered by a dedicated button, often labeled “√”. For example, to find the square root of 25, the user enters “25” and then presses the “√” button. The result, “5”, is displayed.
Parentheses for Complex Calculations
Parentheses are vital for specifying the order of operations in complex calculations. They allow users to group calculations and prioritize operations, ensuring accurate results.
- Implementing parentheses: Buttons for opening and closing parentheses (“(” and “)”) are necessary for complex calculations. The calculator needs to evaluate expressions following the order of operations, including parentheses. For instance, (2 + 3) × 4 would yield the correct result of 20.
Handling Input and Output
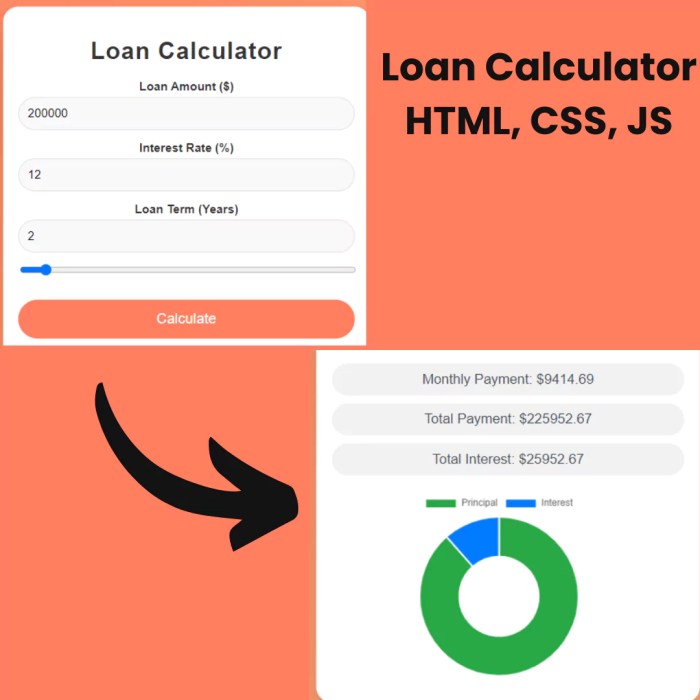
Source: codewithfaraz.com
Collecting user input and displaying results are crucial components of a functional calculator. A well-designed input mechanism ensures ease of use, while accurate output presentation is vital for clarity and reliability. This section details the implementation of these functionalities.
Collecting User Input from Buttons
The calculator gathers input from buttons representing numbers (0-9), operators (+, -,
-, /), and the equals (=) sign. Event listeners attached to these buttons capture clicks, triggering actions that update the display and perform calculations.
Displaying Entered Numbers and Operators
A display area, typically a text field, shows the sequence of numbers and operators entered by the user. Each button press updates this display, concatenating the corresponding numerical or operator symbol. The display acts as a record of the current input.
Handling the Input Sequence
Input sequence handling is a key aspect. The calculator needs to determine the order of operations. This typically involves using a stack-based approach or an expression parser to evaluate the input correctly. The calculator parses the user input to determine the precedence and order of operations. The parsing process breaks down the input string into a series of tokens representing numbers and operators.
Displaying Calculation Results
Once the user presses the equals (=) button, the calculator evaluates the input expression. This process often involves a series of steps, such as parsing the expression, evaluating the operators according to their precedence, and applying the correct order of operations. The calculation result is then displayed in the output area.
Updating the Display Area with Intermediate Results
For complex calculations, intermediate results can be shown in the display. This feature enhances transparency and aids in understanding the steps involved in the calculation. The calculator can display the results of sub-expressions as they are evaluated, providing a clearer understanding of the calculation process. This is particularly helpful in debugging or understanding complex calculations.
Responsive Design
Responsive design is crucial for a calculator application, ensuring a seamless user experience across various devices and screen sizes. A well-designed responsive layout adapts automatically to different screen resolutions, maintaining usability and visual appeal on mobile phones, tablets, and desktops. This adaptability is vital for maximizing user engagement and accessibility.
Responsive design leverages CSS media queries to adjust the layout based on the device’s characteristics. This dynamic approach allows for tailored presentation, optimizing content display for various screen sizes. Implementing responsive design techniques will provide users with an intuitive and consistent experience regardless of the device they are using.
HTML Table Structure for Responsiveness
A well-structured HTML table can form the foundation of a responsive layout. Tables are particularly suitable for arranging elements in rows and columns, which can be easily adapted to different screen sizes. This is accomplished by utilizing CSS media queries to modify table attributes, such as cell widths, row heights, and table spacing.
| Input | Operation | Output |
|---|---|---|
| 10 | + | 20 |
| 5 | – | 15 |
CSS Media Queries for Responsive Design
Media queries allow for targeting specific screen sizes and applying tailored styles. This enables precise control over layout elements, ensuring optimal display across different devices. They are essential for adapting to various screen resolutions and orientations.
Example: To adjust the table’s cell width on smaller screens, the following CSS media query can be used:
@media (max-width: 768px)
  table
    width: 100%;

  th, td
    width: 33%; /* Each column takes one third of the width
-/
CSS Techniques for Responsive Layout
Several CSS techniques can be employed to create a responsive layout. These techniques encompass a range of approaches, from flexible units to media queries, each contributing to the overall adaptability of the design.
- Flexible Units (e.g.,
rem,em): These units allow elements to scale proportionally with the font size, making the layout more adaptable to different screen sizes. - Media Queries: These are used to apply different styles based on the screen width or other characteristics. This enables tailoring the layout for specific devices.
- Fluid Grids: These use percentages for defining the layout, allowing the elements to resize proportionally to the screen width. This method is crucial for creating responsive columns.
- CSS Grid Layout: This modern layout technique provides more control over the layout and allows for creating complex responsive designs. It is particularly useful for arranging elements in a grid structure.
Responsive Columns
Creating responsive columns involves dynamically adjusting the width of columns based on the screen size. This ensures that the content remains readable and visually appealing on various devices. Fluid grids, using percentages for column widths, are often employed for this purpose.
Example: To create responsive columns, you could use percentages for the column widths. If you want three columns, you could set each column’s width to 33.33%. On smaller screens, the columns would automatically shrink to accommodate the device’s width.
Error Handling and Validation: Build Calculator HTML CSS JS
Robust error handling and input validation are crucial for any calculator application. They ensure the application functions predictably and safely, regardless of the user’s input. This is achieved by preventing errors like division by zero, invalid operations, and non-numeric input. By implementing proper validation and error handling, you build a more user-friendly and reliable calculator.
Input Validation Techniques
Input validation is the process of verifying that the user’s input conforms to the expected format and range. This is accomplished by checking the input data against predefined rules. These rules ensure the data is suitable for processing and avoids unexpected program behavior. This crucial step often involves checking for the correct data type, range, and format.
Preventing Unexpected Behavior
Unexpected behavior arises when the application encounters input that violates its design assumptions. This often leads to errors, crashes, or incorrect results. To mitigate this, implement checks to validate the user’s input. For example, ensure input is numeric before performing calculations. Using regular expressions, you can check for specific patterns and prevent non-numeric values from entering the system.
Handling Potential Errors
The application should anticipate and handle potential errors gracefully. This includes division by zero, invalid operations, and data format issues. Implement try-catch blocks to encapsulate these errors. This strategy helps to maintain the program’s stability and prevent crashes.
Division by Zero
A common error is division by zero. A simple check can prevent this. The code should explicitly check for a divisor of zero and respond accordingly. For example:“`javascriptfunction calculate(numerator, denominator) if (denominator === 0) return “Division by zero error”; return numerator / denominator;“`
Invalid Input
Invalid input can include non-numeric values. The code must validate the input to ensure it is of the correct type. If the input is not valid, display an error message to the user. For instance, if the user enters text instead of a number, the program should handle this and prevent crashes or incorrect results.“`javascriptfunction validateInput(input) if (isNaN(parseFloat(input))) return “Invalid input.
Please enter a number.”; return parseFloat(input);“`
User-Friendly Error Messages
Error messages should be clear, concise, and informative. They should guide the user on how to correct their input. Instead of cryptic error codes, provide user-friendly explanations. This enhances the user experience and helps users understand and fix any errors quickly.
| Error Type | User-Friendly Message |
|---|---|
| Division by zero | Cannot divide by zero. |
| Invalid input | Please enter a valid number. |
| Unsupported operation | This operation is not supported. |
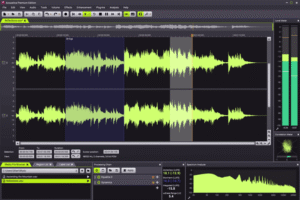
Testing and Debugging
Source: codingartistweb.com
Thorough testing and debugging are crucial for ensuring the calculator’s accuracy, reliability, and user experience. Robust testing strategies prevent unexpected errors and guarantee that the calculator functions as intended across various scenarios. Effective debugging techniques enable rapid identification and resolution of issues, ultimately leading to a high-quality product.
Testing Different Calculator Functions
Testing individual calculator functions isolates potential problems and confirms their correct operation. This approach allows for a more focused examination of specific functionalities, preventing issues from spreading to other areas of the calculator.
- Unit Tests: Employ unit tests to validate the correctness of each function. This entails writing small, isolated tests for each arithmetic operation (addition, subtraction, multiplication, division, etc.) and other specific calculator functions (e.g., percentage calculation, square root). For instance, a unit test for the addition function would verify that 2 + 2 equals 4. A test suite encompassing various inputs, including edge cases like zero, negative numbers, and large values, ensures comprehensive coverage.
- Integration Tests: Test the interaction between different functions to ensure seamless integration. Verify that results from one function are correctly processed by subsequent functions. A test that calculates the total of a series of numbers after a percentage calculation would be considered an integration test. This type of test verifies the flow of calculations.
- Edge Case Testing: Address scenarios that are not typical input data. This includes values at the extremes of the input range (very large or very small numbers), as well as unusual or invalid inputs. For example, testing what happens when the user enters non-numeric input or performs division by zero, ensures the calculator handles these exceptional cases.
Debugging JavaScript Code Related to Calculations
Effective debugging techniques streamline the identification and resolution of errors in the JavaScript code. These techniques are crucial for maintaining code quality and preventing unexpected behavior in the calculator.
- Console Logging: Utilize the browser’s developer console to inspect variable values and track the flow of execution. Insert `console.log()` statements strategically within the code to monitor intermediate results and identify discrepancies. For instance, log the values of operands and the intermediate results of a calculation to understand where the issue might lie.
- Debugger Tools: Leverage the browser’s built-in debugger to step through the code line by line, examine variables, and inspect the call stack. This helps identify the exact location and nature of errors. The debugger allows a step-by-step inspection of the code, enabling observation of variable values and function calls, which is crucial for pinpointing errors.
- Error Handling: Implement `try…catch` blocks to handle potential errors gracefully. This prevents the application from crashing when encountering unexpected inputs or exceptions. For instance, if a user enters non-numeric input, a `try…catch` block can handle the error and display an appropriate message to the user.
Testing Methodology for Various Scenarios
A comprehensive testing methodology ensures the calculator functions correctly across a wide range of scenarios. A well-defined testing plan encompasses various aspects, from individual function testing to end-to-end testing.
- Test Cases: Create a set of test cases that cover various scenarios, including normal calculations, edge cases, and invalid inputs. For instance, a test case could involve calculating the total cost of items after applying a discount. This encompasses normal calculations. Another test case might be calculating the result of a very large number divided by a very small number to ensure correct results with extreme values.
This addresses edge cases.
- Automated Testing: Utilize automated testing frameworks to execute tests repeatedly and reliably. This saves time and ensures consistent results. Automated testing frameworks like Jest, Mocha, or Jasmine can be integrated to streamline the testing process. Automated testing can be easily incorporated by using testing frameworks to automate repetitive tests and increase the speed and accuracy of the testing process.
- Regression Testing: Include regression tests in the testing plan. Regression tests are used to verify that modifications to the code haven’t introduced new errors. These tests are essential to maintain the quality of the application as changes are made. Regular regression testing helps to identify any unintended side effects of code changes.
Debugging the User Interface
Debugging user interface issues often requires examining both the HTML and CSS. A structured approach is vital for efficient problem-solving.
- Inspecting the HTML: Use the browser’s developer tools to inspect the HTML structure and ensure it accurately reflects the intended layout. Examine elements and their attributes to identify any inconsistencies or errors in the markup. Inspecting the HTML structure can help identify issues in layout or display.
- Inspecting the CSS: Examine the CSS rules to identify styling inconsistencies or errors. Inspect the styling applied to elements and verify that it aligns with the desired appearance. This helps pinpoint any issues related to layout, colors, or fonts.
- Debugging JavaScript Interactions: Ensure that JavaScript code interacts correctly with the UI elements. Use the browser’s developer tools to inspect the interaction between JavaScript and HTML elements. This helps diagnose problems with dynamic updates or responsiveness.
Examples of Unit Tests for Calculator Functions
Unit tests are essential for verifying the functionality of individual calculator components.
// Example using Jest (a popular JavaScript testing framework)
import  add, subtract  from './calculator';

describe('Calculator functions', () =>
  it('should add two numbers correctly', () =>
    expect(add(2, 3)).toBe(5);
  );

  it('should subtract two numbers correctly', () =>
    expect(subtract(5, 2)).toBe(3);
  );

  // Add more test cases for other functions and edge cases
);
Final Conclusion
In conclusion, building a calculator using HTML, CSS, and JS offers a practical and engaging way to solidify your front-end development skills. This detailed guide covers every stage, from project setup to advanced features, ensuring a thorough understanding. By the end, you’ll have the know-how to create a robust and visually appealing calculator. Remember to practice and adapt these techniques to your own projects.


Post Comment