A Complete Guide To Building Your First Custom Pc
A Complete Guide to Building Your First Custom PC dives into the exciting world of PC customization. This guide provides a comprehensive overview, walking you through every step, from initial planning to final testing and personalization. Discover the advantages of building your own PC and the satisfaction of crafting a machine perfectly tailored to your needs and desires.
Learn about crucial components, like CPUs, motherboards, and graphics cards, and how to choose the right ones for your desired performance. The detailed process of building your custom PC is broken down into manageable steps, ensuring a smooth and rewarding experience for all skill levels. From assembling the core components to fine-tuning performance, we cover it all.
Introduction to Building a Custom PC
Building a custom PC offers a significant advantage over purchasing a pre-built one. You gain unparalleled control over the components, allowing you to tailor the system to your specific needs and budget. This level of customization often translates to better performance and a more satisfying experience. Further, building a custom PC allows for precise component selection, optimizing for specific tasks, like gaming or video editing, without unnecessary bloatware.A custom PC build provides the flexibility to upgrade individual components as technology advances, maintaining a system that remains relevant for years.
Pre-built systems often lock you into a less upgradeable configuration, leading to potential obsolescence and requiring a new system sooner. Building a custom PC is a rewarding experience that grants you greater control over your hardware and fosters a deeper understanding of PC components.
Key Components of a Custom PC
Choosing the right components is fundamental to a successful PC build. Each part plays a critical role in the overall performance and functionality of the system. The core components include the CPU, GPU, RAM, motherboard, storage (SSD/HDD), and power supply.
Types of PC Cases and Their Features
PC cases come in various styles, sizes, and features. Mid-tower cases offer a good balance of space and features, while smaller mini-tower cases are ideal for those with limited space. Full-tower cases provide ample room for high-end components and extensive cooling solutions. The choice depends on the size and type of components you plan to use, and the aesthetic preference of the builder.
Consider features like airflow, cable management, and mounting options.
Choosing the Right Components for Your Build
Choosing the right components involves careful consideration of your budget, desired performance, and intended use. Start by defining your budget and determining the tasks you’ll be performing with the PC. Research different component options and their performance characteristics, focusing on benchmarks and user reviews. Compare similar products and identify potential trade-offs between price and performance. This methodical approach will guide you toward components that meet your needs without unnecessary cost overruns.
Essential PC Components
Understanding the function of each component is crucial for building a successful system. The table below Artikels the essential components, their descriptions, purposes, and examples.
| Component | Description | Purpose | Examples |
|---|---|---|---|
| CPU (Central Processing Unit) | The brain of the computer, performing calculations and instructions. | Executes programs, manages data, and controls other components. | Intel Core i5, AMD Ryzen 5 |
| GPU (Graphics Processing Unit) | Responsible for rendering images and video. | Handles graphical processing, crucial for gaming and video editing. | Nvidia GeForce RTX 4090, AMD Radeon RX 7900 XTX |
| RAM (Random Access Memory) | Short-term memory for the computer. | Stores data that the CPU needs quickly. Higher capacity and speed RAM allows for smoother multitasking. | DDR5-6000, DDR4-3600 |
| Motherboard | The main circuit board that connects all components. | Connects and manages communication between the CPU, GPU, RAM, and other components. | ASUS ROG STRIX Z790-A, MSI MAG Z790 Tomahawk |
| Storage (SSD/HDD) | Long-term storage for data. | Stores operating system, applications, and user files. | Samsung 990 Pro, Western Digital Black SN850 |
| Power Supply | Provides electrical power to all components. | Essential for supplying consistent and sufficient power to the system. An inadequate power supply can damage components. | Corsair RM850x, EVGA SuperNOVA 850 G3 |
Choosing the Right Components
Picking the right components is crucial for building a PC that meets your needs and budget. This involves careful consideration of each part’s specifications and performance characteristics. From the CPU’s processing power to the storage’s speed, each component plays a vital role in the overall system’s performance. Understanding these factors will ensure you build a system that’s both powerful and efficient.
Central Processing Unit (CPU), A Complete Guide to Building Your First Custom PC
CPUs are the brains of your PC, responsible for executing instructions. Different CPU types cater to varying needs and budgets. High-end CPUs, like Intel’s Core i9 or AMD’s Ryzen 9 series, offer top-tier performance for demanding tasks, including gaming and video editing. Mid-range options provide a good balance of power and price. Lower-end CPUs, like Intel’s Core i3 or AMD’s Ryzen 3, are more affordable but may not be as powerful for intensive applications.
Crucial specifications include clock speed (measured in GHz), core count, and cache size. Higher clock speeds, more cores, and larger cache sizes generally lead to better performance.
Motherboard
The motherboard is the foundation of your PC, connecting all the components. Selecting the right motherboard is essential for compatibility and future upgrades. Key factors include: the CPU socket type, compatible RAM slots, available expansion slots (PCIe), and integrated peripherals. Consider the long-term goals for upgrades when choosing a motherboard. A motherboard with ample expansion slots will allow for future upgrades without needing to replace the entire system.
The chipset on the motherboard also affects compatibility and performance. High-end chipsets usually support newer technologies and higher-speed components.
Random Access Memory (RAM)
RAM is the computer’s short-term memory, storing data the CPU needs to access quickly. Different RAM types exist, including DDR3, DDR4, and DDR5. DDR5 RAM offers the highest speeds and performance. DDR4 is still a popular and cost-effective option, but DDR3 is becoming obsolete. RAM speed, measured in MHz, is a significant factor in system performance.
Higher speeds allow the CPU to access data faster, resulting in smoother multitasking. Also consider the RAM capacity (measured in GB). More RAM allows you to run more applications and programs simultaneously without experiencing performance slowdowns.
Graphics Processing Unit (GPU)
The GPU handles graphical processing, crucial for gaming and video editing. The GPU’s power is directly correlated to the quality and smoothness of visuals. High-end GPUs, such as NVIDIA’s RTX series or AMD’s Radeon RX series, offer stunning visuals and smooth performance for high-resolution gaming and demanding applications. Mid-range GPUs provide a good balance of performance and price.
When choosing a GPU, consider the desired resolution and frame rate. Higher resolutions and frame rates demand more powerful GPUs.
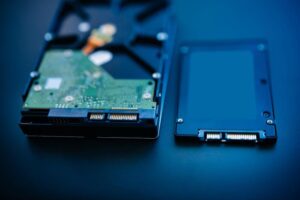
Storage Devices
Storage devices store your operating system, programs, and files. Different types include Hard Disk Drives (HDDs), Solid State Drives (SSDs), and Non-Volatile Memory Express (NVMe) drives. HDDs are the most affordable but have slower read/write speeds. SSDs are significantly faster than HDDs and provide better performance. NVMe drives are the fastest storage option, ideal for demanding applications that require quick access to data.
Choose the type based on your budget and performance needs. For example, NVMe drives are essential for high-end gaming PCs and applications requiring quick loading times.
Power Supply Unit (PSU)
The PSU converts AC power from the wall outlet to DC power for the components. Choosing the right PSU is critical for stability and reliability. The PSU’s wattage rating should exceed the combined power requirements of all components. A PSU that’s too small can lead to instability and component damage. Look for 80+ certified PSUs, which indicate high efficiency and lower energy consumption.
Consider the size and form factor of the PSU when selecting it for your case.
CPU Comparison Table
| Brand | Model | Features | Price (Estimated) |
|---|---|---|---|
| Intel | Core i5-13600K | 16 cores, 24 threads, high clock speeds | $250-300 |
| AMD | Ryzen 5 7600X | 6 cores, 12 threads, good balance of performance and price | $200-250 |
| Intel | Core i7-13700K | 24 cores, 32 threads, high-end performance | $400-500 |
| AMD | Ryzen 7 7700X | 8 cores, 16 threads, good balance of performance and price | $300-350 |
Building the PC: A Complete Guide To Building Your First Custom PC
Assembling your custom PC is a rewarding experience, allowing you to tailor the components to your specific needs and desires. This section will guide you through the crucial steps of installing the motherboard, CPU, RAM, storage, graphics card, power supply, cables, and securing the PC case. Thoroughness and precision are key to a successful build.
Installing the Motherboard
Before installing the motherboard, ensure all the necessary components are in place and ready. Position the motherboard tray within the PC case, aligning it with the designated mounting points. Secure the motherboard to the case using the provided screws. Carefully place the motherboard into the tray, ensuring proper alignment. Double-check all connections before securing the screws.
Installing the CPU and RAM
The CPU and RAM are critical components that need careful handling. Open the CPU socket on the motherboard, carefully position the CPU, ensuring proper alignment. Press down gently on the lever to secure the CPU. Install RAM modules into the designated slots on the motherboard, aligning the clips. Press firmly until the clips click into place.
Connecting Storage Devices
Connect hard drives, SSDs, and other storage devices to the motherboard’s SATA or NVMe ports. The cables are color-coded to aid in identification. Align the connectors with the corresponding ports, ensuring a firm connection. Take note of the device’s orientation.
Installing the Graphics Card and Power Supply
Carefully insert the graphics card into the PCIe slot on the motherboard, ensuring proper alignment. Secure the graphics card with the provided screw. Install the power supply unit (PSU) in the designated bay, and secure it using the mounting hardware. Connect the PSU cables to the motherboard, CPU, and other components.
Connecting Cables and Peripherals
Connect all the necessary cables, including the power cables to the components and the data cables to the storage devices. Ensure all connections are secure. Connect any peripherals such as keyboards, mice, monitors, etc., to the appropriate ports on the motherboard or graphics card.
Assembling and Securing the PC Case
Carefully close the PC case, aligning the panels and securing them with the screws. Tighten all screws firmly, but do not overtighten. Double-check all connections before closing the case completely.
PC Assembly Steps
| Step | Description | Tools | Images |
|---|---|---|---|
| 1 | Prepare the PC case and components. | None | Visual representation of a PC case with all components arranged outside the case. |
| 2 | Install the motherboard into the case. | Screwdriver | A detailed image showing the motherboard being secured into the PC case. |
| 3 | Install the CPU and RAM. | CPU installation tool (if needed) | Clear image illustrating the placement of the CPU and RAM in the motherboard slots. |
| 4 | Connect the storage devices. | SATA/NVMe cables | Image demonstrating the connection of storage devices to the motherboard using SATA/NVMe cables. |
| 5 | Install the graphics card. | Screwdriver | Illustration showing the graphics card installed in the PCIe slot. |
| 6 | Install the power supply. | Screwdriver | Image of the power supply secured in the case. |
| 7 | Connect cables and peripherals. | Cable ties (optional) | Image illustrating all cables connected to the appropriate components. |
| 8 | Assemble and secure the PC case. | Screwdriver | Image of the PC case completely assembled and secured. |
Testing and Troubleshooting
Successfully building a PC is only half the battle. Thorough testing and troubleshooting are crucial to ensuring your system operates as expected and to identify and resolve potential issues promptly. This section will guide you through the initial testing procedure, common problems, and effective troubleshooting methods.A well-tested PC ensures optimal performance and longevity. Addressing problems early minimizes frustration and allows you to get the most out of your new build.
Initial Testing Procedure
This initial testing phase verifies basic functionality and identifies any immediate problems. Power on your PC and monitor its startup process. Observe the system’s boot sequence, checking for any error messages or unusual behavior. Verify all components are functioning correctly, including the graphics card, by running basic tests and checking for any unusual noise or overheating. After the system has fully booted, run diagnostic tools to test the stability of the system.
Common Problems and Troubleshooting Steps
Numerous issues can arise during a PC build. Power supply issues are common. Verify that the PSU is correctly connected and within the system’s power requirements. Insufficient cooling can lead to overheating and system instability. Ensure adequate airflow and proper fan operation.
Incorrectly installed components can lead to system instability. Verify all connections are secure and that components are installed correctly.
Diagnosing and Resolving Component Issues
Component-specific issues require targeted troubleshooting. For instance, if the graphics card isn’t detected, review the connections, drivers, and compatibility. RAM issues might manifest as system instability or boot errors. Verify the RAM modules are correctly seated and the timings are appropriate. Hard drive problems often result in boot failures or data loss.
Verify the hard drive’s connection, SMART status, and compatibility with the system.
Ensuring System Stability
System stability is paramount. Regularly monitor system temperatures and performance metrics using monitoring software. Overheating components can lead to instability and system crashes. Over time, ensure your system is well-ventilated and that your components remain within safe operating temperatures. Use diagnostic tools to identify and address any performance bottlenecks.
Running Diagnostic Tools
System diagnostic tools are essential for verifying functionality and identifying potential problems. This step helps you to identify potential hardware issues before they cause larger problems.
- Windows built-in tools: Windows provides built-in diagnostic tools to test various hardware components, such as the Memory Diagnostic Tool. Running these tools helps to pinpoint potential hardware issues, especially with RAM and storage devices.
- Third-party tools: Third-party utilities, like CPU-Z or HWMonitor, provide detailed information about your hardware, including temperature, speed, and other critical parameters. These tools are valuable for assessing the health and performance of individual components.
Troubleshooting Hardware Issues
Various hardware issues can arise after building a PC. Addressing them effectively can prevent further complications.
- Power supply problems: A faulty power supply can cause instability or prevent components from functioning. Check the power supply’s connections and verify that it meets the system’s power requirements.
- Cooling issues: Insufficient cooling can lead to overheating, causing system instability. Ensure proper airflow within the PC case and verify that all fans are functioning correctly.
- Component incompatibility: Incompatible components can result in boot failures or system instability. Verify that all components are compatible with each other and the motherboard.
Diagnostic Tool Comparison
This table compares different diagnostic tools based on their function, use case, and the results they provide.
| Tool | Function | Use Case | Results |
|---|---|---|---|
| Windows Memory Diagnostic Tool | Tests RAM modules for errors. | Identifying RAM problems. | Reports errors or passes, indicating RAM health. |
| CPU-Z | Provides detailed CPU information. | Checking CPU specifications and stability. | Displays CPU details, including frequency, cache, and other characteristics. |
| HWMonitor | Monitors hardware temperatures and other metrics. | Identifying potential overheating issues. | Displays real-time temperature readings for various components. |
| CrystalDiskInfo | Analyzes hard drive health. | Assessing hard drive status. | Provides SMART data and health indicators. |
Customizing Your PC
Personalizing your custom PC goes beyond just assembling the components. It’s about transforming a functional machine into a reflection of your style and preferences. This section delves into various methods for customizing both the visual appeal and performance features of your PC. From lighting and case modifications to optimizing cooling and monitoring performance, we’ll cover everything you need to know to truly make your build unique.This section will detail methods for enhancing your PC’s aesthetic appeal and performance optimization.
We’ll explore how to tailor the cooling system for optimal thermal management, and showcase how to monitor and fine-tune PC performance. Crucially, this section will emphasize the importance of maintaining proper ventilation to ensure longevity and stability.
Cooling System Customization
Custom cooling solutions offer significant advantages in terms of thermal performance and system longevity. Proper cooling prevents overheating, ensuring reliable operation and extending the lifespan of your components. The choice of cooling solution directly impacts the system’s temperature and overall performance.
- Different cooling solutions cater to diverse needs and budgets. Air cooling, liquid cooling, and specialized solutions each present distinct characteristics and potential benefits. Choosing the appropriate method for your system requires careful consideration of factors like budget, noise levels, and the desired level of thermal performance.
Ventilation and Thermal Management
Adequate ventilation is crucial for maintaining optimal temperatures within the PC case. Proper airflow ensures that components dissipate heat effectively, preventing overheating and system instability. Insufficient ventilation can lead to performance degradation and even component failure.
- Maintaining proper airflow involves strategic placement of fans, ensuring adequate air intake and exhaust. Careful consideration of case design and component placement is key to effective thermal management. Consider using high-quality fans with adjustable speeds to fine-tune airflow for your specific setup.
Performance Monitoring
Monitoring your PC’s performance allows you to identify potential bottlenecks and optimize system configurations. Utilizing monitoring tools enables proactive management, preventing issues before they impact system stability.
- Monitoring tools provide detailed insights into CPU and GPU temperatures, power consumption, and other key performance metrics. This data can be used to identify potential thermal problems or resource constraints and make informed decisions about system upgrades or adjustments.
Aesthetic Customization
Beyond functionality, aesthetic customization allows you to personalize your PC to match your individual style. This can range from simple lighting enhancements to more elaborate case modifications.
- Lighting options, such as RGB LED strips and fans, offer a wide range of customization possibilities. Careful planning and selection are essential for achieving the desired visual effect and avoiding clashes in aesthetics.
- Case modifications, such as painting, adding panels, or installing custom hardware, can significantly enhance the visual appeal of your build. Ensure the modifications do not impede airflow or compromise thermal performance.
Cooling Solutions Comparison
| Solution | Type | Advantages | Disadvantages |
|---|---|---|---|
| Air Cooling | Passive/Active | Affordable, readily available, generally quiet | Limited cooling capacity for high-end systems, potential for overheating |
| Liquid Cooling | Active | Superior cooling capacity, often quieter than air cooling | Higher initial cost, potential for leaks, more complex installation |
| Custom Water Cooling | Active | Highest cooling potential, high degree of customization | Significant cost, complex installation, potential for leaks |
| Peltier Cooling | Active | Effective for smaller components, good for localized cooling | Lower cooling capacity compared to other methods, higher power consumption |
Advanced Topics (Optional)

Source: techicy.com
Beyond the basics of building a custom PC, there are several advanced areas you can explore to further optimize performance and personalize your system. These optional topics delve into overclocking, cooling solutions, system monitoring, and custom water cooling, allowing you to push your PC’s capabilities to the next level. However, remember that these advanced techniques may introduce additional complexity and potential risks.Overclocking, for example, can significantly increase your system’s speed, but it also requires careful attention to thermal management and potential stability issues.
Understanding the risks and appropriate safety measures is crucial for successful overclocking.
Overclocking
Overclocking involves increasing the clock speed of your CPU and/or GPU beyond their manufacturer’s specifications. This can lead to enhanced performance, but it also introduces instability and thermal stress if not managed properly. A key factor is ensuring the components are capable of handling the increased load.
Cooling Solutions for Overclocked Components
Overclocking often necessitates more robust cooling solutions to manage the increased heat output. This is especially important for CPUs and GPUs, which can generate substantial heat under load. Various cooling solutions are available, from improved air coolers to custom water cooling loops. Properly selecting and installing a cooling solution is crucial for maintaining stability and preventing damage.
Monitoring and Managing System Temperatures
Effective monitoring and management of system temperatures are vital for stable operation, especially when overclocking. This involves understanding the various temperature sensors within your PC and utilizing software to track their readings. Temperature monitoring tools can help you identify potential overheating issues and adjust cooling strategies as needed.
Building a Custom Water Cooling Loop
A custom water cooling loop offers significant thermal benefits, particularly for high-performance systems. It involves creating a closed-loop system using a pump, radiator, and tubing to circulate coolant around your components. This method offers superior cooling capabilities compared to air cooling solutions, but requires more effort and expertise to implement.
Comparing Air and Liquid Cooling
Air cooling solutions are generally simpler and more affordable, providing adequate cooling for most users. However, liquid cooling systems offer superior cooling capacity, particularly for high-performance components and overclocked systems. The choice depends on your budget, desired performance, and the level of thermal demands on your system.
Cable Management
Effective cable management not only improves the aesthetics of your PC but also helps maintain airflow and prevents short circuits. Properly routing and organizing cables can significantly contribute to a clean, functional, and stable system. Careful planning and execution are key to achieving a well-organized build.
Optimizing PC Performance
Optimization involves fine-tuning various settings and configurations to achieve optimal performance. This includes adjusting power settings, enabling performance modes, and utilizing software tools to identify and resolve bottlenecks. Experimentation with different configurations and monitoring performance metrics are essential to achieve the desired results.
Water Cooling Kit Comparison
| Kit | Components | Features | Price |
|---|---|---|---|
| EKWB EK-Quantum AIO 240 | Pump, Radiator, Tubing, Fittings | High-performance cooling, Excellent compatibility | $150-$200 |
| Corsair iCUE H150i Elite Capellix | Pump, Radiator, Tubing, Fittings | RGB Lighting, Premium Materials | $180-$250 |
| Cooler Master MasterLiquid ML240L | Pump, Radiator, Tubing, Fittings | Good value, Affordable price | $120-$170 |
| Noctua NH-D15 | Large heatsink, fan(s) | Excellent air cooling, Silent operation | $70-$120 |
Outcome Summary
Source: driversupport.com
This comprehensive guide equips you with the knowledge and expertise to build your dream PC. We’ve explored the intricacies of choosing components, the meticulous process of assembly, and the importance of thorough testing and troubleshooting. Finally, we’ve delved into the art of customization, allowing you to personalize your PC to match your unique style and preferences. Embrace the power of creating a custom machine tailored for your needs.


Post Comment