Migrate From Adobe Photoshop To Gimp
Migrate from Adobe Photoshop to GIMP – Migrating from Adobe Photoshop to GIMP is a significant step, and this guide provides a comprehensive overview of the process. This detailed exploration covers everything from understanding the differences between the two applications to practical examples and troubleshooting potential issues. The guide delves into the nuances of file formats, tools, workflows, and strategies to ensure a smooth transition.
The guide comprehensively covers the essential aspects of the migration process. It provides a step-by-step approach, ensuring that users can confidently navigate the transition. This is a valuable resource for those seeking to explore the capabilities of GIMP while transitioning from the familiar environment of Photoshop.
Introduction to GIMP and Photoshop Comparison
GIMP and Adobe Photoshop are two prominent image editing software choices, each with its own strengths and weaknesses. Understanding their capabilities and philosophies is key for anyone looking to transition or choose between them. This comparison will delve into their core functionalities, user interfaces, and workflows to help in making an informed decision.GIMP, or GNU Image Manipulation Program, is a powerful, open-source image editing application.
It boasts a wide range of tools for photo editing, image manipulation, and graphic design. Its strengths lie in its versatility and comprehensive toolset, making it a viable alternative to proprietary software like Photoshop.
Core Functionalities of GIMP
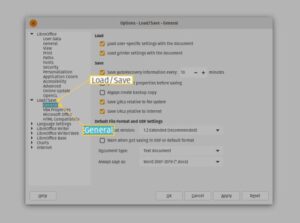
GIMP offers a broad array of functionalities. It supports various image formats, including popular ones like JPEG, PNG, and GIF. Users can perform common tasks like resizing, cropping, color adjustments, and basic retouching. Beyond these fundamentals, GIMP’s strength is its extensive set of advanced features, including layer management, masking, and sophisticated image manipulation tools.
Core Functionalities of Adobe Photoshop
Adobe Photoshop, a commercial product, is known for its industry-standard status and extensive professional-grade features. It excels in high-resolution image editing, photo retouching, and complex graphic design tasks. Photoshop’s strength lies in its extensive feature set, particularly its advanced tools for manipulation and editing, such as sophisticated masking and compositing techniques.
Philosophies and Approaches
GIMP’s philosophy is open-source and community-driven. This means that its development is collaborative, with frequent updates and contributions from a global community. Photoshop, on the other hand, is a commercially driven product with a more focused approach on professional standards and feature sets.
User Interfaces and Workflows
GIMP’s interface is known for its flexibility and customization options, making it user-friendly for both beginners and advanced users. Photoshop’s interface, while powerful, might require more time for beginners to master, given its vast array of tools and options. Both applications have their own unique workflows, with GIMP emphasizing a more intuitive, visual approach and Photoshop focusing on precision and control.
Comparison Table: GIMP vs. Photoshop
| Feature Category | GIMP | Adobe Photoshop |
|---|---|---|
| Layers | Supports layers, though with a slightly different approach than Photoshop. | Highly advanced layer management, including blending modes, masks, and non-destructive editing. |
| Filters | Extensive library of filters, some user-created. | Large library of professional-grade filters, often industry-standard. |
| Tools | Comprehensive set of tools, including selection, retouching, and drawing tools. | Extensive set of advanced tools for precision manipulation and compositing. |
| File Formats | Supports a wide variety of image formats, including common ones like JPEG, PNG, and GIF. | Supports a wide variety of image formats, including those used in professional workflows. |
| Pricing | Free and open-source. | Subscription-based or one-time purchase. |
Transition Strategies for Migrating Assets
Source: diyphotography.net
Migrating assets from Adobe Photoshop to GIMP necessitates careful consideration of file formats and workflow. This section details strategies for a smooth transition, focusing on preserving image quality and maintaining layer integrity where possible. Understanding the compatibility between the two applications is crucial to avoid data loss or significant quality degradation.A crucial aspect of the migration process involves selecting appropriate conversion methods and understanding the limitations of each approach.
This often requires a strategic approach to managing different file types and layer structures. Careful planning ensures that the transition is efficient and minimizes the risk of losing crucial data or compromising image quality.
Common File Formats and Compatibility
Both Photoshop and GIMP support a range of image formats. JPEG, PNG, TIFF, and GIF are common formats compatible with both applications. However, Photoshop’s PSD format, designed for layered images, presents a specific challenge for GIMP.
Converting Photoshop Files to GIMP-Compatible Formats
Converting Photoshop files to GIMP-compatible formats is often necessary to maintain data integrity. Converting PSD files to TIFF, PNG, or JPEG, for instance, is a standard method. Specific tools within GIMP and external software are often used to convert files efficiently. When converting, prioritize lossless formats like TIFF to maintain maximum detail.
Migrating Layered PSD Files to GIMP
Migrating layered PSD files to GIMP is challenging due to the differences in layer management between the two applications. PSD files contain extensive layer information, including blending modes, masks, and adjustment layers. Direct import into GIMP is not always straightforward. Strategies include converting PSD layers to individual layers in GIMP or using external tools for conversion, carefully preserving the original intent of the layers.
Alternatively, one may choose to flatten the PSD file before importing into GIMP.
Preserving Image Quality During Migration
Preserving image quality during the migration process is paramount. Using lossless formats like TIFF during conversion and export steps helps retain maximum detail. Optimizing image size and resolution, where necessary, ensures compatibility without compromising quality. Carefully examining the image’s color profile during conversion and ensuring proper color management throughout the process also contribute to preserving image quality.
Step-by-Step Procedure for Migrating Photoshop Files to GIMP
- Exporting Files: Export Photoshop files in compatible formats (TIFF, PNG, JPEG). This ensures the original data is retained as much as possible.
- File Import: Import the exported files into GIMP.
- Layer Management: Analyze the layers in the imported files in GIMP. Flatten layers where necessary or use GIMP’s layer management tools to replicate the PSD structure.
- Quality Control: Evaluate the imported images and adjust if necessary to maintain quality.
Importing and Exporting Different Image Formats
GIMP and Photoshop offer diverse import and export options for various image formats. Import and export functions vary based on the specific format. Lossy formats like JPEG introduce data compression, which can lead to quality degradation. Lossless formats like TIFF preserve all data. The user should be aware of the tradeoffs between quality and file size.
GIMP and Photoshop provide options for optimizing file size while maintaining acceptable quality levels.
Migrating Specific Features and Tools
Source: futurecdn.net
Transitioning from Photoshop to GIMP necessitates understanding how to replicate specific features and tools. This involves a shift in workflow, recognizing that while GIMP provides comparable functionality, the exact methods and interfaces differ. Understanding these differences is key to a smooth migration.A successful migration relies on familiarity with GIMP’s capabilities and an awareness of the subtle but important distinctions between the two applications.
This section provides practical strategies for transferring adjustments, layer styles, and retouching techniques.
Color Correction Adjustments
GIMP offers a range of color correction tools comparable to Photoshop’s. For instance, Curves and Levels adjustments in GIMP provide similar control over tonal ranges. Understanding the mapping of Photoshop’s adjustment layers, like Hue/Saturation and Vibrance, to their GIMP counterparts is essential for maintaining consistent results. Using the ‘Image’ > ‘Adjustments’ menu in GIMP allows access to these tools, and understanding the corresponding parameters in both programs is key.
Layer Styles Conversion
Photoshop’s layer styles offer numerous effects. GIMP’s equivalent options, found in the ‘Layer Styles’ dialog, don’t always mirror Photoshop’s exact appearance, but they can be used to achieve similar outcomes. Careful adjustments of blending modes, gradients, and textures in GIMP can recreate Photoshop layer style effects. It is often a process of experimentation and iteration to find the closest GIMP equivalent.
Masking and Selection Tools Comparison
GIMP’s masking and selection tools provide comparable functionality to Photoshop’s. Both applications offer options for creating selections and masks using various techniques, such as the lasso, magic wand, and polygonal lasso tools. GIMP’s ‘Select’ menu and the associated options are the equivalent for selection tools. Masking in GIMP, through the use of alpha channels and selections, provides similar precision to Photoshop.
Experimentation is key to finding the most efficient methods for specific tasks.
Image Retouching Migration
Migrating retouching work involves careful transfer of adjustments and manipulations. GIMP’s clone stamp tool and healing brush tool can replicate Photoshop’s retouching capabilities. Understanding the workflow for using these tools in GIMP is critical to achieving the desired results. Careful adjustments of brush size, opacity, and blending modes will ensure the seamless incorporation of retouching. Careful study of the GIMP equivalents and practicing their usage are crucial to successful retouching in GIMP.
Image Manipulation Effects
GIMP’s filter gallery offers a vast array of effects comparable to Photoshop’s. The filters in GIMP often have slightly different parameters or user interfaces, requiring a learning curve. For instance, applying Gaussian blur in GIMP will yield results similar to Photoshop, but the specifics may vary slightly. Blending modes in both applications provide options for combining layers, but the terminology and specific interactions may differ.
Experimentation is vital to discovering the most effective techniques for migrating effects.
Achieving Similar Results in GIMP
Achieving identical results between Photoshop and GIMP often requires experimentation and understanding the underlying mechanisms of the tools. For instance, a specific filter in Photoshop might have multiple corresponding GIMP filters, each with its own nuances. Understanding the underlying principles of the effect and the tools in both applications will lead to the best possible results.
Learning Curve and Workflow Adaptation
Migrating from Photoshop’s extensive feature set to GIMP’s powerful, yet different, approach necessitates a conscious effort to adapt workflows and tools. This transition involves understanding GIMP’s unique strengths and weaknesses compared to Photoshop, and learning how to leverage its capabilities for similar results. The learning curve can be steep, but the rewards of a potentially more efficient workflow and a cost-effective solution can be significant.The core of the adaptation lies in recognizing the fundamental differences between the two applications.
While both are powerful image editing tools, their philosophies and implementations diverge in various areas. GIMP, being open-source, often has alternative methods for achieving the same outcome as Photoshop. This necessitates a shift in mindset from the familiar Photoshop interface to a more flexible and customizable GIMP environment.
Understanding GIMP’s Tools and Workflow
GIMP’s interface, though functional, differs significantly from Photoshop’s familiar layout. Understanding the various panels, toolbars, and menus is crucial. Navigating these elements effectively takes time and practice. Users should dedicate time to explore the interface, learning shortcuts and exploring the available tools. This process of familiarization is key to achieving optimal workflow.
Challenges and Potential Pitfalls
A major challenge is the lack of direct equivalents for some Photoshop features. Users accustomed to specific Photoshop tools may find their functionality replicated in GIMP but with different procedures. This requires learning alternative approaches to achieve similar outcomes. Misunderstanding GIMP’s layer management system, particularly the absence of layers as a fundamental concept in the same way as Photoshop, can lead to significant workflow disruption.
Understanding GIMP’s non-destructive approach is paramount for maintaining image integrity.
Advantages and Disadvantages for Specific Use Cases
Photoshop’s extensive features are well-suited for complex professional photo editing, with tools designed for specific tasks. GIMP’s strength lies in its flexibility and extensibility. For simple edits, GIMP’s lightweight nature can be advantageous. For complex projects, Photoshop’s robust features and professional workflows might be preferable. Ultimately, the best choice depends on the user’s specific needs and the project requirements.
Resources and Tutorials for Adaptation
Learning GIMP effectively involves utilizing various resources. GIMP’s official website provides extensive documentation, tutorials, and user forums. Online communities and YouTube channels dedicated to GIMP offer valuable insights and demonstrations of techniques. These resources will prove crucial for mastering GIMP’s functionalities and developing a productive workflow.
Photoshop to GIMP Equivalents
| Photoshop Tool/Feature | GIMP Equivalent |
|---|---|
| Layers | Layers (but different structure) |
| Adjustment Layers | Adjustments (often using a different process) |
| Filters | Filters (with similar but potentially different options) |
| Selection Tools | Selection Tools (some differences in functionality) |
| Channels | Channels (similar functionality) |
Transitioning from Photoshop’s Layer-Based Workflow, Migrate from Adobe Photoshop to GIMP
GIMP’s non-destructive approach to image editing leverages layers, but in a different manner than Photoshop.
“GIMP’s non-destructive approach allows for multiple editing steps without altering the original image data. This enables a more flexible and reversible workflow compared to Photoshop’s destructive methods.”
Users accustomed to Photoshop’s layer-based workflow should understand that GIMP’s layers provide similar functionality, albeit with differing implementation. The key is to understand the tools and techniques available in GIMP for achieving the desired results without losing image integrity.
Practical Examples and Case Studies
Migrating from Adobe Photoshop to GIMP involves understanding the differences in functionality and workflow. Real-world examples demonstrate how users successfully transitioned, highlighting both the challenges and rewards of this switch. Careful planning and a structured approach are crucial for a smooth transition.
A Successful Migration Case Study
A graphic designer, Sarah, transitioned from Photoshop to GIMP for a personal project. Initially, Sarah encountered difficulties with layer management and blending modes, but after dedicated research and practice, she mastered the equivalent GIMP functionalities. She successfully completed a complex logo design project using GIMP, achieving the desired aesthetic and quality comparable to Photoshop.
Common Scenarios During Migration
The migration process often involves adapting to GIMP’s interface and commands. Users frequently experience initial frustration with the absence of specific Photoshop features. Furthermore, some users struggle with layer management, understanding the workflow and the use of masks in GIMP. However, with sufficient practice and resourcefulness, these difficulties can be overcome.
Specific Image Editing Tasks in Both Applications
This table illustrates the comparable image editing tasks in Photoshop and GIMP.
| Task | Photoshop | GIMP |
|---|---|---|
| Cropping an image | Using the Crop tool, adjust aspect ratio, and define the crop area. | Employ the Crop tool, similar adjustment options for aspect ratio, and define the cropping region. |
| Applying a filter | Extensive filter library, including artistic effects, blurring, and sharpening. | A smaller filter library but with comparable effects, including Gaussian Blur, sharpening, and artistic effects. |
| Adjusting colors | Advanced color controls, including levels, curves, and color balance adjustments. | Comparable color controls with levels, curves, and color balance adjustments. |
Detailed Procedure for Migrating a Complex Project
A multi-layered project migration requires a phased approach. First, meticulously export all Photoshop layers as individual images. Next, import these images into GIMP, ensuring proper naming conventions for organization. Then, recreate layer structures in GIMP, utilizing similar blending modes and adjustments. Finally, meticulously review the output, making any necessary adjustments.
Speed and Efficiency Comparisons
While GIMP’s user interface may seem less intuitive than Photoshop’s to new users, GIMP’s speed and efficiency can often be equivalent or even superior for certain tasks. Specific tasks like batch processing of images can be performed with GIMP scripts, enabling faster and more efficient workflow compared to Photoshop’s single-image approach.
Achieving Photoshop Effects in GIMP
GIMP provides equivalent tools and techniques to achieve similar results to Photoshop. For example, achieving a specific artistic effect in Photoshop can often be replicated using GIMP’s layer blending modes, filters, and adjustment tools. The key lies in understanding the underlying principles of each effect and applying the appropriate GIMP techniques.
Potential Issues and Solutions: Migrate From Adobe Photoshop To GIMP
Migrating from Photoshop to GIMP can present various challenges. Understanding these potential issues and their solutions is crucial for a smooth transition. This section details common problems, troubleshooting techniques, and data recovery methods.
Common Migration Problems
Issues frequently encountered during the migration process often stem from differences in functionality and file compatibility between Photoshop and GIMP. Understanding these disparities can prevent potential problems. For instance, layers and layer styles, which are central to Photoshop’s workflow, have different implementations in GIMP. This difference can impact the accuracy of image manipulation during the transfer process.
Troubleshooting Techniques
Efficient troubleshooting is key to mitigating issues. A systematic approach can resolve many problems. For instance, verifying file formats and checking compatibility before conversion is a critical step. This helps to avoid unexpected issues with the final output. Thoroughly examining GIMP’s documentation and online tutorials is also important, as this often reveals effective solutions to common issues.
Restoring Lost Data
Data loss during the migration process is a possibility. Taking preventive measures like backing up files before migration can mitigate this risk. If data is lost, the backup acts as a crucial restoration point. Using specialized data recovery software, if needed, is another potential solution. The specific process will depend on the nature of the data loss.
Recovering Corrupted or Damaged Files
Corrupted or damaged files are another potential hurdle. Understanding the potential causes of corruption, such as file system errors or corrupted software, can aid in recovery. Image repair tools or specialized software designed to recover corrupted files can often resolve this issue. Careful examination of the file structure can also help in identifying the cause of the corruption.
Plugin Incompatibility
Photoshop plugins are not directly compatible with GIMP. This incompatibility requires alternative solutions. Exploring GIMP’s equivalent tools and functionalities is a critical approach. Using the appropriate GIMP tools for the tasks originally performed by the Photoshop plugins is crucial for achieving the desired results. For instance, if a Photoshop plugin is used for specific image adjustments, researching the corresponding GIMP tools is necessary.
Data Loss Recovery Guide
This guide Artikels a structured approach for recovering lost data.
- Backup Regularly: Create regular backups of your critical files to prevent data loss during the migration process. External drives or cloud storage are excellent options.
- Understand File Formats: Familiarize yourself with the file formats supported by GIMP and how they compare to Photoshop. This understanding prevents unexpected issues with compatibility.
- Test Conversions: Perform test conversions on small sample files to verify the migration process’s integrity before transferring large volumes of data.
- Employ Data Recovery Software: Use professional data recovery software to restore lost or corrupted files, if necessary. These tools are designed to recover data from various situations.
- Seek Support: Consult online forums, communities, or GIMP support resources for troubleshooting assistance if needed.
Closing Notes
This guide has provided a thorough examination of migrating from Photoshop to GIMP, encompassing a wide range of aspects. From foundational comparisons to practical exercises, the process has been broken down into manageable steps, making it accessible for users of all skill levels. Ultimately, the guide aims to empower users to confidently embrace GIMP while leveraging their existing Photoshop expertise.
By understanding the similarities and differences, users can successfully transition their skills and workflows, optimizing their image editing experience.


Post Comment