Useful Arduino Projects with Code A Beginners Guide
Useful Arduino projects with code offer a fantastic way to learn about electronics and programming. This guide provides a comprehensive overview of Arduino projects, covering everything from basic concepts to advanced techniques. We’ll explore a range of projects, including home automation, environmental monitoring, robotics, and more, all with clear code examples.
The guide will walk you through the entire project development process, from ideation to deployment. You’ll discover how to connect and configure external components, test and debug code, and troubleshoot common errors. Numerous examples, including controlling LEDs, using sensors, and controlling motors, will illustrate the practical applications of Arduino.
Introduction to Arduino Projects
Arduino is an open-source electronics platform based on easy-to-use hardware and software. It’s widely used for building interactive electronic devices, from simple gadgets to complex robotic systems. Its flexibility and affordability make it a popular choice for both hobbyists and professionals.Arduino boards are microcontroller-based platforms, meaning they process instructions and control electrical components. This allows users to create projects that sense and respond to the environment, such as controlling lights based on temperature or monitoring soil moisture levels.
The ease of programming and vast online resources make it a great starting point for anyone interested in electronics and automation.
Basic Components and Functionalities of an Arduino Board
Arduino boards contain several essential components. The microcontroller, the “brain” of the board, interprets code and controls actions. Input/output pins allow interaction with external devices, enabling the board to receive signals from sensors or send signals to actuators. The power supply, typically via a USB connection or external power source, provides the necessary voltage to operate the board and connected components.
Importance of Learning Arduino
Learning Arduino offers significant benefits for beginners and experienced users alike. For beginners, it provides a practical introduction to electronics and programming. It builds foundational knowledge in areas like circuit design, microcontroller programming, and problem-solving. Experienced users can use Arduino to expand their skill set, experiment with new technologies, and create more complex projects. The flexibility of the platform allows for creative exploration in various fields, from robotics to home automation.
Beginner-Friendly Arduino Projects
Here are some projects perfect for beginners, gradually increasing in complexity:
- Simple LED Blink: This project involves controlling an LED light to blink on and off. It’s a fundamental exercise in understanding digital output and basic programming. This is a great way to familiarize yourself with the Arduino IDE and basic code structure.
- Button-Controlled LED: This project introduces input from a button to control an LED. It teaches the concept of reading input from a switch and performing a corresponding action. This project strengthens the understanding of input/output operations.
- Sensor-Based Project (e.g., Light Sensor): These projects utilize sensors to react to environmental changes. For example, a light sensor project could turn on a light when it gets dark. This project explores using sensors to detect changes in the environment and automating actions.
Comparison of Different Arduino Boards
Choosing the right Arduino board depends on the specific project requirements. Here’s a table comparing different boards:
| Board | Features | Price (approx.) |
|---|---|---|
| Arduino Uno | Basic microcontroller, good for beginners, versatile | $30 |
| Arduino Nano | Compact size, suitable for space-constrained projects | $15 |
| Arduino Mega | More processing power, more I/O pins, good for complex projects | $40 |
| Arduino Pro Mini | Small form factor, low power consumption, suitable for battery-powered projects | $20 |
Useful Projects for Different Fields
Source: all3dp.com
Arduino’s versatility extends beyond simple blinking LEDs. This section explores diverse applications of Arduino in various fields, demonstrating its potential for practical and educational use. From automating household tasks to monitoring environmental conditions, Arduino projects offer a compelling blend of hands-on learning and real-world application.
Home Automation Projects
Home automation projects leverage Arduino’s ability to control various devices and create a more convenient and intelligent living space. These projects often involve sensors and actuators working together to automate tasks like lighting, security, and appliance control.
- Lighting Control: A simple lighting control system could be built using an Arduino and light sensors. The system could automatically adjust lighting levels based on ambient light conditions, saving energy and enhancing user comfort. For example, a system could dim lights when natural light is sufficient, or turn lights on automatically at dusk.
- Security Systems: An Arduino-based security system can be constructed using motion detectors and alarms. The system can send alerts to a smartphone or activate sirens when motion is detected in a specified area. A system could trigger an alarm when an intruder is detected or send a notification to the user.
- Smart Appliances: Arduino can be used to control appliances like fans, refrigerators, and heating systems. For instance, an Arduino system could adjust the temperature in a room based on occupancy or schedule, potentially saving energy. This could also automate the switching on and off of appliances based on user-defined schedules.
Environmental Monitoring Projects
Arduino-based environmental monitoring systems provide valuable data on crucial parameters like temperature, humidity, and air quality. These systems are particularly useful for understanding and addressing environmental challenges.
- Temperature and Humidity Sensors: Arduino can be programmed to collect data from temperature and humidity sensors. The collected data can be displayed on a graphical interface or logged to a file for further analysis. For instance, such a system could be used to monitor the temperature and humidity levels in a greenhouse to optimize plant growth. A system could alert the user when the temperature or humidity levels exceed a threshold.
Data Logging and Visualization
Data logging and visualization projects use Arduino to capture and present data in a user-friendly format. These projects often involve sensors, data acquisition, and data presentation using graphs or charts.
- Data Acquisition and Presentation: A project could involve collecting data from various sensors, like temperature, light, or sound. The data can be stored in a data logger and visualized using a graphical user interface (GUI). This could be used to track the changes in environmental factors over time.
Robotics and Automation Projects
Arduino’s ability to control motors and other actuators makes it a powerful tool for robotics and automation projects. These projects can range from simple line followers to more complex automated systems.
- Controlling Small Robots: Arduino can be used to program small robots to perform tasks like following lines, avoiding obstacles, or carrying objects. For example, a line-following robot could be programmed to navigate a specific path autonomously. This could be a project for educational purposes or to automate a simple task.
Educational Applications
Arduino provides engaging learning experiences for students of all ages. These projects emphasize hands-on learning and problem-solving.
- Interactive Learning Tools: Arduino can be used to create interactive learning tools for educational purposes. These tools can range from simple light-based games to more complex systems that simulate scientific phenomena. For instance, a system could allow students to interact with a model of a solar system or a model of a simple ecosystem.
- Simple Robot Programming for Kids: A simple robot can be programmed using Arduino to teach kids basic programming concepts. The robot could be designed to follow a path, react to stimuli, or perform simple tasks. This hands-on experience could help children develop problem-solving skills and an interest in technology.
Sensor-Based Projects
Using sensors with Arduino opens up a wide range of possibilities for measuring various physical quantities. These projects often involve interpreting sensor readings and reacting to them accordingly.
- Light Intensity Measurement: Arduino can be programmed to measure light intensity using a light sensor. This data can be used to adjust lighting levels automatically or trigger actions based on light conditions. For example, a system could adjust the brightness of indoor lights based on the amount of natural light available. This can help in saving energy and optimizing lighting conditions.
- Sound Level Measurement: Arduino can be used with sound sensors to measure sound levels. This data can be used to trigger alarms or alerts when sound levels exceed a certain threshold. For instance, a system could be designed to monitor noise pollution in an environment and provide data on sound levels over time.
Project Selection Criteria
Choosing the right Arduino project is crucial for a rewarding learning experience and successful implementation. Careful consideration of various factors ensures the project aligns with your skills, resources, and desired outcomes. This section details essential criteria for selecting an Arduino project.Selecting a project should not be a haphazard endeavor. A thoughtful approach ensures a productive learning experience, avoiding frustration and promoting success.
This involves considering various factors, from project complexity to available resources.
Factors to Consider When Selecting a Project
Careful planning is paramount to a successful Arduino project. Factors such as project complexity, budget constraints, and available resources are essential considerations. The choice should reflect your skill level and time commitment.
- Project Complexity: Assessing the project’s complexity is vital. Simple projects, such as a basic LED blinker, are ideal for beginners, while complex projects, like a robotic arm controller, demand a more advanced understanding of Arduino programming and electronics. Beginner projects should focus on fundamental principles and gradually increase in complexity as experience grows.
- Budget and Resources: The budget plays a significant role. Some projects require specific components, and the cost of these components can vary widely. Available tools and equipment are also important. Access to a breadboard, jumper wires, and the Arduino itself are essential. Estimating costs and assessing the availability of resources is crucial.
- Skill Level: Choosing a project that aligns with your skill level is essential for success. Beginners should start with projects that involve basic functionalities, gradually increasing the complexity as their skills develop. Intermediate users can tackle projects that require more sophisticated programming and hardware integration. Advanced users can attempt more challenging projects that demand a high level of technical expertise.
- Time Commitment: Realistic project planning involves estimating the time required for completion. A beginner-friendly project might take a few hours to complete, while a more complex project could span several days or weeks. Realistic timeframes are crucial for effective project management.
Project Complexity Comparison
Different Arduino projects exhibit varying degrees of complexity. Understanding these differences helps in selecting a project that aligns with your skill level and available time.
- Simple Projects: Simple projects, such as a blinking LED or a basic light sensor, require fundamental programming skills and minimal hardware setup. These projects are excellent for beginners to grasp the basics of Arduino programming and hardware interaction.
- Intermediate Projects: Intermediate projects, like a simple robot or a temperature control system, require more sophisticated programming skills and involve more intricate hardware setups. These projects build upon the foundational knowledge gained from simpler projects, introducing more advanced concepts.
- Complex Projects: Complex projects, such as a robotic arm or a data logging system, necessitate advanced programming knowledge and extensive hardware integration. These projects demand a deep understanding of various Arduino libraries and hardware interactions.
Budget and Resource Considerations
Project costs and the availability of resources are crucial factors to consider when selecting an Arduino project. Estimating costs and evaluating the availability of necessary resources ensures a smooth project execution.
- Component Costs: The cost of components like sensors, actuators, and displays can vary considerably. A project requiring many specialized components might have a high cost.
- Tools and Equipment: Access to essential tools like soldering irons, breadboards, and jumper wires is necessary for project construction. The availability and condition of these tools significantly impact project execution.
- Time Constraints: Realistic time estimations are crucial for planning and execution. A project requiring specialized components or extensive research may require more time.
Potential Challenges and Troubleshooting
Anticipating potential challenges and having troubleshooting strategies in place is vital for smooth project execution. This can prevent delays and frustration.
- Hardware Issues: Troubleshooting hardware problems, such as incorrect connections or faulty components, is a common challenge. Thorough verification of connections and careful component selection can mitigate these issues.
- Programming Errors: Debugging programming errors is another common challenge. Careful code review, step-by-step testing, and utilization of debugging tools can aid in resolving these issues.
- Component Compatibility: Ensuring compatibility between components is essential. Compatibility issues can lead to unexpected behavior or project failure.
Project Examples for Different Skill Levels
Choosing a suitable project depends on the user’s experience and desired learning objectives. These examples illustrate projects for varying skill levels.
- Beginner: A simple LED blinker, a light-activated LED, or a basic temperature sensor.
- Intermediate: A simple robot, a light-activated motor, or a project controlling a servo motor.
- Advanced: A robotic arm, a data logger, or a project using advanced sensors and actuators.
Planning and Execution Steps
Planning and execution are critical phases of any Arduino project. Following a structured approach enhances the chances of a successful outcome.
- Project Definition: Clearly define the project goals, desired functionality, and expected outcomes.
- Component Selection: Select the necessary components based on the project requirements.
- Circuit Design: Design the circuit layout, considering component interconnections.
- Coding: Write the Arduino code to control the circuit.
- Testing and Debugging: Thoroughly test the project, identify and fix errors.
- Documentation: Document the project, including circuit diagrams, code, and results.
Arduino Project Levels and Estimated Completion Time
This table provides a general guideline for project levels and their estimated completion time. These times are approximate and may vary based on individual skill and project complexity.
| Project Level | Description | Estimated Completion Time |
|---|---|---|
| Beginner | Simple LED control, basic sensor reading | 1-3 hours |
| Intermediate | Simple robot, light-activated motor | 3-8 hours |
| Advanced | Complex robotic arm, data logging | 8+ hours |
Code Examples and Structure: Useful Arduino Projects With Code
Getting started with Arduino involves understanding how to write effective and readable code. This section provides practical examples and guidelines for various Arduino projects, showcasing best practices for code structure, commenting, and using libraries. This will help you write maintainable and robust code that is easier to understand and modify.This section will demonstrate how to structure your Arduino code, providing examples for different project types.
We’ll cover the use of comments, libraries, and functions to create well-organized and efficient code. We’ll also present code examples for simple and complex projects, highlighting important functions and how to incorporate them.
Simple LED Blinker Project
This example shows a basic LED blinker project. This demonstrates a fundamental Arduino program structure, essential for understanding how to control outputs.“`C++void setup() // Initialize the digital pin as an output pinMode(13, OUTPUT);void loop() // Turn the LED on digitalWrite(13, HIGH); delay(1000); // Wait for 1000 milliseconds (1 second) // Turn the LED off digitalWrite(13, LOW); delay(1000); // Wait for 1000 milliseconds (1 second)“`This code initializes digital pin 13 as an output.
Inside the `loop()` function, it toggles the pin between HIGH and LOW states, creating a blinking effect. The `delay()` function pauses the execution for a specified duration.
Sensor-Based Project (Temperature)
This example demonstrates how to read data from a temperature sensor.“`C++#include
Motor Control Project
This example controls a DC motor using PWM.“`C++const int motorPin = 9;void setup() // Set the motor pin as an output pinMode(motorPin, OUTPUT);void loop() // Set motor speed to 255 for full speed analogWrite(motorPin, 255); delay(1000); // Set motor speed to 0 for stop analogWrite(motorPin, 0); delay(1000);“`This code uses `analogWrite()` to control the speed of a DC motor connected to digital pin 9.
It demonstrates how to control the speed of a motor using PWM.
Code Structure for Maintainability
To improve code maintainability and readability, organize your Arduino code into functions. This enhances code organization and reusability. Separate different functionalities into distinct functions.“`C++void setup() //Initializationvoid loop() //Main program loop“`Use meaningful variable names to improve readability. Include comprehensive comments to explain the purpose of each function and section of code.
Comments and Clarity
Comments are crucial for explaining complex logic and the purpose of code sections.“`C++// Function to read the analog input from pin A0int readAnalogInput() int sensorValue = analogRead(A0); return sensorValue;“`
Important Arduino Functions
| Function | Syntax | Functionality |
|---|---|---|
pinMode() |
pinMode(pin, mode) |
Sets the mode of a digital pin (INPUT, OUTPUT). |
digitalWrite() |
digitalWrite(pin, value) |
Writes HIGH or LOW to a digital pin. |
analogRead() |
analogRead(pin) |
Reads the analog value from an analog pin. |
Using Libraries and External Components
Incorporating external libraries extends the functionality of your Arduino projects. For instance, the `Servo` library is used to control servo motors.“`C++#include
Best Practices for Efficient and Robust Code
Use meaningful variable names and functions. Include comments to clarify complex logic. Avoid global variables to improve code organization and maintainability. Employ error handling techniques to prevent unexpected behavior.
Project Development Process
Developing Arduino projects effectively involves a structured approach. This process, from initial concept to final deployment, ensures projects are well-planned, implemented efficiently, and debugged thoroughly. Following a systematic methodology will lead to more reliable and robust outcomes.
Ideation and Planning
A crucial first step is defining the project’s goals and scope. This involves identifying the problem to be solved or the function to be performed. Clear specifications and desired functionalities will guide subsequent design choices. Documenting the project’s requirements and constraints is vital for successful implementation. A well-defined project scope prevents scope creep and ensures the project stays focused.
Component Selection and Connection
Careful consideration of external components is essential. Choosing the appropriate components for the project’s needs is a crucial step. This involves researching component specifications, considering compatibility with the Arduino board, and estimating required power and signal connections.
- Connecting Components: Before connecting any components, ensure the Arduino board and external components are properly grounded. This step prevents potential short circuits and ensures reliable operation. Carefully follow the component’s datasheet for proper wiring connections. Incorrect wiring can lead to malfunctions or damage to the components. Use appropriate jumper wires for safe and efficient connections.
Ensure connections are secure and tight to avoid intermittent issues. Double-check the connections after completing the wiring.
- Power Considerations: Understanding the power requirements of each component is crucial. Excessive current draw can damage the Arduino board or external components. Adequate power supply for both the Arduino and external devices is necessary. Ensure the power supply can handle the combined current demands of all connected components.
Coding and Implementation
Developing the Arduino code is a key stage. The code should accurately reflect the project’s design and specifications. Utilize appropriate libraries and functions to streamline the coding process. Proper commenting is essential for maintaining and understanding the code.
Testing and Debugging
Thorough testing and debugging are critical to ensure the project functions as intended. Testing involves verifying that the code executes correctly and produces the desired outputs. Debugging involves identifying and resolving errors or unexpected behaviors in the code.
- Testing Strategies: Employ different test cases to cover various scenarios and potential inputs. Start with simple tests and gradually increase the complexity. Use serial communication to monitor and debug the code during runtime. Check for unexpected behavior and errors. Monitor the output of the Arduino on a serial monitor.
- Debugging Techniques: Use the Arduino IDE’s debugging tools to step through the code line by line. Check variable values and identify the point of failure. Use print statements within the code to observe the flow of execution and track the values of variables. If a particular line of code is causing issues, use a debugger to isolate and identify the problematic section.
Thoroughly check for syntax errors and logic errors.
Troubleshooting
Troubleshooting common errors in Arduino projects involves identifying the source of the problem. This includes analyzing the code, checking the connections, and reviewing component specifications. Common errors include incorrect wiring, faulty components, and issues with the code.
- Common Error Types: Incorrect pin assignments, insufficient power supply, damaged components, and faulty wiring are common issues. Using the Arduino IDE’s serial monitor for debugging can help identify potential issues and display relevant information. If the problem persists, carefully check the project’s wiring diagram.
- Troubleshooting Steps: Isolate the suspected area. Verify the component’s functionality. Check the code for logical errors. Examine the connections. If the problem is with the code, refactor and retest the relevant parts.
Project Development Process Stages
| Stage | Tasks |
|---|---|
| Ideation & Planning | Define project goals, scope, and requirements; document specifications; assess resources |
| Component Selection & Connection | Choose appropriate components; ensure compatibility; plan wiring; connect components; verify connections |
| Coding & Implementation | Develop Arduino code; implement functionalities; add comments; integrate libraries |
| Testing & Debugging | Develop test cases; run tests; debug code; address errors; verify functionality |
| Deployment & Evaluation | Prepare for deployment; deploy the project; assess performance; document the process; refine the design |
Helpful Resources
- Online Forums and Communities: Join Arduino forums and communities for support and advice. Sharing knowledge and seeking help from experienced users can be invaluable.
- Official Documentation: Refer to the official Arduino website for comprehensive documentation, tutorials, and examples. These resources provide valuable insights and support.
- Books and Tutorials: Numerous books and online tutorials offer detailed information on Arduino programming and project development. Consider exploring these resources for in-depth learning.
Advanced Topics and Considerations
Taking your Arduino projects beyond the basics requires understanding advanced libraries, programming techniques, and communication protocols. This section explores these essential elements, equipping you with the knowledge to build more complex and sophisticated applications. Advanced projects often involve integrating multiple sensors, controlling actuators precisely, and interacting with external systems.Understanding advanced techniques enables you to handle complex tasks efficiently and create more robust and versatile Arduino-based solutions.
By mastering these concepts, you can push the boundaries of what’s possible with Arduino and develop applications in a wider range of fields.
Advanced Arduino Libraries and Techniques
Arduino offers a vast ecosystem of libraries extending its functionality beyond its core capabilities. These libraries provide pre-written code for specific tasks, allowing you to avoid reinventing the wheel and focus on the application logic. Efficiently leveraging these libraries is key to creating complex projects.
Application of Advanced Programming Concepts
Advanced programming concepts such as object-oriented programming (OOP) and data structures enhance the modularity, reusability, and maintainability of Arduino code. Applying these concepts allows you to organize code effectively, creating more robust and scalable applications. By employing OOP, you can create classes for reusable components, leading to cleaner and more organized code.
Using Communication Protocols
Various communication protocols facilitate interaction between Arduino and other devices. These protocols enable data exchange and control over multiple components within a system.
- I2C (Inter-Integrated Circuit): I2C is a two-wire communication protocol commonly used for connecting multiple sensors and actuators to an Arduino. It’s highly efficient, especially for applications with limited bandwidth. I2C allows multiple devices to share a single communication line, making it suitable for scenarios where multiple sensors need to transmit data concurrently. For example, connecting multiple temperature sensors to an Arduino using I2C would be significantly simpler than connecting each sensor individually through separate wires.
- SPI (Serial Peripheral Interface): SPI is a synchronous communication protocol providing high-speed data transmission. It’s suitable for applications demanding rapid data transfer, such as high-resolution image capture or controlling high-speed motors. SPI is a full-duplex protocol, meaning data can be transmitted and received simultaneously, making it ideal for applications requiring bidirectional communication.
- UART (Universal Asynchronous Receiver/Transmitter): UART is a simple, asynchronous communication protocol. It’s frequently used for communicating with external devices, like GPS modules or displays. UART is straightforward to implement but might not be as fast as SPI or I2C.
Designing a User Interface for Arduino Projects, Useful Arduino projects with code
Creating a user interface (UI) for Arduino projects enhances user interaction and provides a more intuitive way to control and monitor the system. Graphical User Interfaces (GUIs) allow for more complex interactions and a more sophisticated user experience.
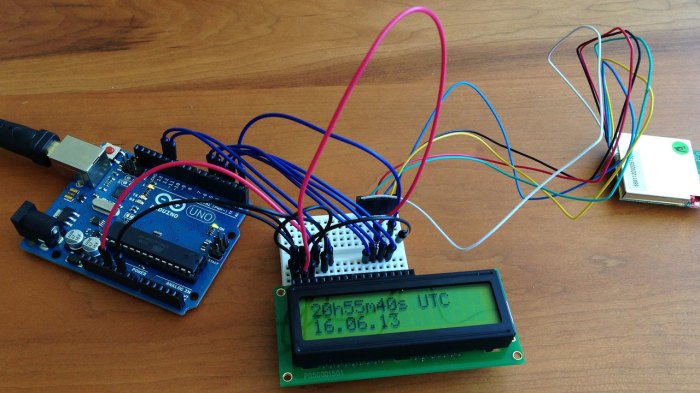
- Using LCD Displays: Liquid Crystal Displays (LCDs) are a common choice for creating simple text-based UIs. They offer a straightforward way to display information and receive user input.
- Employing graphical displays: For more complex interfaces, graphical displays can be integrated, allowing for visual feedback and more interactive control.
- Employing Software Libraries: Libraries provide the necessary tools to design the UI elements and handle input from the interface, simplifying the design and implementation process.
Data Visualization and Analysis
Visualizing sensor data in real-time helps to understand trends, identify patterns, and make informed decisions.
- Plotting data: Tools like Serial Plotter within the Arduino IDE or external software allow you to plot sensor readings graphically. This allows for easy identification of trends and anomalies.
- Statistical analysis: Data analysis techniques can be used to calculate statistics, such as average, maximum, and minimum values, from sensor data. This can provide valuable insights for your application.
Data Logging
Logging sensor readings allows you to track the evolution of data over time.
- Storing data locally: Storing data on an SD card or similar storage device allows for offline analysis. This approach is beneficial for projects where data retention is required, such as environmental monitoring.
- Utilizing cloud storage: Cloud services provide remote storage for large datasets and allow for easy access and analysis of data from anywhere.
Integrating Cloud Services
Integrating cloud services extends the capabilities of your Arduino projects.
- Connecting to cloud platforms: Platforms like ThingSpeak, Firebase, or AWS IoT allow you to store and analyze data from sensors remotely. This allows for real-time monitoring and data visualization.
- Developing data-driven applications: Data collected and stored in the cloud can be used to trigger actions or alerts based on predefined conditions, enhancing the automation potential of your project.
Illustrative Examples
These examples showcase practical Arduino projects, demonstrating how to apply sensor readings, control actuators, and display information. They provide a foundation for further experimentation and project development.These examples use common components and illustrate typical Arduino programming techniques. Each project is designed to be easily adaptable and expanded upon.
DHT11 Temperature and Humidity Sensor
This project measures and displays temperature and humidity using a DHT11 sensor. The DHT11 sensor provides digital output, which the Arduino reads and interprets. This data can then be displayed on a serial monitor or incorporated into a more complex system.
- Hardware Components: Arduino board, DHT11 sensor, jumper wires.
- Software Setup: Include the DHT11 library in your Arduino IDE. This library simplifies reading sensor data.
- Data Acquisition: The Arduino code reads the sensor’s digital output and converts it into temperature and humidity values. Accurate readings depend on the sensor’s placement and environmental conditions.
- Output Display: Use the Serial.print() function to display temperature and humidity values on the serial monitor. The values are printed in a readable format.
- Code Example (Partial):
“`C++
#include// Define DHT11 sensor pins
#define DHTPIN 2
#define DHTTYPE DHT11DHT dht(DHTPIN, DHTTYPE);
void setup()
Serial.begin(9600);
dht.begin();void loop()
// Check if any errors occurred during reading.
if (isnan(dht.readTemperature()) || isnan(dht.readHumidity()))
Serial.println(“Failed to read from DHT sensor!”);
return;// Read temperature as Celsius (default)
float temperature = dht.readTemperature();
float humidity = dht.readHumidity();Serial.print(“Temperature: “);
Serial.print(temperature);
Serial.print(“°C, “);
Serial.print(“Humidity: “);
Serial.print(humidity);
Serial.println(“%”);
delay(2000);“`
Servo Motor Control with Potentiometer
This project demonstrates controlling a servo motor’s position using a potentiometer as an analog input. The potentiometer’s position dictates the servo’s angle.
- Hardware Components: Arduino board, servo motor, potentiometer, jumper wires.
- Analog Input: The potentiometer’s position is read as an analog value, which represents the input for controlling the servo motor.
- Servo Control: The Arduino code maps the potentiometer’s analog value to a servo position. This allows for smooth and continuous control of the servo’s rotation.
- Code Example (Partial):
“`C++
#include// Define servo and potentiometer pins
const int servoPin = 9;
const int potPin = A0;Servo myservo;
void setup()
myservo.attach(servoPin);
Serial.begin(9600);void loop()
int sensorValue = analogRead(potPin);
int servoPosition = map(sensorValue, 0, 1023, 0, 180);
myservo.write(servoPosition);
Serial.println(servoPosition);
delay(15);“`
LCD Display
This project displays data on an LCD screen. This allows for more visual feedback than just using the serial monitor.
- Hardware Components: Arduino board, 16×2 LCD display, LCD library, jumper wires.
- LCD Library: The LiquidCrystal library is used to control the LCD display. This library simplifies communication with the LCD.
- Data Display: The Arduino code sends data to the LCD, allowing the display of various pieces of information.
- Code Example (Partial):
“`C++
#include// Define LCD pins
const int rs = 12, en = 11, d4 = 5, d5 = 4, d6 = 3, d7 = 2;
LiquidCrystal lcd(rs, en, d4, d5, d6, d7);void setup()
lcd.begin(16, 2);
Serial.begin(9600);void loop()
lcd.setCursor(0, 0);
lcd.print(“Temperature:”);
lcd.setCursor(0, 1);
lcd.print(“Humidity:”);
delay(1000);“`
LED Control with Button
This project controls LEDs based on button input. The button serves as a switch to turn the LEDs on or off.
- Hardware Components: Arduino board, LEDs, resistors, push button, jumper wires.
- Button Input: The Arduino code reads the state of the button. When pressed, the code changes the LED state.
- LED Control: The Arduino code turns LEDs on or off based on the button input.
- Code Example (Partial):
“`C++
const int buttonPin = 2; // Button connected to digital pin 2
const int ledPin = 13; // LED connected to digital pin 13void setup()
pinMode(buttonPin, INPUT_PULLUP); // Enable internal pull-up resistor
pinMode(ledPin, OUTPUT);void loop()
if (digitalRead(buttonPin) == LOW)
digitalWrite(ledPin, HIGH);
else
digitalWrite(ledPin, LOW);“`
GSM Module for SMS
This project sends SMS messages using a GSM module. This is useful for remote notifications or data transmission.
- Hardware Components: Arduino board, GSM module, SIM card, jumper wires.
- GSM Library: A GSM library is required to interact with the GSM module. This library handles the communication protocols.
- SMS Sending: The Arduino code sends SMS messages using the GSM library. The code needs appropriate credentials and message content.
- Code Example (Partial):
// Requires a GSM library. Example code depends on the specific GSM library used.
Final Review
In conclusion, this guide provides a strong foundation for understanding and implementing useful Arduino projects with code. We’ve covered a variety of projects and provided practical examples, helping you get started with your own creations. Whether you’re a beginner or an experienced user, this resource will equip you with the knowledge and skills needed to embark on your Arduino project journey.


Post Comment