Best Arduino Projects for Beginners A Guide
Best Arduino projects for beginners sets the stage for a comprehensive exploration of engaging projects. This guide dives deep into the world of Arduino, providing clear instructions for setting up a basic environment and tackling a variety of beginner-friendly projects. From simple interactive designs to more advanced sensor and actuator applications, this guide equips you with the knowledge to create impressive projects.
This comprehensive guide begins with a fundamental understanding of Arduino and its application in beginner projects, moving through increasingly complex examples. You’ll learn about essential components, step-by-step setup, and common pitfalls. The guide then progresses to practical projects, walking you through materials, assembly, coding, and troubleshooting. Furthermore, the guide explores the use of sensors and actuators, and delves into more complex topics like loops, conditional statements, and library usage.
Introduction to Arduino for Beginners
Arduino is a user-friendly platform for creating interactive projects. It’s particularly well-suited for beginners due to its open-source nature, readily available resources, and straightforward programming language. This platform allows users to build everything from simple blinking LEDs to complex automated systems. The core concept revolves around interacting with the physical world through electronic components and software.The platform’s versatility stems from its ability to control various sensors and actuators, enabling a wide range of creative applications.
Learning Arduino provides a strong foundation for understanding electronics and programming, making it an excellent starting point for further exploration in fields like robotics, automation, and IoT (Internet of Things).
Essential Components for Basic Arduino Projects
Understanding the fundamental components is crucial for grasping how Arduino projects function. These components interact to translate code into physical actions.
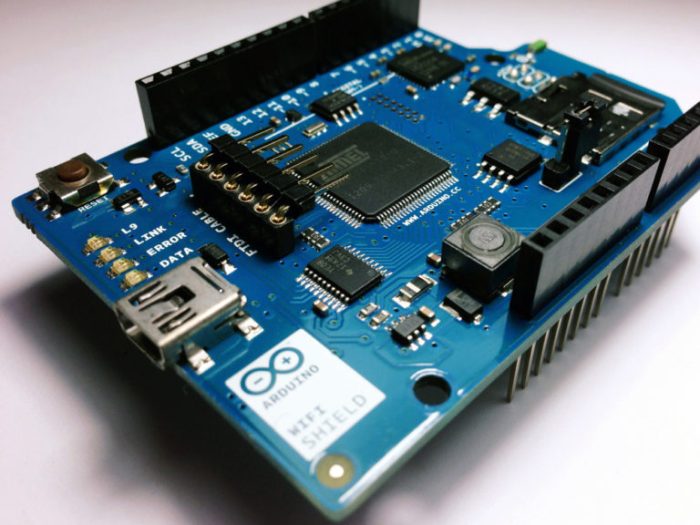
- Arduino Board: This is the central processing unit (CPU) of the project. It interprets the code and controls the other components. It contains microcontrollers, input/output pins, and support circuitry.
- Breadboard: A breadboard is a convenient prototyping platform for connecting different components. Its grid layout allows easy wiring and testing without soldering.
- Connecting Wires: Jumper wires are used to connect components to the breadboard and Arduino board. These wires have different colors for easier identification and organization of the connections.
- LED (Light Emitting Diode): An LED is a semiconductor device that emits light when an electric current flows through it. It’s a fundamental component for visual feedback and indicators in projects.
- Resistors: Resistors are passive components used to limit the current flow through components like LEDs. They protect the circuit and components from damage due to excessive current.
- Other components: Further components might include buttons, sensors, motors, or displays, depending on the project’s complexity. The use of these components extends the functionality of the project.
Setting Up a Basic Arduino Environment
A well-structured setup streamlines the programming and interaction process.
- Install the Arduino IDE: Download and install the Arduino Integrated Development Environment (IDE) software on your computer. This software provides the interface for writing, compiling, and uploading code to the Arduino board.
- Connect the Arduino Board: Connect the Arduino board to your computer using a USB cable. The IDE will recognize the board and display it in the tools menu.
- Choose the correct board and port: Ensure that the correct Arduino board type and USB port are selected in the Arduino IDE’s “Tools” menu. This step ensures the correct communication protocol is used.
- Write and upload the code: Write the code in the Arduino IDE based on the project’s requirements. Then, click the “Upload” button to transfer the code to the Arduino board.
- Verify the code: Before uploading, use the “Verify” option to check for any errors in the code. This crucial step prevents unexpected behavior or failures during execution.
Key Differences Between Arduino Boards for Beginners
The range of Arduino boards caters to diverse project needs. This table summarizes the differences between common boards.
| Board | Microcontroller | Memory (KB) | Input/Output Pins | Suitable for |
|---|---|---|---|---|
| Arduino Uno | ATmega328P | 32 | 14 digital, 6 analog | Beginner projects, simple interactions |
| Arduino Nano | ATmega328P | 20 | 14 digital, 8 analog | Compact projects, space-constrained applications |
| Arduino Mega 2560 | ATmega2560 | 256 | 54 digital, 16 analog | More complex projects requiring more processing power |
Common Beginner Mistakes and How to Avoid Them
Recognizing and avoiding common errors is vital for effective learning.
- Incorrect Wiring: Double-check all connections to ensure proper circuit design and prevent short circuits. Use a schematic diagram to verify the wiring.
- Syntax Errors: Carefully review the code for correct syntax and variable usage to prevent compilation errors. Utilize online resources for syntax reference.
- Incorrect Board Selection: Verify that the correct board and port are selected in the IDE to prevent compatibility issues. Consult the board’s specifications.
- Lack of Understanding of Components: Thoroughly research the functions of components before integrating them into the project. Understanding their roles enhances the project’s functionality.
Simple and Interactive Projects
This section delves into a collection of straightforward Arduino projects designed to enhance your understanding of fundamental concepts. These projects prioritize ease of assembly and comprehension, allowing you to build a strong foundation before tackling more complex endeavors. By focusing on practical application, you’ll gain hands-on experience with Arduino’s capabilities and build confidence in your coding skills.
Beginner Project List
The following projects are carefully selected for their pedagogical value and straightforward nature. They are perfect for solidifying your understanding of basic Arduino functionalities and provide a practical starting point for further exploration.
- Simple LED Flasher: This project involves controlling an LED to blink at a predefined frequency. It’s an excellent introduction to digital output and timing.
- Button-Controlled LED: Learn how to create a simple circuit where pressing a button activates an LED. This project introduces input/output interactions.
- Potentiometer-Controlled Brightness: This project explores analog input by controlling the brightness of an LED using a potentiometer. You’ll understand how to map analog values to control outputs.
- LCD Display Project: Displaying text or information on an LCD screen. This illustrates how to use external components and control them through Arduino code.
- Buzzer Sound Control: Using a buzzer to produce different tones or sounds depending on input values. This demonstrates sound generation and input-output interaction.
- Temperature Sensor: This project uses a temperature sensor to measure and display temperature readings on an LCD. It’s a practical application of analog input and output.
- Light Sensor Controlled LED: This project controls the brightness of an LED based on ambient light levels. This demonstrates how to use light sensors and create a responsive system.
Materials Required
To successfully complete these projects, gather the necessary components. This list ensures you have all the parts needed for each project. Refer to the project descriptions for specific requirements.
- Arduino Board: A basic Arduino Uno or Nano board is sufficient for these projects.
- LEDs, Resistors, Buttons: Standard electronic components required for various projects.
- Potentiometer: For controlling brightness or other analog values.
- LCD Display Module: A small LCD screen for displaying information.
- Buzzer: For creating audible signals.
- Temperature Sensor: A sensor for measuring temperature.
- Light Sensor: A sensor for detecting ambient light levels.
Assembly Instructions
Proper assembly is crucial for successful project execution. Follow the detailed instructions for each project to ensure a correct setup. Visual aids would be extremely beneficial for a comprehensive guide.
- LED Flasher: Connect the LED, resistor, and power supply to the Arduino board following the schematic. Write code to control the LED’s on/off state.
- Button-Controlled LED: Connect the button and LED to the appropriate Arduino pins. Code will handle the button input to control the LED.
Coding Principles
Understanding the fundamental coding principles behind each project is key. This section explains the essential concepts used.
- Digital Input/Output: Control of pins to turn on or off devices like LEDs.
- Analog Input: Reading continuously changing values from sensors like potentiometers or light sensors.
- Timing Functions: Control the duration of events or actions, for instance, making an LED blink at a specific rate.
Troubleshooting
Anticipating and resolving common issues is essential. This section details potential problems and solutions for the projects.
- LED not lighting: Verify connections, resistor value, and code logic.
- Incorrect readings: Check the connections, calibrate sensors if necessary, and review the code for potential errors.
Complexity and Learning Outcomes Table
| Project | Complexity (1-5, 1 being easiest) | Learning Outcomes |
|---|---|---|
| Simple LED Flasher | 1 | Digital output, basic coding |
| Button-Controlled LED | 2 | Digital input/output, conditional statements |
| Potentiometer-Controlled Brightness | 2 | Analog input, mapping values |
| LCD Display Project | 3 | External component interaction, displaying information |
| Buzzer Sound Control | 3 | Sound generation, input/output interactions |
| Temperature Sensor | 4 | Sensor integration, data display, analog input |
| Light Sensor Controlled LED | 4 | Sensor integration, responsiveness, control based on input |
Basic Sensor Projects
Sensors are the eyes and ears of your Arduino projects, allowing them to interact with the physical world. They translate real-world phenomena like temperature, light, and distance into electrical signals that your Arduino can read and process. This section explores various sensor types, their operation, and how to integrate them into interactive Arduino projects.
Common Sensor Types
Several sensor types are frequently used in beginner Arduino projects. Understanding their individual characteristics is key to selecting the right sensor for a specific application. These include but are not limited to:
- Temperature Sensors: These sensors measure the surrounding temperature. Commonly used are LM35 or DHT11/DHT22, offering various levels of accuracy and features. These sensors are essential for applications like controlling heating systems, monitoring environmental conditions, and creating automated incubators.
- Light Sensors: Photoresistors (LDRs) and light-dependent diodes (photodiodes) measure ambient light intensity. Photoresistors are cost-effective and relatively simple to use. Photodiodes are more sensitive and often used in applications requiring higher precision. Their use is crucial in automatic lighting systems, light-sensitive alarms, and light-controlled displays.
- Distance Sensors: Ultrasonic sensors, like the HC-SR04, measure distances by emitting ultrasonic pulses and measuring the time taken for the echoes to return. They are widely used in robotics, obstacle avoidance systems, and proximity detection applications. The precise measurement of distance makes them suitable for automated guided vehicles (AGVs) and other navigation-based projects.
- Moisture Sensors: These sensors detect the amount of moisture present in the environment. They are often used in agricultural settings for automated irrigation systems, humidity control, and soil moisture monitoring. A simple application would be a self-watering plant system.
Sensor Principles
Sensors function by converting physical quantities into electrical signals. The specific mechanism varies depending on the sensor type.
- Temperature Sensors: The change in temperature affects the resistance or voltage output of the sensor element. For example, the LM35 outputs a voltage directly proportional to the temperature.
- Light Sensors: Light intensity affects the resistance of the photoresistor or the current generated in the photodiode. Higher light intensity results in lower resistance for photoresistors and higher current for photodiodes.
- Distance Sensors: The time taken for the ultrasonic pulse to reflect back from an object is measured. This time is then converted into a distance measurement.
- Moisture Sensors: Moisture content affects the conductivity of the medium. Sensors detect this change in conductivity to measure the moisture level.
Interfacing Sensors with Arduino
Connecting sensors to the Arduino involves understanding the sensor’s output and connecting it appropriately to the Arduino’s analog or digital pins. This step is crucial for accurate readings.
- Connecting the sensor to the Arduino. Ensure the connection adheres to the sensor’s specific wiring diagram. Most sensors have clear instructions.
- Choosing the appropriate Arduino pin. Some sensors require analog pins, while others use digital pins.
Coding for Sensor Data
Reading and processing sensor data is essential for creating interactive projects. The Arduino code will typically involve reading the sensor’s output, converting it to a usable format, and performing calculations or comparisons.
// Example code for reading temperature from an LM35
int sensorPin = A0;
float voltage;
float temperature;

void setup()
  Serial.begin(9600);


void loop()
  voltage = analogRead(sensorPin);
  temperature = (voltage
- 5.0) / 1023.0
- 100; //Convert to Celsius
  Serial.print("Temperature: ");
  Serial.println(temperature);
  delay(1000);
Sensor Applications
| Sensor Type | Applications |
|---|---|
| Temperature | Environmental monitoring, controlling heating systems, incubators |
| Light | Automatic lighting, light-sensitive alarms, light-controlled displays |
| Distance | Robotics, obstacle avoidance, proximity detection |
| Moisture | Automated irrigation, humidity control, soil moisture monitoring |
Actuator Projects: Best Arduino Projects For Beginners
Actuators are crucial components in Arduino projects, transforming electrical signals into mechanical actions.
They are the “muscles” of your automated systems, enabling movement, control, and interaction with the physical world. Understanding different actuator types and their control methods is essential for building sophisticated and functional projects.
Common Actuator Types
Various actuators are available, each with unique characteristics and applications. Their selection depends on the specific requirements of your project, such as the required force, speed, and precision of movement.
- DC Motors: These motors convert electrical energy into rotational mechanical energy. Their simplicity and affordability make them popular choices for beginner projects. A key advantage is the direct relationship between voltage and speed. For example, increasing the voltage to a DC motor usually increases its rotational speed.
- Stepper Motors: Stepper motors offer precise control over their position. They rotate in discrete steps, making them ideal for applications requiring precise positioning, such as robotic arms or 3D printers. Their precise movements are achieved by activating electromagnets sequentially, controlling the rotation in small increments.
- Servo Motors: Servo motors provide controlled rotational movement within a specific range. They are frequently used for applications demanding precise angular positioning, such as robotic arms, model airplanes, and automated opening mechanisms. Servo motors use feedback mechanisms to maintain their position.
- Solenoids: Solenoids are electromagnets that produce linear motion. They are commonly used in applications requiring quick and direct movement, like valves, latches, or door locks. When an electrical current passes through the coil, the magnetic field attracts the core, producing the linear motion.
- Pneumatic Actuators: These actuators use compressed air to generate force and motion. Their use is suitable for applications requiring high force, like industrial automation. Compressed air provides a powerful yet controllable way to move heavy objects or perform repetitive tasks.
Working Principles of Actuators
Each actuator type functions differently, converting electrical signals into physical actions. Understanding these principles allows for effective control and integration into Arduino projects.
- DC Motors: The electric current creates a magnetic field that interacts with the motor’s windings, causing rotation. The direction of rotation depends on the current’s polarity.
- Stepper Motors: Applying current to specific coils of the motor produces a magnetic field that interacts with the permanent magnets in the motor, leading to discrete step-by-step rotation.
- Servo Motors: Servo motors use a feedback mechanism, typically a potentiometer, to measure the motor’s position. The Arduino sends a signal to adjust the motor’s position to match the desired angle.
- Solenoids: The flow of electricity creates a magnetic field, drawing the core within the solenoid. Switching off the current allows the core to return to its original position.
- Pneumatic Actuators: Compressed air exerts pressure on a piston or diaphragm, producing the desired linear or rotational movement.
Automated System Examples
Actuators are fundamental to automating various systems.
- Automated Watering System: A solenoid valve controlled by an Arduino can open and close to deliver water to plants at specific intervals, based on sensor readings.
- Simple Robotic Arm: Stepper motors can be used to control the movement of a robotic arm, allowing it to pick and place objects.
- Automated Door Opener: A servo motor can be used to open and close a door automatically, responding to sensor input.
Controlling Actuators with Arduino Code
Arduino code allows precise control over actuators, defining their actions and responses.
- Using Libraries: Arduino libraries simplify the process of controlling various actuators, reducing the code needed for integration.
- Analog/Digital Pins: Actuators are connected to specific digital or analog pins on the Arduino board, depending on the actuator type.
- Control Loops: Using loops like `for` or `while`, the Arduino can execute actions repeatedly, such as controlling the speed of a DC motor or the position of a servo.
Integrating Actuators into Projects
Integrating actuators requires careful consideration of wiring, power, and control mechanisms.
- Wiring: Connect the actuator to the appropriate pins on the Arduino board, ensuring correct polarity and grounding.
- Powering: Provide adequate power to the actuator, considering the current requirements of the device.
- Testing: Thoroughly test the actuator’s functionality to ensure proper operation before integrating it into the complete system.
Actuator Comparison Table
| Actuator Type | Working Principle | Suitability | Advantages | Disadvantages |
|---|---|---|---|---|
| DC Motor | Electric current creates magnetic field, causing rotation | Simple projects, speed control | Affordable, simple to use | Less precise, not suitable for fine positioning |
| Stepper Motor | Sequential activation of coils, causing step-by-step rotation | Precise positioning, robotics | High precision, controlled movement | Slower than DC motors, can be more complex to use |
| Servo Motor | Uses feedback mechanism for precise angular positioning | Positioning, robotics, automated systems | Precise angular control, easy integration | Limited rotation range |
| Solenoid | Electric current creates magnetic field, causing linear motion | Valves, latches, door locks | Quick, direct linear motion | Limited force output |
| Pneumatic Actuator | Compressed air exerts force on piston/diaphragm | High force applications, automation | High force, speed | Requires compressed air supply, potentially noisy |
Advanced Concepts and Applications
Taking your Arduino projects to the next level involves understanding more sophisticated programming techniques and expanding project capabilities. This section dives into essential concepts like loops, conditional statements, and functions, and explores how to integrate libraries and design robust projects with multiple components. It also introduces power management strategies and demonstrates how to enhance basic projects with advanced features.
Mastering these advanced concepts empowers you to create more complex and functional Arduino-based systems, pushing the boundaries of what’s possible with this versatile platform.
Loops, Conditional Statements, and Functions
Arduino programming heavily relies on control structures like loops and conditional statements for managing program flow. These structures allow you to execute blocks of code repeatedly or conditionally, creating dynamic and responsive systems. Functions further enhance code organization and reusability.
- Loops: Loops, such as
forandwhileloops, are crucial for repeating actions. Aforloop is ideal for a predetermined number of iterations, while awhileloop executes a block of code as long as a condition remains true. For instance, aforloop could be used to cycle through sensor readings, and awhileloop could maintain a continuous motor control based on a sensor’s input. - Conditional Statements: Conditional statements, like
if,else if, andelse, enable conditional execution of code. This allows you to create decision-making logic in your projects. For example, anifstatement can trigger an action based on a sensor’s reading, like turning on a light when the temperature exceeds a threshold. - Functions: Functions are reusable blocks of code. Defining functions improves code organization, reduces redundancy, and promotes modularity. This allows you to call a function multiple times with different inputs, leading to more efficient and manageable code, such as a function for calculating the average of sensor readings or controlling a specific actuator.
Using Libraries
Libraries are pre-written code that extend the functionality of Arduino. They provide ready-made functions for various tasks, saving you significant development time and effort.
- Library Selection: Libraries are readily available for tasks like communication protocols (e.g., Serial communication), sensor interfacing (e.g., reading data from an ultrasonic sensor), and actuator control. Choose the appropriate library for your project’s requirements.
- Integration: To use a library, you need to include it in your sketch. The Arduino IDE provides a simple method for including libraries. After downloading and installing the desired library, simply include it in your code with the
#includedirective.
Advanced Projects
Complex projects often involve multiple sensors and actuators, and coordinating their interactions can be challenging. The examples below illustrate how to create advanced projects.
- Automated Irrigation System: A system using soil moisture sensors to determine watering needs, coupled with a solenoid valve for automated water delivery, showcases a project that integrates multiple sensors and actuators. This project requires sophisticated timing and logic to prevent overwatering or underwatering.
- Smart Home Automation: This involves multiple sensors, like temperature, light, and motion sensors, triggering various actuators, like lights, fans, and appliances. The complexity lies in coordinating the different sensors and actuators to create a truly automated system.
Project Design Considerations
Several factors impact the success of your project.
- Power Management: Efficient power management is crucial for long-lasting projects, especially those utilizing multiple components. Consider power supply capacity and using power-saving techniques, such as turning off components when not needed. This minimizes power consumption, preventing premature battery drain and improving the project’s overall lifespan.
Expanding Basic Project Functionalities
Expanding on your basic projects can significantly enhance their functionality.
- Adding Communication: Integrating communication protocols, such as Serial Communication or WiFi, allows you to transmit data from your Arduino to a computer or other devices. This enables remote monitoring, control, and data logging.
- Implementing Feedback Loops: Feedback loops provide a way to control and refine the project’s behavior based on sensor data. For instance, a temperature control system might adjust heating based on the measured temperature.
Advanced Project Ideas
| Project Idea | Application |
|---|---|
| Automated Greenhouse Control | Precisely controlling environmental factors (temperature, humidity, light) to optimize plant growth. |
| Smart Home Security System | Detecting and responding to security threats (motion, intrusion). |
| Remote-Controlled Robot | Building a mobile platform for autonomous tasks (navigation, object detection). |
Troubleshooting and Debugging
Getting your Arduino projects working smoothly involves more than just coding. Effective troubleshooting and debugging are crucial for identifying and fixing issues, ultimately leading to successful projects. This section dives into common problems, strategies for error identification, and the power of the Arduino IDE’s built-in tools.
Understanding the process of locating and rectifying errors in your Arduino projects is essential for progression. This will not only enhance your ability to build reliable systems but also significantly increase your confidence in tackling more complex projects in the future.
Common Beginner Problems
Many common issues stem from simple oversights. Incorrect wiring, typos in code, and misunderstandings of the Arduino’s functionality are frequent pitfalls. For example, a simple wiring error could result in a circuit that doesn’t function as expected. A typo in a variable declaration or a missing semicolon can cause unexpected behavior or program crashes. Likewise, misinterpreting sensor readings or actuator commands can lead to incorrect outputs.
Strategies for Identifying Errors
Systematic approaches are vital for effectively identifying errors. First, carefully review the code for syntax errors and logical flaws. Pay attention to variable declarations, function calls, and loop structures. Then, meticulously check the wiring connections to ensure that all components are correctly connected. Using a multimeter to verify voltage and current readings can pinpoint any circuit problems.
Using the Arduino IDE’s Debugging Tools
The Arduino IDE offers several tools to assist in debugging. The Serial Monitor allows real-time output of data from your program. Using print statements strategically in your code can help pinpoint where the issue might be occurring. The Debugger, available in some advanced IDE versions, provides more in-depth tools for stepping through the code line by line.
It allows you to observe variable values and program execution flow, significantly facilitating the detection of errors.
Troubleshooting Specific Issues
| Issue | Possible Cause | Solution |
|---|---|---|
| No output from LED | Incorrect wiring, faulty LED, or incorrect code. | Verify wiring connections. Check the LED for any damage. Review the code for errors in pin assignments and circuit logic. |
| Motor not spinning | Incorrect wiring, faulty motor, or incorrect code for speed control. | Ensure proper motor wiring and verify power supply. Inspect the motor for any mechanical obstructions or damage. Check the code for errors in motor control commands. |
| Sensor readings are inconsistent | Faulty sensor, wiring issues, or interference from other components. | Check the sensor for any damage or physical interference. Inspect wiring connections for loose or damaged wires. Evaluate the sensor’s position relative to other components to minimize interference. |
Common Hardware Failures
Arduino boards can experience issues like damaged microcontrollers, faulty power supplies, or broken components. Check the power supply for adequate voltage and stability. Observe the microcontroller for signs of damage. Ensure that all connections are secure and properly soldered.
Example Troubleshooting Process
Imagine a project where an LED doesn’t light up. First, check the wiring diagram to ensure the LED is connected correctly to the Arduino’s output pin. Next, use a multimeter to measure the voltage across the LED and the resistance of the LED. Then, check the code for errors in the pin assignment and ensure the correct pin mode is set.
If the LED still doesn’t light up, verify the power supply voltage to the Arduino. By systematically checking the connections, code, and components, you can efficiently isolate the cause of the issue.
Resources and Further Learning
Embarking on your Arduino journey is just the beginning. This section Artikels valuable resources to deepen your understanding and propel your projects to the next level. Leveraging these tools and communities will accelerate your learning curve and equip you with the knowledge to tackle increasingly complex projects.
Further development hinges on consistent practice and engagement with a supportive community. This section provides resources to support this continuous learning.
Online Tutorials and Courses
Various online platforms offer structured learning paths for Arduino enthusiasts. These courses provide comprehensive guidance, practical examples, and often, interactive exercises. Khan Academy, for example, provides free video tutorials on programming concepts relevant to Arduino projects. Numerous online courses are available on platforms like Udemy and Coursera, which offer more in-depth learning experiences, including certification options.
- Instructables: A vast repository of Arduino projects and tutorials, often with detailed instructions and visual aids.
- Arduino Project Hub: A dedicated platform for finding and sharing Arduino projects.
- YouTube Channels: Numerous channels provide tutorials and project demonstrations, often offering a visual and engaging approach to learning.
Documentation and Example Projects
The official Arduino website is a crucial resource for in-depth documentation. This comprehensive resource covers the Arduino IDE, board specifications, and libraries. Examples and code snippets can serve as invaluable starting points for your projects.
- Arduino Reference: Provides detailed information on all Arduino functions, libraries, and components.
- Arduino Examples: The Arduino IDE includes example projects, offering a starting point for various functionalities.
- Online Forums: Online forums dedicated to Arduino provide support and guidance from experienced users.
Books and Articles, Best Arduino projects for beginners
Books and articles offer a more structured and in-depth approach to learning about Arduino and embedded systems. They provide a broader perspective on concepts and methodologies beyond the scope of online tutorials. A well-written book on microcontrollers can enhance your understanding of underlying principles.
- “Programming Arduino” by Massimo Banzi and Michael McRoberts: A highly regarded book that covers the core concepts and practical applications of Arduino.
- “Arduino Cookbook”: A practical guide covering a wide range of projects, providing hands-on experience and problem-solving approaches.
- Online Articles: Many websites and blogs publish articles on Arduino projects, tutorials, and discussions.
Online Platforms for Support
Several online platforms foster a supportive environment for Arduino enthusiasts. These platforms offer opportunities to share projects, ask questions, and engage in discussions with experienced users.
- Arduino Forum: A large online community specifically dedicated to Arduino users.
- Reddit Subreddits: Dedicated subreddits (e.g., r/arduino) offer a space for discussion, support, and project sharing.
- Stack Overflow: A platform where users can ask and answer questions about a wide range of technical topics, including Arduino programming.
Recommended Tools for Beginners
Beyond the software, a collection of essential tools can enhance your Arduino experience. These tools can range from simple breadboards to more advanced components like sensors and actuators. Starting with a basic kit can streamline the learning process and offer a complete solution for experimentation.
- Breadboard: A versatile prototyping platform for connecting components and circuits.
- Jumper Wires: Essential for connecting components to the breadboard and Arduino.
- Resistors: Essential for protecting components and ensuring proper circuit operation.
- Various sensors: These components provide input to your Arduino projects, such as temperature sensors, light sensors, and more.
Summary of Recommended Resources
| Category | Resource | Description |
|---|---|---|
| Online Tutorials/Courses | Instructables, Arduino Project Hub, YouTube Channels | Structured learning paths, visual aids, detailed instructions |
| Documentation/Examples | Arduino Reference, Arduino Examples | In-depth information on functions, libraries, and components |
| Books/Articles | “Programming Arduino,” “Arduino Cookbook” | Structured and in-depth understanding of Arduino and embedded systems |
| Online Support Platforms | Arduino Forum, Reddit Subreddits, Stack Overflow | Community support, project sharing, and discussion |
| Tools | Breadboard, Jumper Wires, Resistors, Sensors | Essential for prototyping and experimentation |
Last Recap
Source: thecustomizewindows.com
In conclusion, this guide provides a solid foundation for beginners looking to embark on their Arduino journey. By exploring various projects, understanding sensor and actuator applications, and mastering essential coding concepts, you’ll be well-equipped to tackle more advanced Arduino endeavors. The troubleshooting section and readily available resources further solidify your learning experience. The varied projects and supportive materials are designed to nurture a strong understanding of Arduino’s capabilities.


Post Comment