Arduino AI Assistant Coding Companion A Deep Dive
Arduino AI assistant coding companion provides a comprehensive guide to developing intelligent projects using Arduino boards. This exploration delves into the core functionalities, coding considerations, data handling, and AI integration techniques needed to create practical AI assistants. We’ll explore diverse applications, from simple use cases to advanced real-world scenarios.
The guide systematically examines the technical aspects of building AI-powered Arduino projects. It covers programming languages, libraries, and essential data handling methods. We’ll also analyze different AI algorithms suitable for Arduino’s resource constraints, providing practical examples and code snippets to illustrate key concepts. Finally, the document emphasizes user interface design and hardware considerations to ensure a smooth user experience.
Introduction to Arduino AI Assistant
An Arduino AI assistant is a microcontroller-based system that incorporates artificial intelligence (AI) algorithms to perform specific tasks or provide responses to user input. It leverages the processing capabilities of an Arduino board to interact with the physical world, making decisions based on data collected through sensors. This integration allows for smart, responsive, and adaptive control of devices and processes.These systems offer a powerful platform for building interactive and intelligent applications that can be tailored to a wide variety of needs.
The core functionalities of an Arduino AI assistant are typically centered around sensing, processing, and acting on information. This allows for the creation of systems capable of reacting to changes in their environment, learning from experiences, and adapting their behavior accordingly.
Core Functionalities
The core functionalities of an Arduino AI assistant typically revolve around sensing, processing, and acting on data. Sensing involves collecting information from the environment using various sensors like temperature, light, or motion detectors. Processing this data using AI algorithms allows the system to identify patterns, make predictions, and respond appropriately. The final action step involves controlling actuators or other devices based on the processed information.
Potential Applications
Arduino AI assistants can be implemented in diverse everyday scenarios. For example, a smart greenhouse might use an Arduino AI assistant to monitor environmental conditions, adjust watering schedules, and optimize plant growth. In a home setting, an assistant could control lighting, temperature, and security systems based on detected patterns or user preferences. Furthermore, in industrial settings, AI assistants can monitor machinery, predict potential failures, and automate maintenance tasks.
Simple Use Case Scenario
Imagine a smart home irrigation system. An Arduino AI assistant, connected to soil moisture sensors and weather forecasts, would monitor the soil’s moisture content. If the soil is too dry, the system would activate a pump to water the plants. The system would also take into account the current weather conditions, adjusting the watering schedule accordingly. This system could potentially save water and energy by only watering when necessary.
Comparison of AI Assistant Types
| Feature | Rule-Based | Machine Learning | Deep Learning |
|---|---|---|---|
| Processing Power | Low | Medium | High |
| Memory | Low | Medium | High |
| Connectivity | Limited | Medium | High |
This table Artikels the suitability of different AI assistant types for Arduino projects. Rule-based systems, relying on pre-defined rules, are best for simple tasks with limited data input. Machine learning systems, learning from data, offer more flexibility, and deep learning systems, with their complex algorithms, are best suited for large datasets and complex interactions. The choice depends on the specific project requirements and available resources.
Coding Considerations
Building an Arduino AI assistant requires careful consideration of the programming language, AI library integration, and data handling methods. This section delves into these crucial aspects, providing practical examples and insights into common pitfalls.Integrating AI into a constrained environment like Arduino necessitates a streamlined approach. The focus is on selecting appropriate libraries, optimizing code for speed and memory, and ensuring robust data management to ensure reliable and responsive AI assistance.
Programming Languages for Arduino
The primary language for Arduino projects is C++. Its efficiency and familiarity with embedded systems make it a strong choice. While other languages like Wiring exist, C++ remains the dominant and most versatile option for the wide range of tasks.
Integrating AI Libraries
Many open-source AI libraries are compatible with Arduino, allowing you to integrate AI models into your projects. Choosing the right library is crucial, as it significantly impacts the project’s performance.
Basic Arduino Code Examples for an AI Assistant
Here are a few examples demonstrating basic functionalities of an AI assistant:
// Example 1: Simple Voice Recognition
#include <SoftwareSerial.h> // For serial communication
#include <VoiceRecognition.h> // Example AI library

SoftwareSerial mySerial(2, 3); // RX, TX pins

void setup()
  Serial.begin(9600);
  mySerial.begin(9600);
  voiceRecognition.begin(); // Initialize the AI library


void loop()
  if (voiceRecognition.isRecognized())
    String command = voiceRecognition.getCommand();
    Serial.print("Command: ");
    Serial.println(command);
    // Process the command (e.g., turn on/off a light)
    if (command == "turn on light")
      digitalWrite(8, HIGH);
     else if (command == "turn off light")
      digitalWrite(8, LOW);
// Example 2: Simple Image Classification
#include <Arduino_Camera.h>
#include <ImageClassification.h> // Example AI library

void setup()
  camera.begin();
  imageClassification.initialize();


void loop()
  if (camera.captureImage())
    int result = imageClassification.classify(camera.getImage());
    if (result == 1)
      Serial.println("Object detected: Cat");
     else if (result == 2)
      Serial.println("Object detected: Dog");
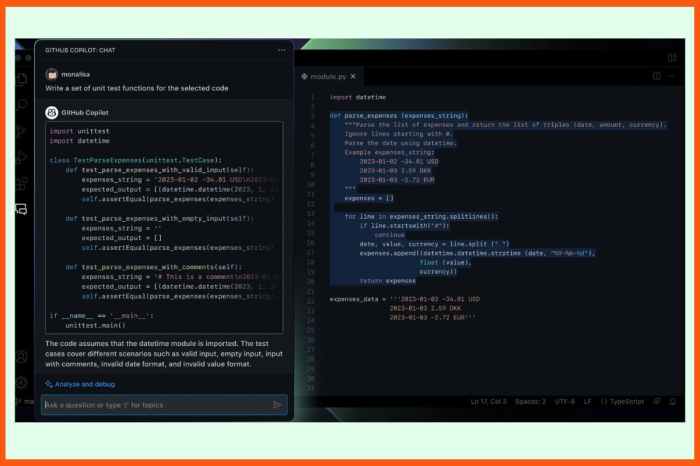
These examples showcase how to use simple commands and image classification, demonstrating the potential of AI in Arduino projects.
Real-world applications could include object recognition for automated tasks, or voice-controlled home appliances.
Common Coding Errors
Several common errors are encountered while coding for Arduino AI assistants:
- Memory limitations: Arduino boards have limited memory. Large AI models or libraries can cause issues. Careful selection of models and optimization techniques is crucial.
- Library incompatibility: Mismatched libraries or outdated versions can lead to errors. Always verify the compatibility of libraries with your Arduino board and software.
- Data input/output problems: Errors in data transmission (e.g., serial communication) or processing can hinder the AI assistant’s functionality. Implementing robust error handling and data validation is essential.
- Incorrect model usage: Failing to correctly load, configure, or utilize the AI model in the Arduino code can lead to inaccurate results or program crashes.
Addressing these issues early in the development process is crucial for a successful project.
Data Input and Output Methods
Arduino AI assistants utilize various methods for handling data:
- Serial communication: A standard method for transmitting data between the Arduino and a computer. It’s frequently used for receiving user commands or displaying results.
- I2C or SPI: For communicating with external sensors or actuators. These protocols offer more efficient data transfer than serial, particularly for large datasets.
- Wireless communication (e.g., WiFi): For accessing cloud-based AI services or transferring data to a central system. WiFi provides connectivity but can introduce latency and complexity.
- Custom libraries: Creating custom libraries to streamline specific data processing tasks.
Data Handling and Processing
Arduino AI assistants rely heavily on effective data handling and processing to function correctly. This involves acquiring data from various sensors, transforming it into a usable format, and storing it for later use or analysis. The efficiency and accuracy of the AI assistant’s decision-making directly correlate with the quality and handling of the acquired data.
Data Acquisition and Processing
The Arduino AI assistant gathers data through various sensors attached to it. These sensors can measure physical quantities like temperature, pressure, humidity, or even more complex data from image or sound input. The collected data needs to be preprocessed before being fed into the AI model. This preprocessing might involve filtering out noise, converting analog signals to digital values, or normalizing the data to a specific range.
These steps are crucial to ensure the accuracy and reliability of the AI model’s predictions.
Data Storage and Retrieval
Storing and retrieving data is essential for long-term use and analysis by the AI assistant. Different storage methods are suitable for different data types and project requirements. For instance, simple data logs might be stored in text files (e.g., CSV), while more complex data sets or configurations might benefit from a structured database. The choice of storage method will depend on factors like the volume of data, the frequency of access, and the required level of organization.
Appropriate storage strategies ensure data accessibility and integrity over time.
Data Formats for Arduino AI Projects
| Format | Description | Example |
|---|---|---|
| CSV (Comma Separated Values) | A simple text-based format where data is organized into rows and columns, separated by commas. Easy to read and write, but limited in complexity. | “Temperature,Humidity,Pressure 25.5,60.2,101.3 26.1,61.8,101.5″ |
| JSON (JavaScript Object Notation) | A structured text-based format that uses key-value pairs to represent data. More flexible and complex than CSV, allowing nested data structures. | “”temperature”: 25.5, “humidity”: 60.2, “pressure”: 101.3″ |
| Binary | A compact format that stores data directly in its numerical representation. Highly efficient for storing large datasets but less human-readable than CSV or JSON. | 0x19, 0x3C, 0x4F (example, actual data varies) |
The table above presents common data formats used in Arduino AI projects. Choosing the appropriate format depends on the project’s specific needs. CSV is straightforward for simple data logging, JSON is ideal for structured data exchange, and binary is best for high-volume, performance-critical applications.
Data Security and Privacy Challenges
Data security and privacy are paramount concerns when working with sensitive information. Arduino AI assistants may handle personal data, environmental measurements, or operational parameters. Compromised data can lead to privacy violations, operational disruptions, or financial losses. Potential threats include unauthorized access, data breaches, and malicious manipulation. Understanding and mitigating these risks is crucial for responsible development.
Data Security Strategies
Several strategies can enhance data security in Arduino AI assistants:
- Secure Data Transmission: Encrypting data during transmission between the Arduino and a central server or database can protect against unauthorized interception.
- Access Control: Implement strict access controls to limit data access to authorized personnel or systems. This may involve using passwords, authentication protocols, or role-based access.
- Data Encryption: Encrypting data at rest on storage devices or databases can protect it from unauthorized access in case of a breach.
- Data Validation: Validating and sanitizing input data from sensors and other sources helps prevent malicious attacks and ensures data integrity.
Robust data security strategies are essential to maintain the trustworthiness and reliability of Arduino AI assistants, particularly in applications where sensitive data is involved.
AI Integration Techniques
Integrating AI algorithms into Arduino projects presents a fascinating opportunity to imbue these microcontrollers with intelligent capabilities. This process involves careful selection of suitable algorithms, understanding their limitations on resource-constrained platforms, and implementing them effectively within the Arduino environment. The choice of algorithm directly impacts the project’s functionality and performance.
Effective AI integration requires a nuanced understanding of the computational resources available on Arduino boards. Algorithms demanding significant processing power may prove impractical, while simpler models can deliver compelling results. Choosing the right balance between desired functionality and the limitations of the platform is critical.
Methods for Integrating AI Algorithms
Various methods facilitate the integration of AI algorithms into Arduino code. Directly embedding the AI model within the Arduino sketch allows for real-time processing, though this is feasible only for smaller models. Alternatively, pre-processing data on a more powerful platform (like a computer) and sending the processed data to the Arduino for further analysis is a viable strategy, particularly for larger models.
This approach leverages the Arduino’s real-time capabilities for tasks such as control or actuation.
Comparison of AI Algorithms
Different AI algorithms possess varying strengths and weaknesses, impacting their suitability for Arduino projects. Machine learning models like linear regression, suitable for simple predictive tasks, are often a good starting point. Support vector machines (SVMs) can handle more complex data relationships, but their computational demands might be too high for Arduino. Neural networks, while powerful, typically require substantial computational resources and may not be appropriate for many Arduino projects.
Choosing the algorithm hinges on the specific requirements of the project and the expected data complexity.
Examples of AI Algorithms for Arduino Projects
Simple machine learning models like linear regression can be employed in predicting sensor readings, enabling anticipatory actions. For instance, a project monitoring environmental conditions could use linear regression to forecast temperature fluctuations, triggering preemptive actions. Another example could be an Arduino-based system for controlling a robotic arm. By using a simple machine learning model trained on a dataset of desired arm positions and corresponding sensor inputs, the Arduino can adjust the arm’s position in real time based on sensor readings.
Flowchart for Integrating a Chosen AI Algorithm
A flowchart illustrating the process of integrating a chosen AI algorithm would start with data acquisition from sensors. This data is then pre-processed (e.g., cleaning, feature extraction). The pre-processed data is then used to train the chosen AI model on a separate platform. The trained model is then converted into a format compatible with Arduino (e.g., a set of coefficients for linear regression).
The converted model is integrated into the Arduino code, and the model then makes predictions on incoming sensor data. Finally, the system uses the predictions to trigger actions or adjustments.
[Diagram of the Flowchart (conceptual): A simple flowchart with boxes representing data acquisition, pre-processing, training, conversion, Arduino integration, and prediction/action. Arrows connecting the boxes would indicate the flow of the process.]
Limitations of AI on Resource-Constrained Platforms
Resource-constrained platforms like Arduino face limitations in implementing complex AI algorithms. Memory limitations restrict the size of models that can be loaded and run. Computational power limits the complexity of the calculations that can be performed in real-time. Power consumption also needs to be considered, as running AI algorithms can consume significant power. Consequently, the choice of AI algorithm must be carefully weighed against these constraints.
User Interface (UI) Design
Designing a user-friendly interface is crucial for an Arduino AI assistant. A well-designed UI ensures that users can easily interact with the AI assistant, understand its responses, and get the most out of its capabilities. This section explores various UI design strategies tailored for Arduino projects.
Possible User Interfaces
Several interface options are suitable for Arduino AI assistants, leveraging the limited processing power and resources of these microcontrollers. A simple text-based interface, displaying results on an LCD screen, is a common approach. More sophisticated interfaces can be built using graphical libraries for the display. A graphical interface might display graphs or charts representing sensor data or AI predictions, providing visual insights to the user.
Furthermore, a combination of text and simple graphics could provide a balanced approach, balancing visual appeal with efficient resource use.
Displaying Results
The method for displaying AI assistant results depends heavily on the nature of the data. For simple classifications (e.g., “object detected: cat”), a text-based display is sufficient. For more complex data, such as sensor readings or predictions over time, a graphical display, potentially using a bar graph or line chart, is preferred. In cases involving multiple variables, a combination of graphs or charts might be needed to give a complete picture of the AI’s findings.
For instance, a graph showing temperature readings alongside predicted energy consumption can provide valuable insights.
UI Framework Comparison
The choice of UI framework greatly impacts the functionality and complexity of the Arduino AI assistant. A suitable framework should balance efficiency with required features.
| Framework | Pros | Cons |
|---|---|---|
| TFT library (e.g., Adafruit GFX) | Excellent for graphical displays; provides functions for drawing shapes, text, and images; relatively straightforward to use. | Can be resource-intensive on lower-powered Arduino boards; requires more memory and processing power than simpler text-based interfaces. |
| Simple text-based display (e.g., LCD library) | Extremely resource-efficient; minimal processing power needed; suitable for simpler tasks and smaller displays. | Limited visual appeal; not ideal for complex data presentation. |
| Graphical libraries for specific displays (e.g., for a particular LCD) | Usually optimized for the target display; very efficient for specific hardware configurations. | Requires familiarity with the specific library; less versatile than general-purpose frameworks. |
Intuitive and User-Friendly UI
Creating an intuitive UI for an Arduino AI assistant involves prioritizing clarity and simplicity. The interface should be designed with the user’s needs in mind, making it easy to understand and use. For example, using clear labels for buttons or display elements will greatly enhance user experience. Avoid overwhelming the user with excessive information or complex layouts.
If possible, use color coding to distinguish different types of information, or use icons to convey actions.
Interaction Methods
Users need to interact with the AI assistant to provide inputs and receive outputs. Methods for interaction can vary significantly. A simple button press to trigger an action is a straightforward method. For more complex tasks, a joystick or touch input can allow for more nuanced interaction. For instance, a touch-sensitive display could enable the user to select options or input parameters.
Real-World Application Examples
Arduino AI assistants offer a compelling blend of affordability, customizability, and practical applications. They empower developers to build intelligent systems tailored to specific needs, bridging the gap between complex algorithms and tangible, everyday use cases. From automating tasks to enabling real-time decision-making, these assistants provide a powerful toolkit for innovation.
Smart Agriculture
Real-world applications of Arduino AI assistants in agriculture demonstrate their versatility and potential for optimizing various processes. These systems can collect and analyze data to improve crop yields and resource management.
- Automated Irrigation: Sensors monitor soil moisture levels and trigger irrigation systems automatically, reducing water waste and optimizing plant growth. This system can learn optimal watering schedules based on historical data, weather patterns, and specific plant types.
- Pest Detection: Image recognition algorithms trained on Arduino AI assistants can identify pests or diseases in crops. Early detection allows for targeted interventions, minimizing damage and maximizing yield. For example, an assistant can distinguish between a harmless insect and a pest threatening a particular plant, initiating preventative measures only when needed.
- Nutrient Monitoring: The assistant can monitor soil nutrient levels using sensors and adjust fertilizer application accordingly. This precision approach minimizes fertilizer use, reducing environmental impact and maximizing crop health.
Home Automation
Integrating Arduino AI assistants into home automation systems enables sophisticated, responsive control over various aspects of the household.
- Predictive Maintenance: Sensors monitoring appliances can predict potential malfunctions, allowing for proactive maintenance and minimizing downtime. The system can analyze historical data to estimate the remaining lifespan of a component and schedule repairs or replacements in advance.
- Adaptive Lighting: Light intensity can be adjusted based on ambient light conditions, occupant presence, and even time of day. This AI assistant can learn from user preferences and optimize lighting for comfort and energy efficiency.
- Personalized Security: The AI assistant can analyze sensor data to detect unusual activity and trigger security alerts or implement preventative measures. It can learn the normal patterns of activity in a home and recognize anomalies more efficiently.
Industrial Automation
Arduino AI assistants can enhance efficiency and safety in industrial settings.
- Quality Control: AI assistants can inspect products in real-time, identifying defects and ensuring quality standards are met. For example, an assistant can analyze images of manufactured parts to identify defects in a production line, reducing errors and improving product consistency.
- Predictive Maintenance (Industry): Sensors monitoring machinery can predict potential equipment failures, allowing for timely maintenance and minimizing downtime. This is particularly important in manufacturing where production halts can be costly.
- Process Optimization: The AI assistant can analyze data from various sensors to optimize industrial processes, minimizing energy consumption and maximizing output. By analyzing data on variables like temperature, pressure, and flow rates, the system can adapt process parameters in real time to improve efficiency.
Hardware Considerations
Building an Arduino AI assistant requires careful consideration of the hardware components. The choice of sensors, actuators, and the Arduino board itself significantly impacts the project’s functionality, accuracy, and reliability. Proper selection ensures the assistant can effectively perceive its environment and respond appropriately.
Choosing the right hardware is crucial for a robust and reliable AI assistant. This involves understanding the project’s needs and selecting components that can meet those demands. Factors such as processing power, sensor accuracy, and actuator responsiveness must be taken into account. The goal is to create a system that can gather relevant data, process it efficiently, and translate it into actions effectively.
Sensor and Actuator Selection
Selecting the right sensors and actuators is paramount for accurate data acquisition and effective actions. Different applications demand different sensing capabilities and actuation methods. Consider the specific environment and the desired tasks of your AI assistant when making your selections.
- Environmental Sensors: These sensors provide information about the surroundings. Examples include temperature sensors (e.g., LM35), humidity sensors (e.g., DHT11/DHT22), and light sensors (e.g., photoresistors). Choosing the appropriate sensor type depends on the specific needs of your project.
- Motion and Position Sensors: These sensors detect movement or position changes. Examples include ultrasonic sensors (e.g., HC-SR04), accelerometers (e.g., ADXL345), and gyroscopes (e.g., MPU6050). These are useful for tasks involving navigation or detecting physical interactions.
- Actuators: These components translate processed information into physical actions. Examples include servo motors for precise movements, DC motors for more general movement, and relays for switching electrical devices. The selection depends on the desired action and the required precision.
Arduino Board Selection
The choice of Arduino board directly impacts the project’s performance and capabilities. The board’s processing power, memory, and communication capabilities must align with the complexity of the AI tasks.
- Processing Power: For simple AI tasks, a basic Arduino Uno or Nano might suffice. More complex AI algorithms might require a board with greater processing power, such as the Arduino Mega or a microcontroller with advanced processing capabilities.
- Memory: The amount of memory available on the board affects the size of the data that can be stored and processed. Larger AI models require more memory. Choosing a board with sufficient memory is critical for handling larger datasets.
- Communication Capabilities: The communication capabilities (e.g., USB, serial, Wi-Fi) determine how the Arduino board interacts with the outside world. This is vital for sending data to the cloud or receiving commands from a remote source.
Recommended Sensors and Actuators for Different Applications
The appropriate choice of sensors and actuators depends greatly on the project’s intended use case.
| Application Type | Recommended Sensors | Recommended Actuators |
|---|---|---|
| Smart Home | Temperature, humidity, light, motion sensors | Servo motors, relays, DC motors |
| Robotics | Ultrasonic sensors, accelerometers, gyroscopes | DC motors, servo motors |
| Environmental Monitoring | Temperature, humidity, pressure sensors | Displays, data logging devices |
Troubleshooting and Debugging: Arduino AI Assistant Coding Companion
Developing Arduino AI assistants often involves navigating unexpected challenges. Effective troubleshooting and debugging are crucial for identifying and resolving these issues, ultimately leading to a robust and reliable system. This section details common problems and provides strategies for efficiently tackling them.
Common Problems in Arduino AI Assistant Development
Several factors can contribute to difficulties in developing Arduino AI assistants. Hardware compatibility issues, code errors, and problems with data processing are common. Incorrect sensor calibration, inadequate power supply, or conflicting library versions can lead to erratic behavior or system crashes.
Troubleshooting Code Errors, Arduino AI assistant coding companion
Identifying and fixing code errors is a critical aspect of debugging. Methodical approaches are vital for pinpointing the source of the problem. A systematic approach to examining code for errors, coupled with effective testing, is essential.
- Compile-time errors: These errors are typically syntax-related and are reported by the Arduino IDE during compilation. Carefully review error messages to identify the precise location and nature of the problem. Common causes include incorrect syntax, missing semicolons, or undeclared variables. Correcting these errors directly resolves the issue.
- Run-time errors: Run-time errors may occur during the program’s execution. These errors can manifest as unexpected behavior, crashes, or erratic outputs. Debugging tools, such as the Serial Monitor, can be used to observe the program’s execution flow and pinpoint the problematic part of the code. Step-by-step execution of the code in the IDE’s debugger helps in isolating the problematic section.
Debugging AI-Related Issues
AI-specific issues can be more complex to debug. Understanding the algorithm’s behavior and the data it’s processing is crucial.
- Model training errors: Issues in the training process, such as insufficient data, inappropriate model selection, or inadequate training parameters, can lead to poor performance. Inspect the training logs for error messages, assess the model’s accuracy and loss function, and adjust parameters accordingly.
- Prediction inaccuracies: Unexpected or inaccurate predictions can stem from several factors. Examine the input data for inconsistencies, check the model’s structure, and ensure the correct data preprocessing steps are implemented. Consider using visualization tools to observe the model’s decision-making process for a better understanding of the issue.
Optimizing Arduino AI Assistant Performance
Optimizing performance is essential for deploying efficient and responsive AI assistants on resource-constrained platforms like Arduino.
- Algorithm selection: Choosing lightweight AI algorithms is crucial for maximizing performance on Arduino. Algorithms like decision trees, or optimized versions of neural networks, are often better suited to the constraints of the platform than complex neural networks. Consider the trade-off between accuracy and performance when selecting an algorithm.
- Data compression: Reducing the size of the input data can improve the speed of the AI operations. Employing techniques like feature selection and dimensionality reduction can significantly impact the performance of the AI assistant.
- Hardware considerations: Optimizing the use of hardware resources like memory and processing power can also lead to performance gains. Carefully consider the computational demands of the chosen AI model and ensure sufficient resources are allocated.
Example Debugging Technique
A simple example of debugging a prediction inaccuracy involves examining the input data for inconsistencies.
- Problem: An AI assistant that predicts the temperature based on ambient light intensity is providing incorrect readings. The data input for light intensity appears erratic.
- Solution: Use the Serial Monitor to verify that the light sensor data is accurately reflecting the environment. Check for any sensor issues or anomalies. Verify that the data input to the model is within expected ranges. Correct any discrepancies in the data preprocessing steps.
Conclusion
Source: startuptalky.com
In conclusion, this comprehensive guide empowers readers to build their own Arduino AI assistants. By understanding the intricacies of coding, data handling, and AI integration, coupled with hardware considerations, readers can create innovative projects. From simple prototypes to complex applications, this resource serves as a valuable companion for anyone looking to bring intelligent systems to life using Arduino.









Post Comment