How To Edit Videos Professionally With Davinci Resolve Free Version
How to edit videos professionally with DaVinci Resolve free version? This guide delves into the capabilities of DaVinci Resolve’s free tier, exploring its surprisingly robust features for creating professional-quality videos. We’ll dissect the differences between the free and paid versions, and show you how to master essential editing techniques, color correction, and audio adjustments. From basic trimming to advanced effects, we’ll provide a comprehensive walkthrough to elevate your video editing skills.
This comprehensive guide will walk you through the essential steps for effectively utilizing DaVinci Resolve’s free version, covering all aspects from basic video editing techniques to advanced features, troubleshooting, and project management. The detailed explanations and practical examples will equip you with the necessary skills to produce high-quality videos using the free edition.
Introduction to DaVinci Resolve Free: How To Edit Videos Professionally With DaVinci Resolve Free Version
DaVinci Resolve is a powerful, yet surprisingly user-friendly video editing software. Its free version provides a robust set of tools for enhancing and editing videos, making it a valuable resource for aspiring and professional video editors alike. This overview focuses on the free version’s capabilities, comparing it to the paid version, and explaining its intuitive interface.The free version of DaVinci Resolve is remarkably capable, despite its limitations compared to the full suite.
It allows users to perform a wide range of video editing tasks, including color grading, audio mixing, and basic effects. Understanding the differences between the free and paid versions is key to maximizing your editing workflow.
Key Features of DaVinci Resolve Free
The free version packs a surprising array of professional-grade features. It includes essential tools for video editing, including a powerful timeline, advanced color correction tools, and a comprehensive audio mixing suite. This makes it suitable for various video projects, from simple social media clips to more complex productions.
Comparison to the Paid Version
The free version of DaVinci Resolve differs from the paid version in several key areas. Most notably, the free version has limitations on certain features, like the number of layers for complex projects, and restricted access to certain advanced effects and features. The paid version offers a more comprehensive suite of tools and greater flexibility for advanced editing tasks.
However, the free version is sufficient for many tasks, and the learning curve is quite manageable.
User Interface and Workflow
DaVinci Resolve’s interface is remarkably intuitive, making it easy for users to navigate and master the software. The free version features a user-friendly interface, which is organized around a central timeline. This central timeline allows for efficient editing and collaboration. The user interface is designed to be straightforward and allows for a smooth workflow, even for beginners.
This streamlined interface and workflow make it easy to learn and utilize the software effectively. Navigation through the various panels and tools is intuitive, and many functions are easily accessible.
Basic Video Editing Techniques
Source: skillshare.com
Mastering the fundamentals of video editing is crucial for producing polished and engaging content. DaVinci Resolve’s free version empowers users with a comprehensive toolkit for these tasks. From trimming and splitting clips to crafting transitions and adjusting speed, this section delves into essential techniques achievable with the software’s basic functionalities.
Trimming, Splitting, and Joining Clips
The core of video editing involves meticulously refining footage. Trimming allows for precise removal of unwanted sections from clips, while splitting separates a clip into multiple parts for independent editing. Joining seamlessly integrates these segments into a cohesive narrative. These operations are fundamental to creating a streamlined and impactful video.
- Trimming involves selectively removing portions of a clip. Precise trimming is often needed to eliminate unnecessary pauses or errors in the footage.
- Splitting separates a clip into distinct segments, allowing for individual adjustments to each part.
- Joining combines these separate segments into a single continuous sequence. Careful joining ensures a smooth transition between clips without jarring interruptions.
Creating Transitions Between Clips
Transitions seamlessly connect clips, adding visual flair and flow to a video. The free version of DaVinci Resolve offers several options for transitions.
- Cross-Dissolve gradually fades one clip into the next, creating a smooth transition.
- Wipe uses a graphic element to sweep across the screen, revealing the next clip. A variety of wipe styles are available to suit different aesthetic needs.
- Cut, a fundamental transition, immediately switches between clips. While simple, a well-timed cut can effectively separate different scenes.
Adjusting Clip Speed and Duration
Modifying the speed and duration of clips is a powerful technique for enhancing a video’s impact. DaVinci Resolve’s free version provides tools for these adjustments.
- Speed Adjustment allows for speeding up or slowing down clips, creating dramatic effects like time-lapses or slow-motion sequences. This can be a key element in conveying specific emotions or moods.
- Duration Adjustment permits the shortening or lengthening of clips. This allows for precise control over the timing of scenes, enabling editors to refine their video’s rhythm and pace.
Color Grading and Correction
Color grading and correction in DaVinci Resolve are crucial for transforming raw footage into visually appealing and impactful videos. This process involves adjusting color characteristics like saturation, contrast, and hue to achieve a desired aesthetic. The free version of DaVinci Resolve offers powerful tools for color correction, enabling you to enhance the visual appeal of your videos without incurring extra costs.The color grading and correction tools in DaVinci Resolve’s free version provide a wide range of adjustments, allowing you to fine-tune the visual aspects of your video.
These tools are intuitive and easy to learn, enabling users to quickly achieve professional-looking results. Using these tools effectively enhances the visual impact and emotional response of your videos.
Color Correction Tools and Their Usage
Color correction is a fundamental aspect of video editing. It involves adjusting various color parameters to enhance the visual quality and consistency of your video. DaVinci Resolve’s free version provides essential color correction tools for a wide range of applications. Understanding and effectively utilizing these tools can greatly improve the visual appeal of your videos.
- White Balance: Adjusting white balance corrects color casts, ensuring that white objects appear truly white in your footage. This is crucial for maintaining color accuracy and consistency throughout your video. Common causes of color casts include different lighting conditions and improper camera settings. For example, a video shot indoors under fluorescent lighting may appear with a greenish tint; adjusting the white balance can remove this undesirable cast, providing a more natural and accurate color representation.
- Contrast and Brightness: Adjusting contrast and brightness controls the range of tones in your video. Increasing contrast can create more separation between light and dark areas, making your video appear more vibrant. Conversely, adjusting brightness controls the overall lightness or darkness of the image. These adjustments can be critical for improving the visual impact and clarity of the footage.
- Saturation and Vibrance: Saturation controls the intensity of colors, while vibrance adjusts the intensity of muted colors. Increasing saturation can make colors pop, while increasing vibrance can enhance the richness of muted colors. These adjustments are valuable for achieving a specific aesthetic, such as a more saturated or vibrant look for promotional videos or a more subdued and muted look for documentaries.
- Hue and Tone: Hue controls the color’s overall tone, while tone adjusts the color’s overall warmth or coolness. These adjustments can significantly affect the mood and atmosphere of your video. For example, warm tones can evoke feelings of comfort and nostalgia, while cool tones can create a sense of calmness and tranquility. By carefully adjusting these parameters, you can subtly alter the overall emotional impact of your video.
Practical Techniques for Enhancing Visual Appeal
These techniques highlight how to utilize the available color grading tools effectively to enhance the overall visual appeal of your video.
- Creating a Consistent Look: Applying consistent color grading throughout your video is crucial for maintaining a cohesive aesthetic. This involves using similar color palettes and adjusting parameters consistently across all scenes. This creates a professional and polished final product.
- Matching Lighting and Color: Consider the lighting conditions in your footage. If you have different lighting conditions across different scenes, matching the color of the lighting and adjusting the color grading can help in creating a smooth transition and a more cohesive look. For example, a scene shot in natural sunlight should have a similar color temperature as scenes shot under studio lighting.
- Using Color Grading to Enhance Mood and Atmosphere: Color grading can be used to set the mood and atmosphere of your video. Warm colors can create a welcoming and comfortable ambiance, while cool colors can evoke a sense of tranquility or mystery. Adjusting the color grading appropriately can greatly influence the overall emotional impact of your video.
Audio Editing in the Free Version
DaVinci Resolve’s free version provides surprisingly robust audio editing capabilities, enabling you to fine-tune your audio tracks with adjustments to volume, effects, and noise reduction. This empowers users to enhance their video projects significantly without needing a paid subscription. Mastering these tools can elevate your video’s audio quality, creating a more immersive and engaging viewing experience.
Audio Adjustment
Audio adjustment in DaVinci Resolve’s free version allows for precise control over individual audio tracks. Adjusting volume levels is fundamental for achieving a balanced mix. You can also employ tools for optimizing the overall sound quality, like normalizing audio levels. These features are essential for establishing a consistent listening experience throughout the video.
Adding Audio Effects
The free version offers a variety of audio effects, enabling creative sound manipulation. These tools enhance the audio’s characteristics, creating a more dynamic and interesting listening experience. You can add reverb, delay, or other effects to enhance the mood or atmosphere of specific scenes. Applying effects selectively is important to avoid overwhelming the overall audio mix.
Removing Audio Noise
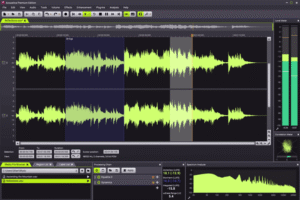
Noise reduction is crucial for enhancing the clarity of audio tracks. DaVinci Resolve’s free version offers several noise reduction tools, useful for eliminating unwanted background sounds. This is especially helpful for improving the quality of recordings in noisy environments. Effective noise reduction can significantly improve the overall clarity and intelligibility of the audio.
Mixing Audio Tracks
Mixing audio tracks involves combining multiple audio elements to achieve a cohesive and balanced soundscape. DaVinci Resolve’s free version provides tools for achieving this. Utilizing these tools allows you to adjust the volume, pan, and other parameters of each track to ensure a balanced mix. The mixing process allows you to control the relative prominence of different audio elements within the video.
Synchronizing Audio and Video
Synchronization between audio and video tracks is essential for ensuring that the audio aligns perfectly with the visuals. DaVinci Resolve’s free version offers tools to facilitate this synchronization. Precise synchronization can help create a seamless and engaging viewing experience, ensuring audio and visuals remain perfectly aligned. Tools for syncing audio and video tracks help in creating a professional-quality final product.
Advanced Editing Features (Within Limitations)
The DaVinci Resolve free version, while lacking some professional-grade features, still provides a robust toolkit for advanced editing. This section delves into leveraging its capabilities for creating visual flair and special effects, though with some limitations. Understanding these limitations allows you to plan projects effectively, maximizing the free version’s potential.The free version of DaVinci Resolve empowers users with a range of effects and transitions, albeit a subset of the full version’s offerings.
These tools are valuable for adding visual interest and enhancing the overall aesthetic of your videos. However, the complexity and sophistication of effects are inherently constrained. The focus should be on mastering the available tools, creating compelling visuals within those boundaries.
Effects and Transitions
The free version offers a selection of effects and transitions. These tools, while not as extensive as in the paid version, can add a significant amount of visual interest. Experimentation is key to discovering their capabilities and creatively using them.
- Basic Visual Effects: The free version offers basic visual effects like blurring, color adjustments, and masking. These can be used to highlight specific elements, create artistic styles, or soften transitions between scenes. For instance, using a Gaussian blur on a title card can draw attention and create a cinematic feel. A vignette effect can draw the viewer’s eye to the main subject by darkening the outer edges of the frame.
- Transitions: The free version provides various transitions. These smooth the movement between scenes, including basic wipes, fades, and cross-dissolves. The use of transitions can enhance the flow of the video and improve the viewer’s experience.
Special Effects and Visual Enhancements
While complex special effects might be beyond the free version’s capabilities, certain effects can be achieved using the available tools.
- Creating a Simple Glitch Effect: The free version allows you to manipulate the color and brightness of your video. By using these tools in conjunction with a masking technique, you can create a rudimentary glitch effect by selectively applying these adjustments. For instance, applying a color shift and blurring to a portion of the frame can produce a compelling glitch effect.
- Visual Enhancements: Combining effects and transitions can yield visually striking results. For instance, applying a slight vignette and a subtle color shift to a scene can create a more dramatic and engaging visual experience.
Basic Animations and Motion Graphics
The free version allows the creation of basic animations or motion graphics. While sophisticated animation tools are not included, fundamental animation techniques can be applied to static elements.
- Creating Text Animations: The free version allows you to apply text animations to titles and other text elements within the video. These animations can include simple movements like slide-in, fade-in, or even basic transformations like scaling. You can add a touch of dynamism by using the animation features.
- Keyframing: While not as extensive as in the paid version, the free version supports keyframing. Keyframing enables you to define the starting and ending points of an animation, letting you control the movement or appearance of elements. This provides control over how a graphic or text element changes over time.
Working with Different File Formats
Source: amazonaws.com
DaVinci Resolve, even in its free version, offers a surprisingly broad compatibility with various video and audio formats. This flexibility allows editors to seamlessly work with projects created using different software and hardware. Understanding the supported formats and how to handle import/export processes is crucial for a smooth workflow.
Supported File Formats
DaVinci Resolve Free supports a diverse range of video and audio formats. While the exact list can vary slightly with updates, common formats like MP4, MOV, AVI, and WMV are generally compatible for video. For audio, formats like WAV, MP3, and AAC are typically supported. Importantly, the free version may have limitations on some advanced codecs or high-resolution formats, but it is still a robust tool for a large range of common file types.
Importing Files
To import your media, navigate to the Media Pool, either from the main project window or through the dedicated import button. Select the files you want to incorporate, and Resolve will automatically add them to your project’s media pool. This media pool serves as a central repository for all your project assets. The software will usually detect the file type automatically and display appropriate previews.
Resolve can import a variety of file types, including common video formats and audio formats.
Exporting Files, How to edit videos professionally with DaVinci Resolve free version
Exporting files in DaVinci Resolve involves several steps. Firstly, select the sequence you want to export. Then, click the “Export Media” button, or use the dedicated menu options. You’ll need to specify the desired output format (e.g., MP4, MOV). Options for quality settings (e.g., resolution, bitrate) are also available to fine-tune the exported file.
Advanced users can tailor the export settings for more control over the video’s output.
Troubleshooting File Format Issues
If you encounter issues with a particular file format, the first step is to verify the format’s compatibility with the free version. If it’s not directly supported, consider transcoding the file into a supported format. This can be done using external tools, and this process will convert the file to a format that Resolve can handle. Another possible solution is to check for corrupted files, as these can sometimes lead to import or playback issues.
If the problem persists, double-check the file’s resolution and frame rate settings to ensure they match your project’s requirements.
Project Management and Organization
Effective project management is crucial for maintaining a smooth workflow in video editing, especially when dealing with multiple projects. A well-organized system helps you stay on track, locate assets efficiently, and avoid frustrating delays. This section details strategies for structuring your projects in DaVinci Resolve’s free version, ensuring efficient workflow and seamless project management.A robust project management system is essential for navigating the complexities of video editing.
It allows for the meticulous organization of projects, media files, and backup procedures, ultimately streamlining the entire process and reducing the likelihood of errors.
Project Organization System
A well-structured project organization system minimizes confusion and maximizes efficiency when working with multiple projects in DaVinci Resolve. A straightforward system, based on folders and naming conventions, can dramatically improve workflow. For example, use a hierarchical folder structure. The top-level folder could be named “Video Projects,” followed by subfolders for individual projects, each named descriptively (e.g., “Documentary_Project_2024,” “Wedding_Montage_2023”).
Within each project folder, create further subfolders for different aspects of the project, such as “Source Media,” “Edited Clips,” “Audio Files,” “Graphics,” and “Color Graded.” Use a consistent naming convention for files (e.g., “Scene01_Interview_01.mov”).
Project Management and Backup
Regularly backing up projects is paramount to prevent data loss, a critical concern in video editing. Using cloud storage services or external hard drives offers a failsafe. Consider a cloud-based backup solution, such as Google Drive, Dropbox, or OneDrive, as a supplementary measure. External hard drives offer a tangible backup, allowing for a physical copy. Implement a routine backup schedule, either daily or weekly, depending on the project’s frequency of updates.
Media File Storage
Efficient media file management is vital for seamless video editing. Organize media files in a clear, structured manner within the project folder structure. This organization reduces search time, avoids unnecessary file clutter, and enhances overall productivity. Create separate folders for different types of media (e.g., “RAW Footage,” “B-Roll,” “Graphics”). Employ descriptive filenames for quick identification (e.g., “Interview_SubjectA_LocationX_Date2024-08-15.mov”).
For large projects, consider utilizing a robust media management software to categorize and index your files.
Creating a Professional Workflow
Leveraging DaVinci Resolve’s free version effectively requires a structured approach. This section Artikels a step-by-step process for setting up a professional workflow, providing examples for various video projects. Understanding how to organize your tasks and resources will significantly enhance your editing experience.
Establishing a Consistent Project Structure
A well-organized project structure is fundamental to a professional workflow. It facilitates easy access to assets, simplifies collaboration, and prevents errors. Creating folders for different video elements (e.g., footage, audio, graphics, and effects) will maintain order. Each folder should be named descriptively to reflect its content.
Setting Up a Template
Developing a project template is crucial for maintaining consistency and reducing repetition. A template should include pre-defined settings, color profiles, and preferred audio levels. This approach ensures that projects have a standardized appearance and audio quality. Consistency ensures a high standard of work across different projects.
Task Breakdown for a Short Film
| Task | Description | Steps Required |
|---|---|---|
| Project Setup | Create a new project and organize folders for footage, audio, and graphics. | 1. Open DaVinci Resolve. 2. Create a new project. 3. Create folders within the project directory. |
| Footage Import | Import all necessary video and audio clips into the project. | 1. Navigate to the source footage. 2. Drag and drop the clips into the media pool. 3. Rename clips for easy identification. |
| Editing | Arrange clips, apply transitions, and refine the narrative. | 1. Place clips in the timeline. 2. Use transitions to connect scenes smoothly. 3. Apply effects to enhance the visual appeal. |
| Color Grading | Adjust the color and tone of the footage for aesthetic appeal. | 1. Apply color grading effects to enhance visual consistency. 2. Use color correction tools to adjust exposure, contrast, and white balance. |
| Audio Mixing | Adjust audio levels, apply effects, and ensure a balanced sound mix. | 1. Adjust audio levels in the audio mixer. 2. Apply audio effects to enhance sound quality. 3. Use EQ to refine the frequency response. |
| Export | Export the final project in the desired format and resolution. | 1. Select the desired export format and resolution. 2. Render the project. 3. Verify the quality and file size. |
Example Workflows
- Short Film: A short film workflow involves meticulous planning, meticulous editing, and creative color grading. The project’s structure is organized around scenes, and the color palette is carefully chosen to enhance the narrative. Each scene is crafted with specific visual and auditory elements to achieve the desired emotional impact.
- Social Media Video: A social media video workflow prioritizes brevity, visual appeal, and engagement. The video is concise, using compelling visuals and engaging music. This workflow frequently uses pre-made templates to maintain consistency across the platform.
- Presentation: A presentation workflow emphasizes clear communication and visual impact. The video focuses on conveying information concisely, using text overlays, graphics, and transitions to enhance understanding. Key visuals are carefully selected to support the presentation’s message.
Troubleshooting Common Issues
The free version of DaVinci Resolve, while powerful, might present some challenges. Understanding common problems and their solutions is crucial for a smooth editing experience. This section will cover frequent issues encountered during video editing with the free version, focusing on practical solutions.
Audio Synchronization Problems
Audio synchronization issues, where audio and video tracks are out of sync, are common. This often arises from variations in file formats, frame rates, or slight timing discrepancies during recording.
- Checking File Compatibility: Ensure the video and audio files have matching frame rates and codecs. Importing files with different frame rates can lead to sync problems. DaVinci Resolve’s import process can sometimes automatically adjust for minor inconsistencies, but a match is ideal.
- Using the “Audio Sync” Tool: DaVinci Resolve provides a built-in audio sync tool to precisely align audio with video. This tool is particularly helpful when dealing with minor timing discrepancies. This feature allows adjusting audio timing by small increments.
- Re-Exporting Files: If issues persist, re-exporting the audio and video files in the same format and frame rate might resolve the problem. This process ensures both tracks are synchronized at the source level.
Import/Export Errors
Import and export errors are another frequent problem. These issues often stem from incompatibility between file formats, codec problems, or insufficient disk space.
- Checking File Format Compatibility: Confirm that the file formats being imported and exported are compatible with DaVinci Resolve. Incompatible formats might lead to corruption or inability to import.
- Ensuring Sufficient Disk Space: Insufficient disk space can lead to errors during both import and export. Adequate storage space is essential for seamless processing. Allocate enough space to handle both source and intermediate files.
- Verifying Codec Compatibility: Certain codecs might not be supported by DaVinci Resolve. Ensure that the codecs of the files are compatible with the software. Using a compatible codec will ensure a smooth import and export.
- Restarting DaVinci Resolve: Sometimes, a simple restart of DaVinci Resolve can resolve temporary glitches and resolve minor import/export issues.
Performance Issues
Large projects, complex edits, or insufficient system resources can lead to slow performance.
- Using a Faster Computer: A powerful computer with sufficient RAM and processing power is essential for smooth editing. A slower computer can impact performance and lead to long processing times.
- Optimizing Project Settings: Adjust project settings like resolution and frame rate to optimize processing time. A lower resolution can reduce the workload and speed up rendering.
- Reducing the Number of Effects: Overusing effects can significantly impact performance. Use effects judiciously to avoid excessive strain on the system.
- Using a Solid State Drive (SSD): A Solid State Drive (SSD) can significantly improve the performance of your computer, especially during video editing. It reduces the time taken to read and write files.
Preventing Common Issues
Thorough preparation and meticulous attention to detail can prevent many issues.
- Backup Regularly: Always back up your project files to prevent data loss due to unforeseen circumstances.
- Organize Your Projects: Maintain a clear and organized project structure. This ensures that you can easily locate and manage files and avoid confusion.
- Check System Requirements: Ensure your system meets the minimum requirements for DaVinci Resolve before starting a project.
Illustrative Examples and Tutorials
Source: cloudinary.com
Learning DaVinci Resolve’s free version is best approached through practical application. This section provides real-world examples to showcase the software’s capabilities, even within the limitations of the free tier. The illustrative projects will highlight key features and demonstrate achievable results.
Video Editing Projects for Beginners
This section provides examples of editing projects suitable for beginners, demonstrating how DaVinci Resolve’s free version can handle basic tasks. These projects will emphasize essential techniques without getting bogged down in advanced features.
- Project: Simple YouTube Intro
– This project focuses on creating a short, engaging intro for a YouTube video. Key features include adding text overlays, transitions, and basic audio adjustments. Steps include importing video footage, adding text titles, selecting appropriate transitions, adjusting audio levels, and exporting the final product. - Project: Montage for a Short Film
-This project guides users in creating a dynamic montage for a short film. Key features involve selecting clips, applying transitions, and adjusting speed for a cohesive narrative. Steps include importing video clips, arranging them in a timeline, applying various transitions, adjusting speed and duration, and exporting the result. - Project: Enhancing a Documentary Clip
-This project demonstrates how to improve a documentary clip using DaVinci Resolve’s free version. Key features include basic color correction, audio normalization, and removing minor imperfections. Steps include importing the clip, adjusting exposure, contrast, and color temperature, normalizing audio levels, and exporting the enhanced version.
Intermediate Video Editing Projects
These projects illustrate the power of DaVinci Resolve’s free version for intermediate users. They will delve into more complex editing tasks and techniques.
| Project Type | Key Features | Steps Required |
|---|---|---|
| Creating a Promotional Trailer | Transitioning between clips, adding text and graphics, and using basic color grading. | Importing video and audio, arranging clips, applying transitions, adding titles and graphics, adjusting color balance, and exporting the trailer. |
| Editing a Travel Vlog | Creating a cohesive narrative, using various transitions, and adding music. | Importing video clips, adding music, selecting transitions, arranging clips for flow, and exporting the finished vlog. |
| Creating a Short Film with Effects | Adding visual effects (e.g., wipes, fades), creating text animations, and enhancing audio. | Importing video and audio, adding visual effects, creating text animations, and adjusting audio levels. |
Visual Examples of Editing Outcomes
These visual examples demonstrate different editing outcomes achievable with DaVinci Resolve’s free version.
- Example 1: A before-and-after comparison showing the enhancement of a video clip’s color and contrast. The before clip appears grainy and washed out, while the after clip displays improved clarity and vibrancy, showcasing how color correction can improve visual appeal.
- Example 2: A short video montage with various transitions, demonstrating how DaVinci Resolve can seamlessly connect video clips to create a visually engaging experience. The montage uses a mix of cross-dissolves, fades, and wipes to create smooth transitions, resulting in a professional-looking video.
- Example 3: A comparison of a video clip with and without text overlays. The video clip with text overlays appears more informative and visually engaging. This demonstrates how adding text can improve clarity and comprehension for viewers.
Wrap-Up
This guide has shown you how to harness the power of DaVinci Resolve’s free version to create professional-looking videos. By mastering basic editing, color correction, and audio techniques, you can elevate your video production to new heights. While the free version has limitations compared to the paid version, its versatility and powerful tools empower you to achieve impressive results.
Remember to explore the various resources and tutorials available to further enhance your skills.







Post Comment